About
In this post, I’ll show you how to set up a CI/CD(continuous integration and continuous delivery/deployment) pipeline in Azure DevOps for Azure Functions running on Azure cloud.
I will assume you already have a function deployed on Azure and you now just want to add CI/CD to it. Else if you would like to know more about Azure Functions see this post I made.
I will also assume you are already familiar with CI/CD. Otherwise, you can check out this post from Red Hat.
Note: I made another post where I show how to create and use a private NuGet package in an Azure DevOps pipeline for Azure Functions.
Function Code
I created a GitHub repository for this Azure function(I took it from this post I made).
using System.Net;
using Microsoft.Azure.Functions.Worker;
using Microsoft.Azure.Functions.Worker.Http;
using Microsoft.Extensions.Logging;
using System.Text.Json;

namespace DemoFunctionApp
{
    public class Function1
    {
        private readonly ILogger _logger;

        public Function1(ILoggerFactory loggerFactory)
        {
            _logger = loggerFactory.CreateLogger<Function1>();
        }

        class TestModel
        {
            public string Test { get; set; }
            public string Text { get; set; }
        }

        [Function("Function1")]
        public async Task<HttpResponseData> Run([HttpTrigger(AuthorizationLevel.Function, "post")] HttpRequestData req)
        {
            //This is how you can use the logger to log information and errors.
            _logger.LogInformation("C# HTTP trigger function processed a request.");
            _logger.LogError("This is an error message.");
            _logger.LogWarning("This is a warning message.");
            //This is how you can read url parameters.
            var query = System.Web.HttpUtility.ParseQueryString(req.Url.Query);
            string message = query["message"];
            //Read the body of the request.
            string body = await req.ReadAsStringAsync();
            //Parse the JSON body into a model.
            TestModel model = JsonSerializer.Deserialize<TestModel>(body);
            //Get an environmental variable.
            if (Environment.GetEnvironmentVariable("TEST_ENVAR") == model.Test)
            {
                //Create a text response.
                var responseTest = req.CreateResponse(HttpStatusCode.NoContent);
                responseTest.Headers.Add("Content-Type", "text/plain; charset=utf-8");
                //Add text to response.
                responseTest.WriteString("Test. Query param: " + message);
                //Return the response.
                return responseTest;
            }
            else
            {
                var response = req.CreateResponse(HttpStatusCode.OK);
                response.Headers.Add("Content-Type", "text/plain; charset=utf-8");
                response.WriteString("Not test. Query param: " + message);
                return response;
            }
        }

        [Function("WarmerEndpoint")]
        public async Task<HttpResponseData> WarmerEndpoint([HttpTrigger(AuthorizationLevel.Function, "get")] HttpRequestData req)
        {
            _logger.LogInformation("Function was warmed.");

            var responseTest = req.CreateResponse(HttpStatusCode.NoContent);
            responseTest.Headers.Add("Content-Type", "text/plain; charset=utf-8");
            responseTest.WriteString("Function was warmed.");

            return responseTest;
        }
    }
}
Azure DevOps CI/CD Build Pipeline Setup
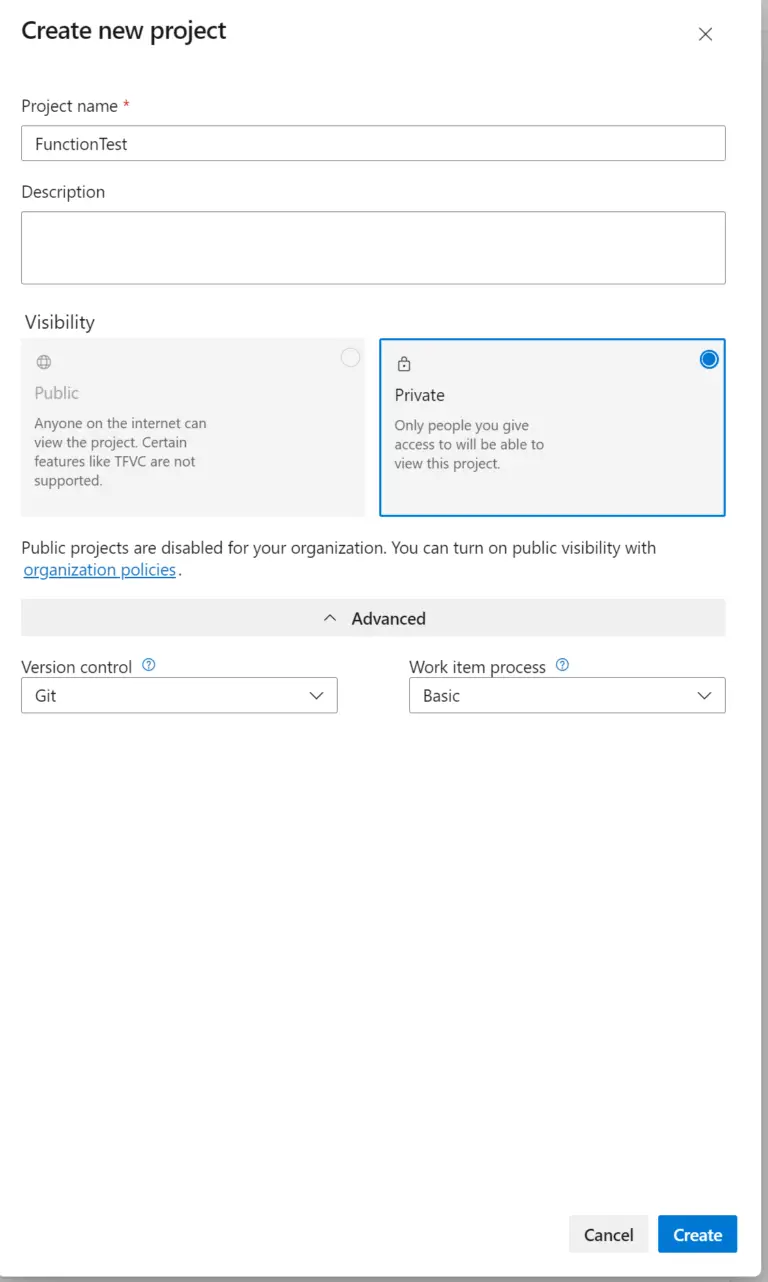
Start by signing up for Azure DevOps and creating a new project.
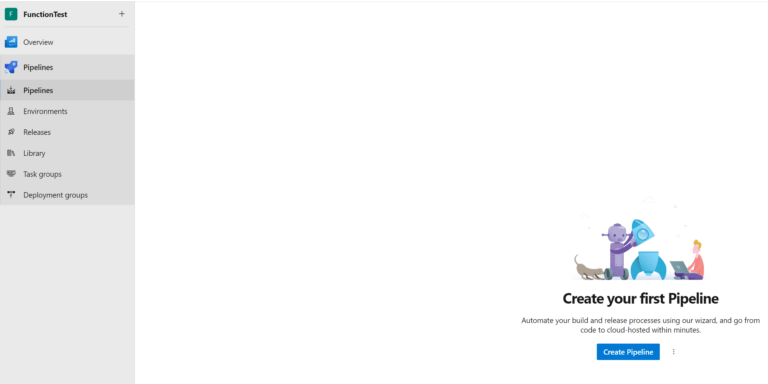
Then select Pipelines in the menu on the left and click the blue “Create Pipeline” button.
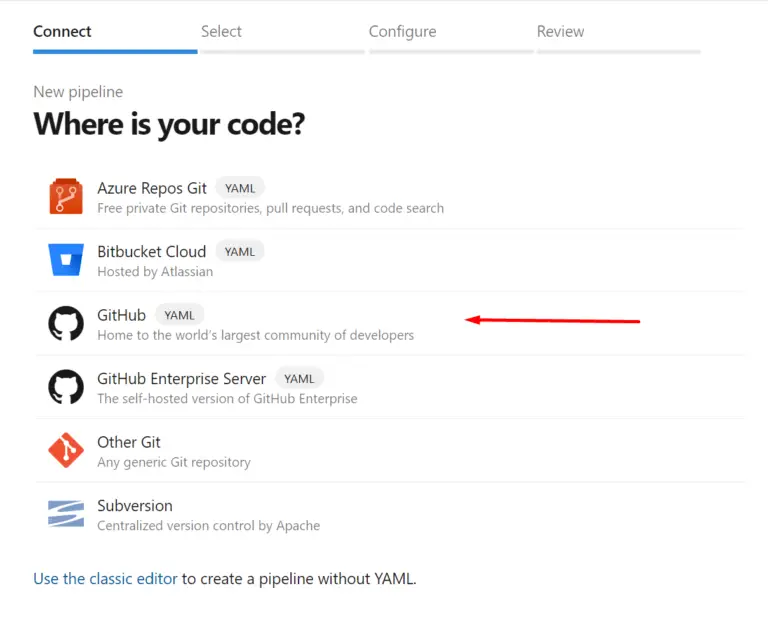
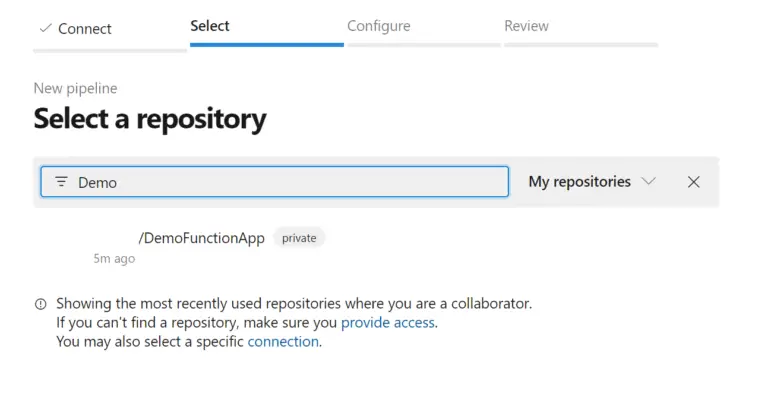
In my case I have a git repo on Github so that’s the option I’ll select. Then, look for your repository and select it.
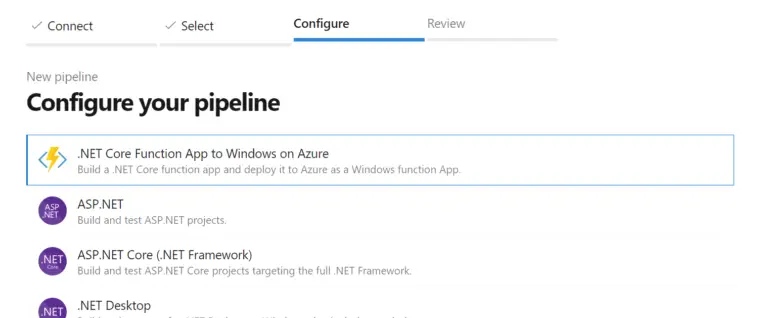
Select the “.NET Core Function App” pipeline template. Or just select the “Empty Starter” template as we’ll replace it with the YAML below anyway.
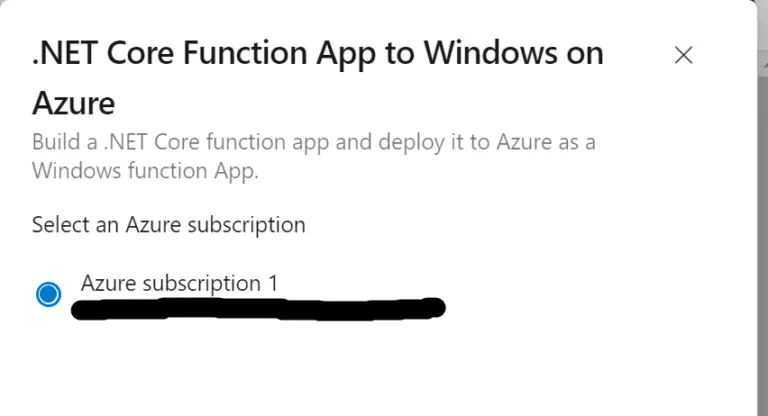
Select your Azure subscription.
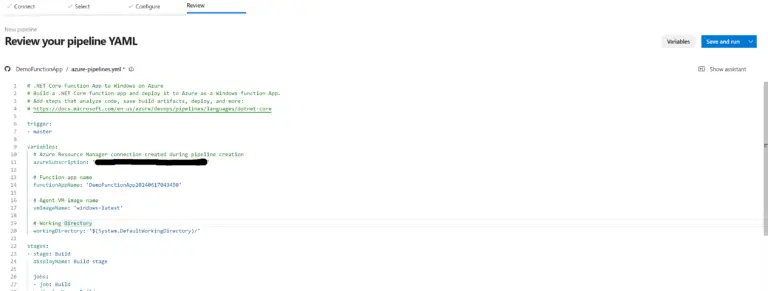
Finaly, we get to the YAML code template for our pipeline.
Add this code and insert your Azure subscription ID. Then save and run the pipeline.
# .NET Core Function App to Windows on Azure
# Build a .NET Core function app and deploy it to Azure as a Windows function App.
# Add steps that analyze code, save build artifacts, deploy, and more:
# https://docs.microsoft.com/en-us/azure/devops/pipelines/languages/dotnet-core

trigger:
- master

variables:
  # Azure Resource Manager connection created during pipeline creation
  azureSubscription: 'enter your azure subscription id'

  # Function app name
  functionAppName: 'DemoFunctionApp20240617043450'

  # Agent VM image name
  vmImageName: 'windows-latest'

  # Working Directory
  workingDirectory: '$(System.DefaultWorkingDirectory)/'

stages:
- stage: Build
  displayName: Build stage

  jobs:
  - job: Build
    displayName: Build
    pool:
      vmImage: $(vmImageName)

    steps:

    - task: DotNetCoreCLI@2
      displayName: Build
      inputs:
        command: 'build'
        projects: |
          $(workingDirectory)/*.csproj
        arguments: --output $(System.DefaultWorkingDirectory)/publish_output --configuration Release

    - task: ArchiveFiles@2
      displayName: 'Archive files'
      inputs:
        rootFolderOrFile: '$(System.DefaultWorkingDirectory)/publish_output'
        includeRootFolder: false
        archiveType: zip
        archiveFile: $(Build.ArtifactStagingDirectory)/$(Build.BuildId).zip
        replaceExistingArchive: true

    - publish: $(Build.ArtifactStagingDirectory)/$(Build.BuildId).zip
      artifact: drop
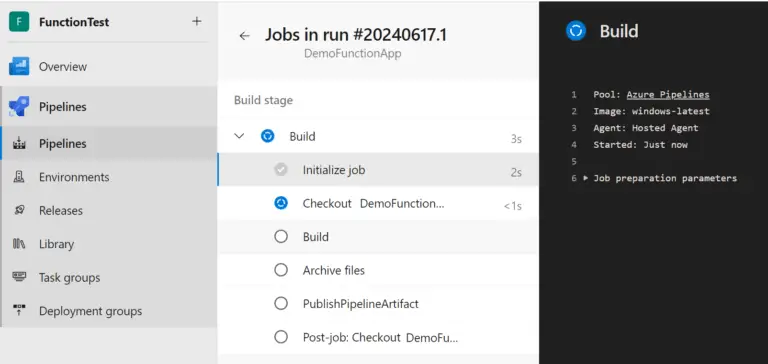
Pipeline run:
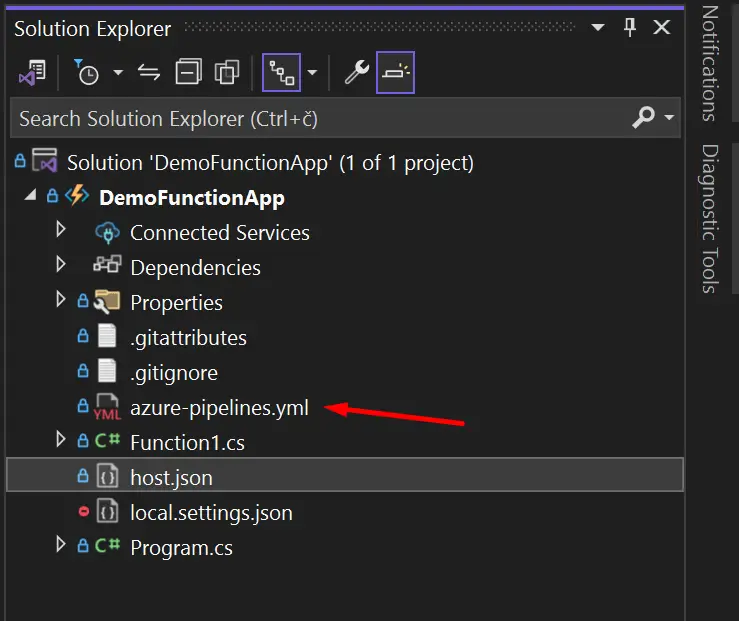
If you check your repository you will see that a .yml configuration file containing your build pipeline configuration was added.
Azure DevOps CI/CD Release Pipeline Setup
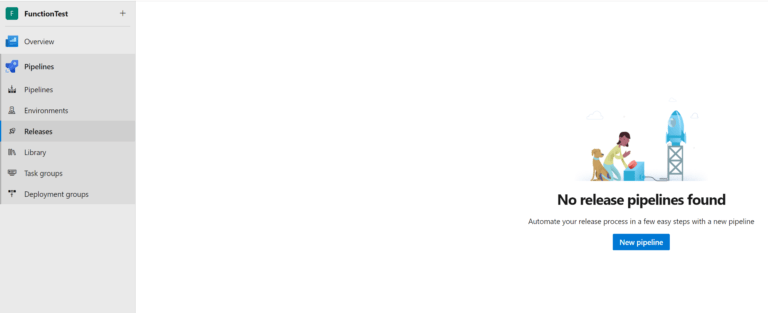
In the left menu click on Releases and then click the blue New pipeline button.
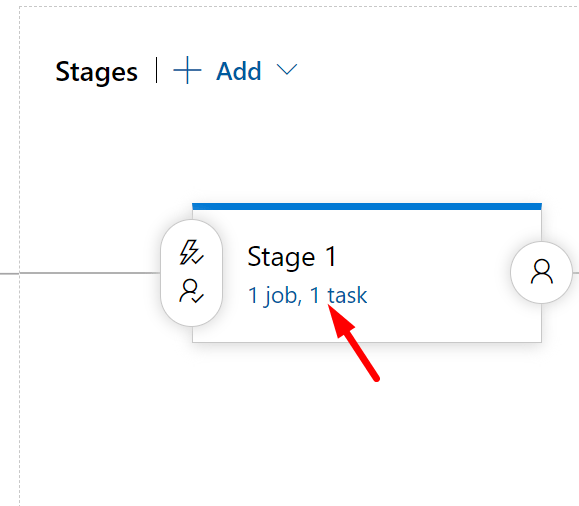
Click on the stage, search for “azure functions” then select the “Deploy a function app to Azure Functions” template(or the slot option if your function is deployed in a slot). This will create a deployment stage.
Open the stage.
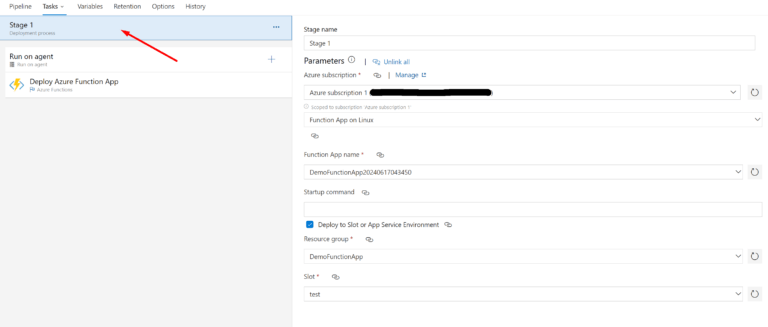
Set the stage settings like so:
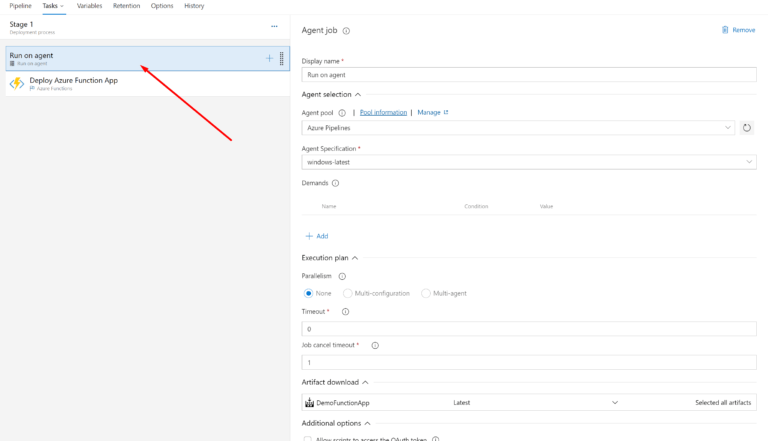
Set the agent settings like so:
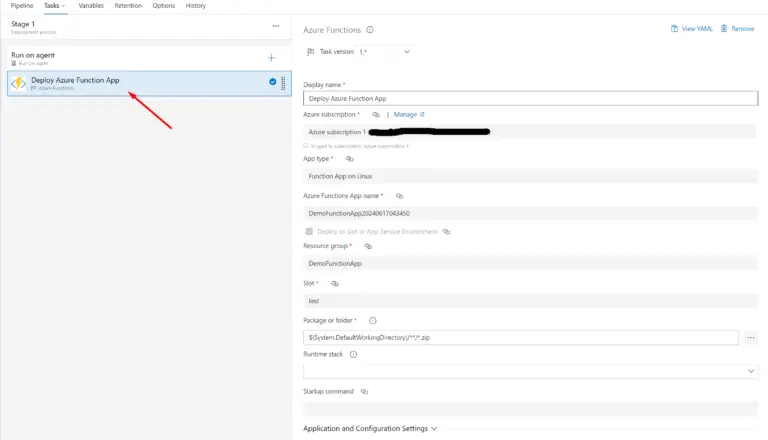
Set deployment task settings like so:
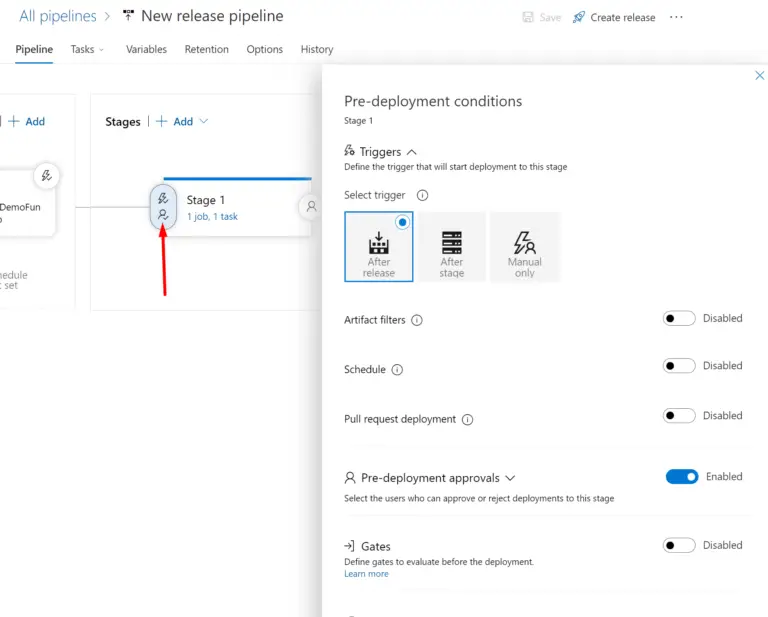
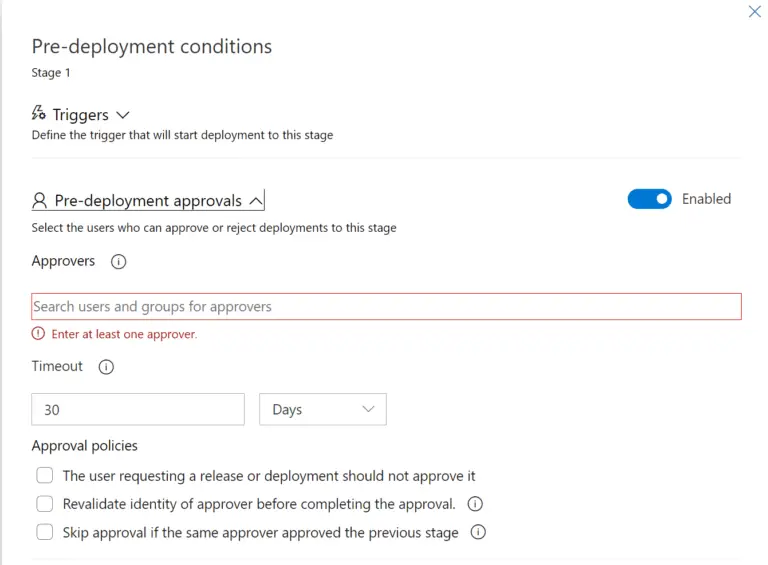
Set the trigger to “After release” and toggle the “Pre-deployment approvals” if you want to confirm the deployment every time.
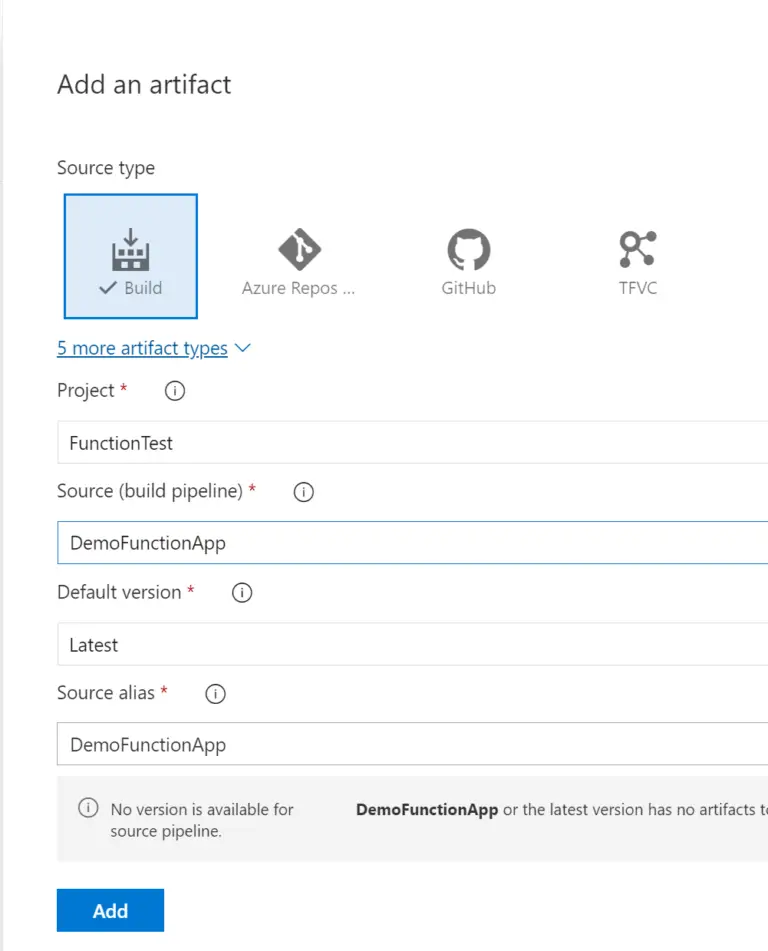
Now let’s add the artifact from the build pipeline.
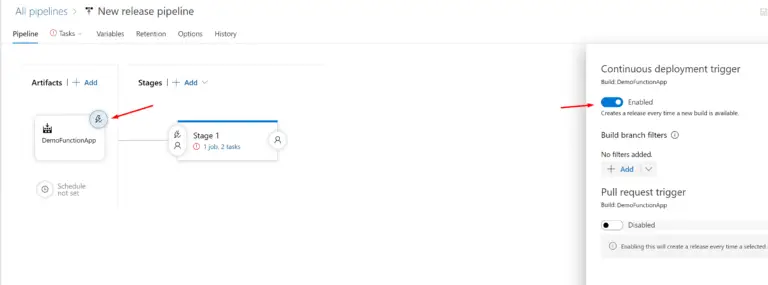
Now let’s set up an automatic deployment pipeline trigger when an artifact is produced by the build pipeline.
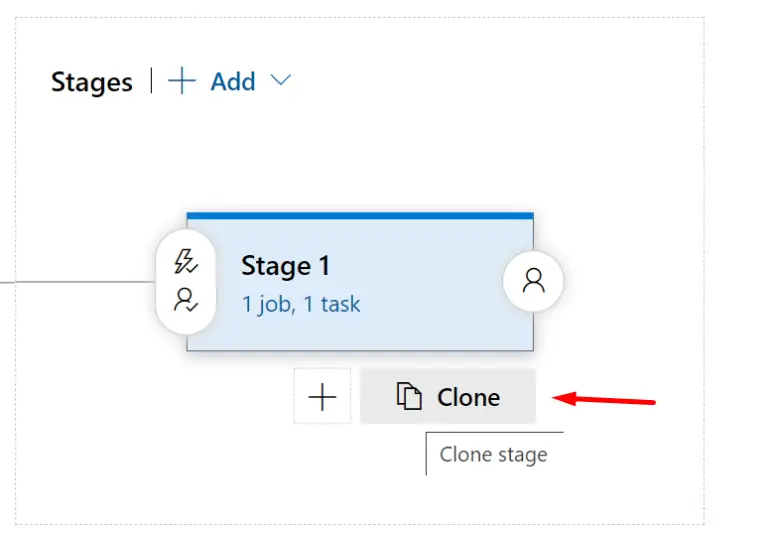
Finally, let’s clone the first stage. The first stage will be used to deploy on the test server while the second one will be used for deploying on live/production(the deployment server can be changed the same way as described here).
Azure DevOps CI/CD Pipeline Test Run
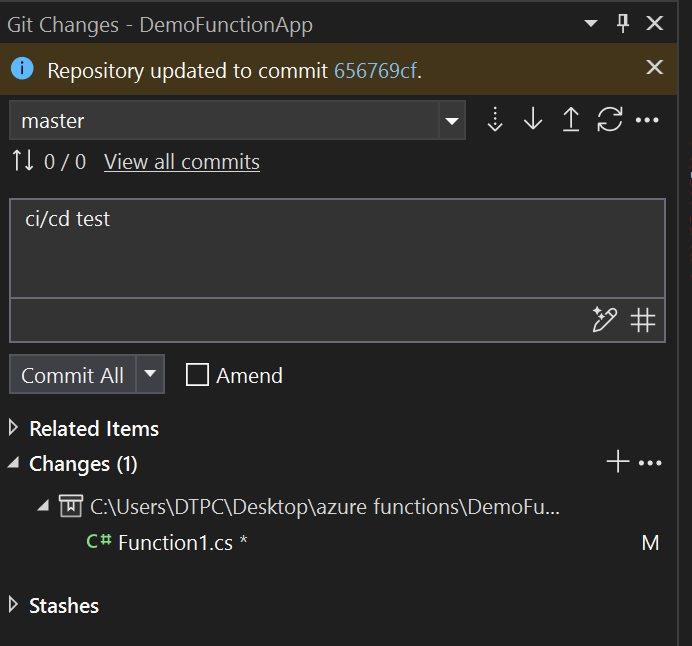
Let’s commit a random change to test our CI/CD pipeline.
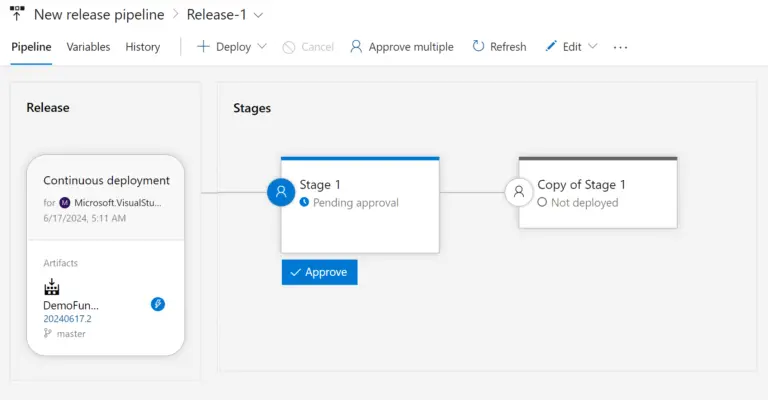
The release is ready for deployment.
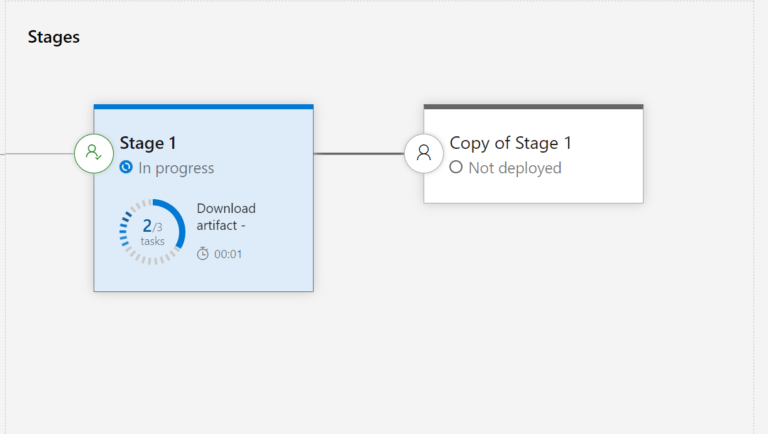
Finally, let’s approve the deployment.
Adding Unit Tests
In Visual Studio you can right-click on a function, select “Create unit test” and tests will be automatically setup in your projects.
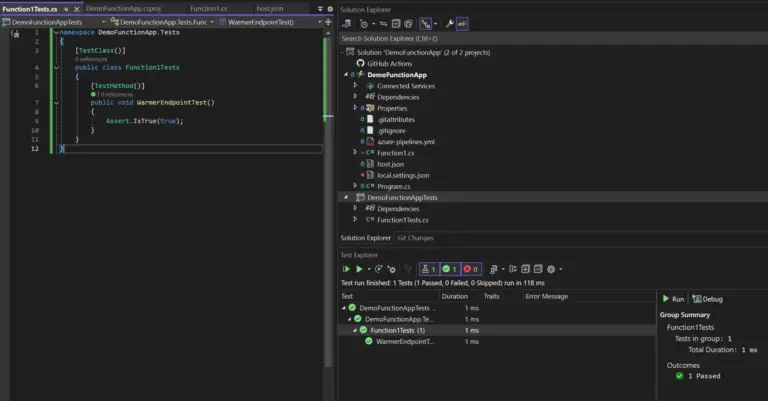
For this demo, I added a dummy unit test for the WarmerEndpoint() function that always succeeds. This way we can test the pipeline.
namespace DemoFunctionApp.Tests
{
    [TestClass()]
    public class Function1Tests
    {
        [TestMethod()]
        public void WarmerEndpointTest()
        {
            Assert.IsTrue(true);
        }
    }
}
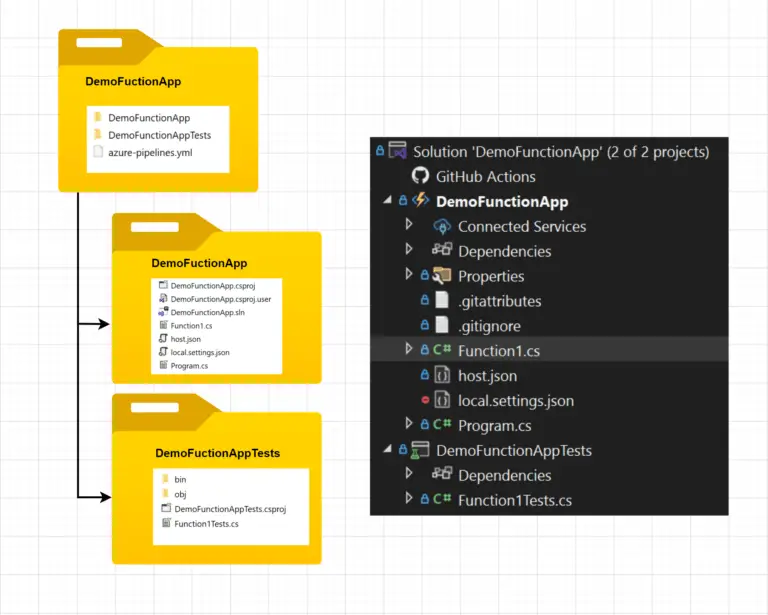
In my case, Visual Studio put the tests in a folder outside the git repository so I moved the files around a bit. This is how I changed the project file structure:
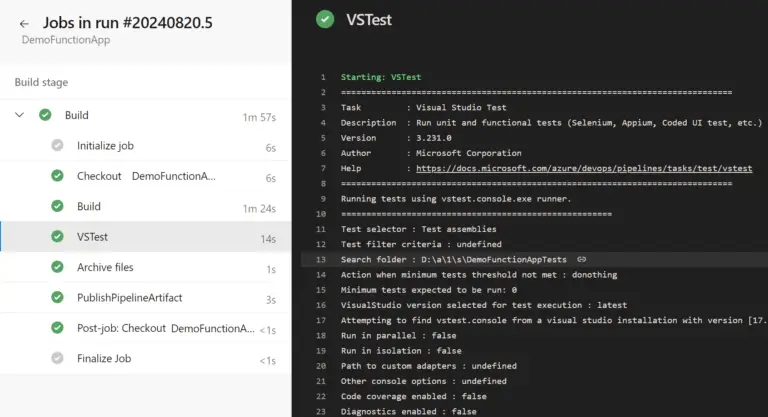
Finally, let’s modify the build pipeline to also run tests by adding a test task. I also have to modify the paths accordingly for the changes in the project file structure described above.
# .NET Core Function App to Windows on Azure
# Build a .NET Core function app and deploy it to Azure as a Windows function App.
# Add steps that analyze code, save build artifacts, deploy, and more:
# https://docs.microsoft.com/en-us/azure/devops/pipelines/languages/dotnet-core

trigger:
- master

variables:
  # Azure Resource Manager connection created during pipeline creation
  azureSubscription: 'your subscription id'

  # Function app name
  functionAppName: 'DemoFunctionApp20240617043450'

  # Agent VM image name
  vmImageName: 'windows-latest'

  # Working Directory
  workingDirectory: '$(System.DefaultWorkingDirectory)/'

stages:
- stage: Build
  displayName: Build stage

  jobs:
  - job: Build
    displayName: Build
    pool:
      vmImage: $(vmImageName)

    steps:

    - task: DotNetCoreCLI@2
      displayName: Build
      inputs:
        command: 'build'
        projects: |
          $(workingDirectory)/DemoFunctionApp/*.csproj
        arguments: --output $(System.DefaultWorkingDirectory)/DemoFunctionApp/publish_output --configuration Release

    - task: VSTest@3
      inputs:
        testSelector: 'testAssemblies'
        testAssemblyVer2: |
          **\*test*.dll
          !**\*TestAdapter.dll
          !**\obj\**
        searchFolder: '$(System.DefaultWorkingDirectory)/DemoFunctionAppTests'

    - task: ArchiveFiles@2
      displayName: 'Archive files'
      inputs:
        rootFolderOrFile: '$(System.DefaultWorkingDirectory)/DemoFunctionApp/publish_output'
        includeRootFolder: false
        archiveType: zip
        archiveFile: $(Build.ArtifactStagingDirectory)/$(Build.BuildId).zip
        replaceExistingArchive: true

    - publish: $(Build.ArtifactStagingDirectory)/$(Build.BuildId).zip
      artifact: drop
If we now run the pipeline you can see the VSTest task gets executed. If any of the tests fail this task will also fail stopping your build.

