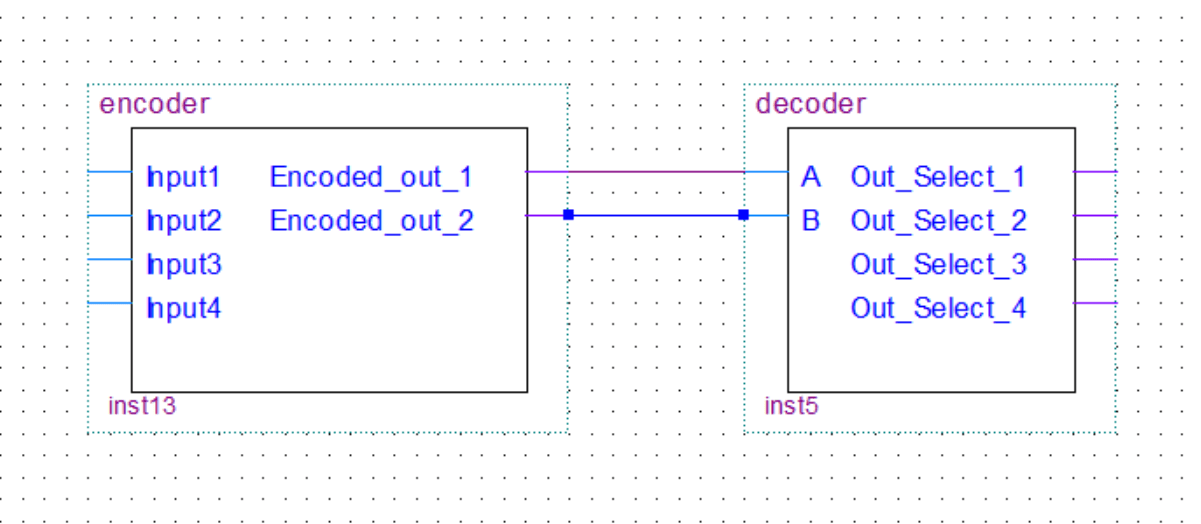
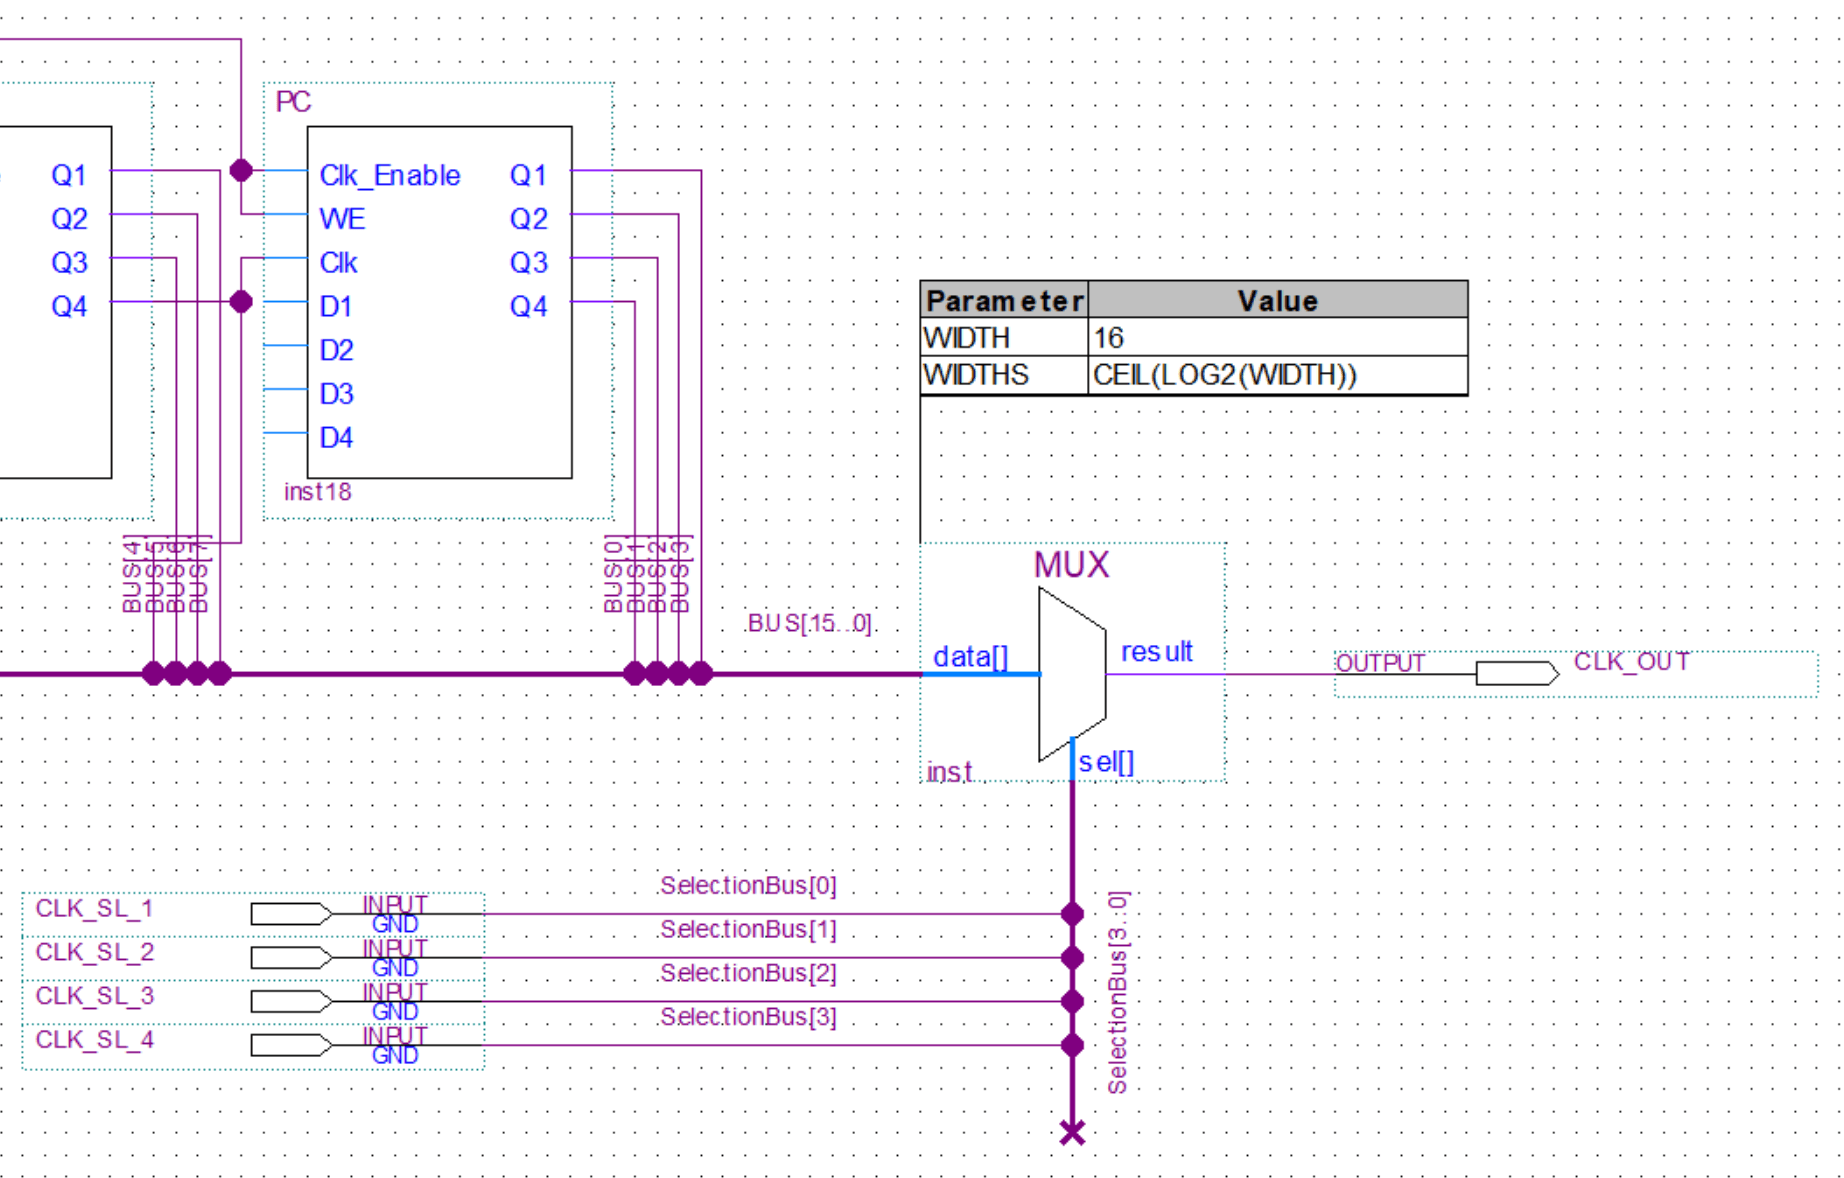
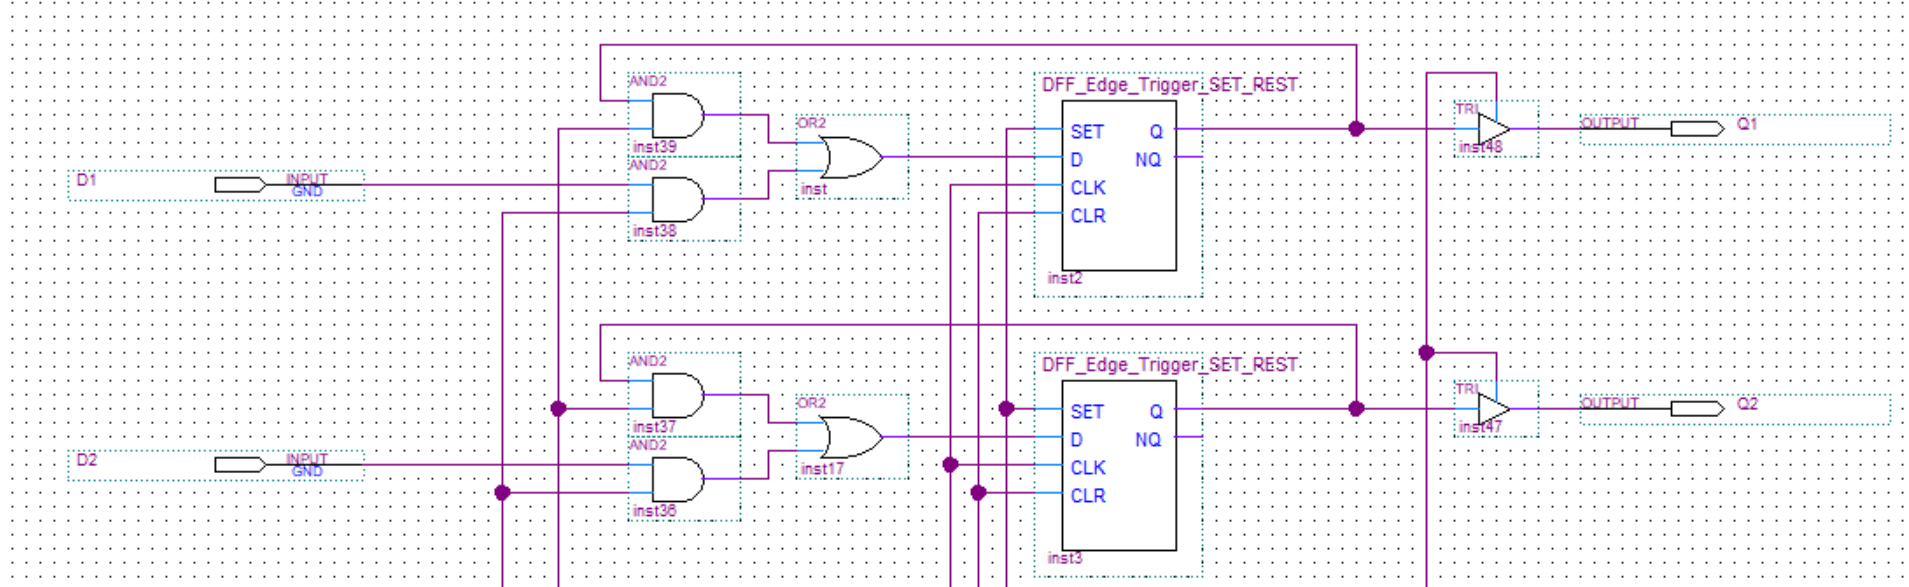
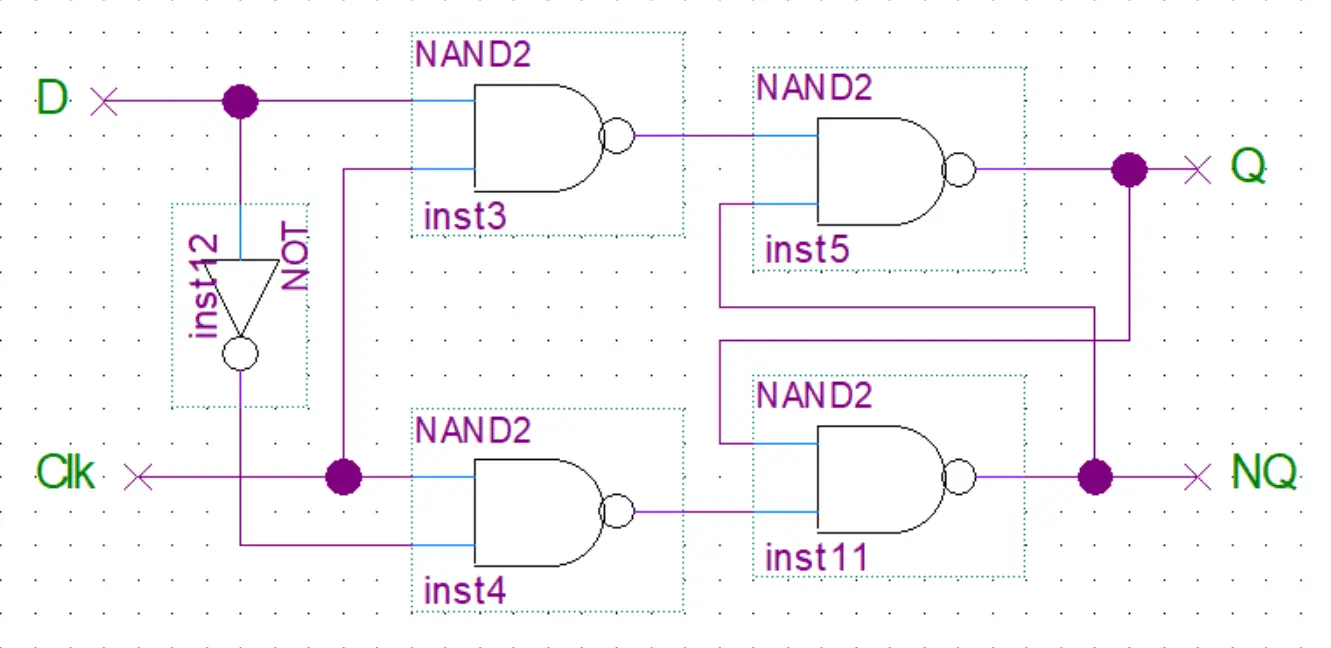
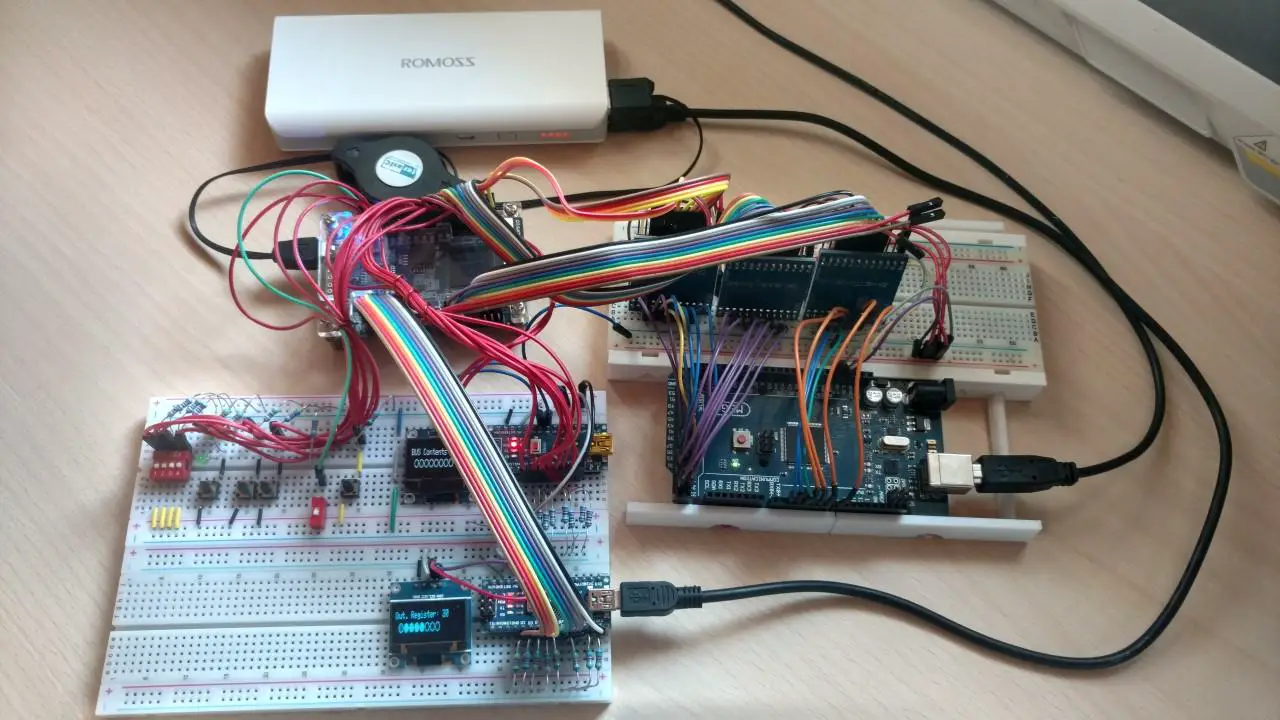
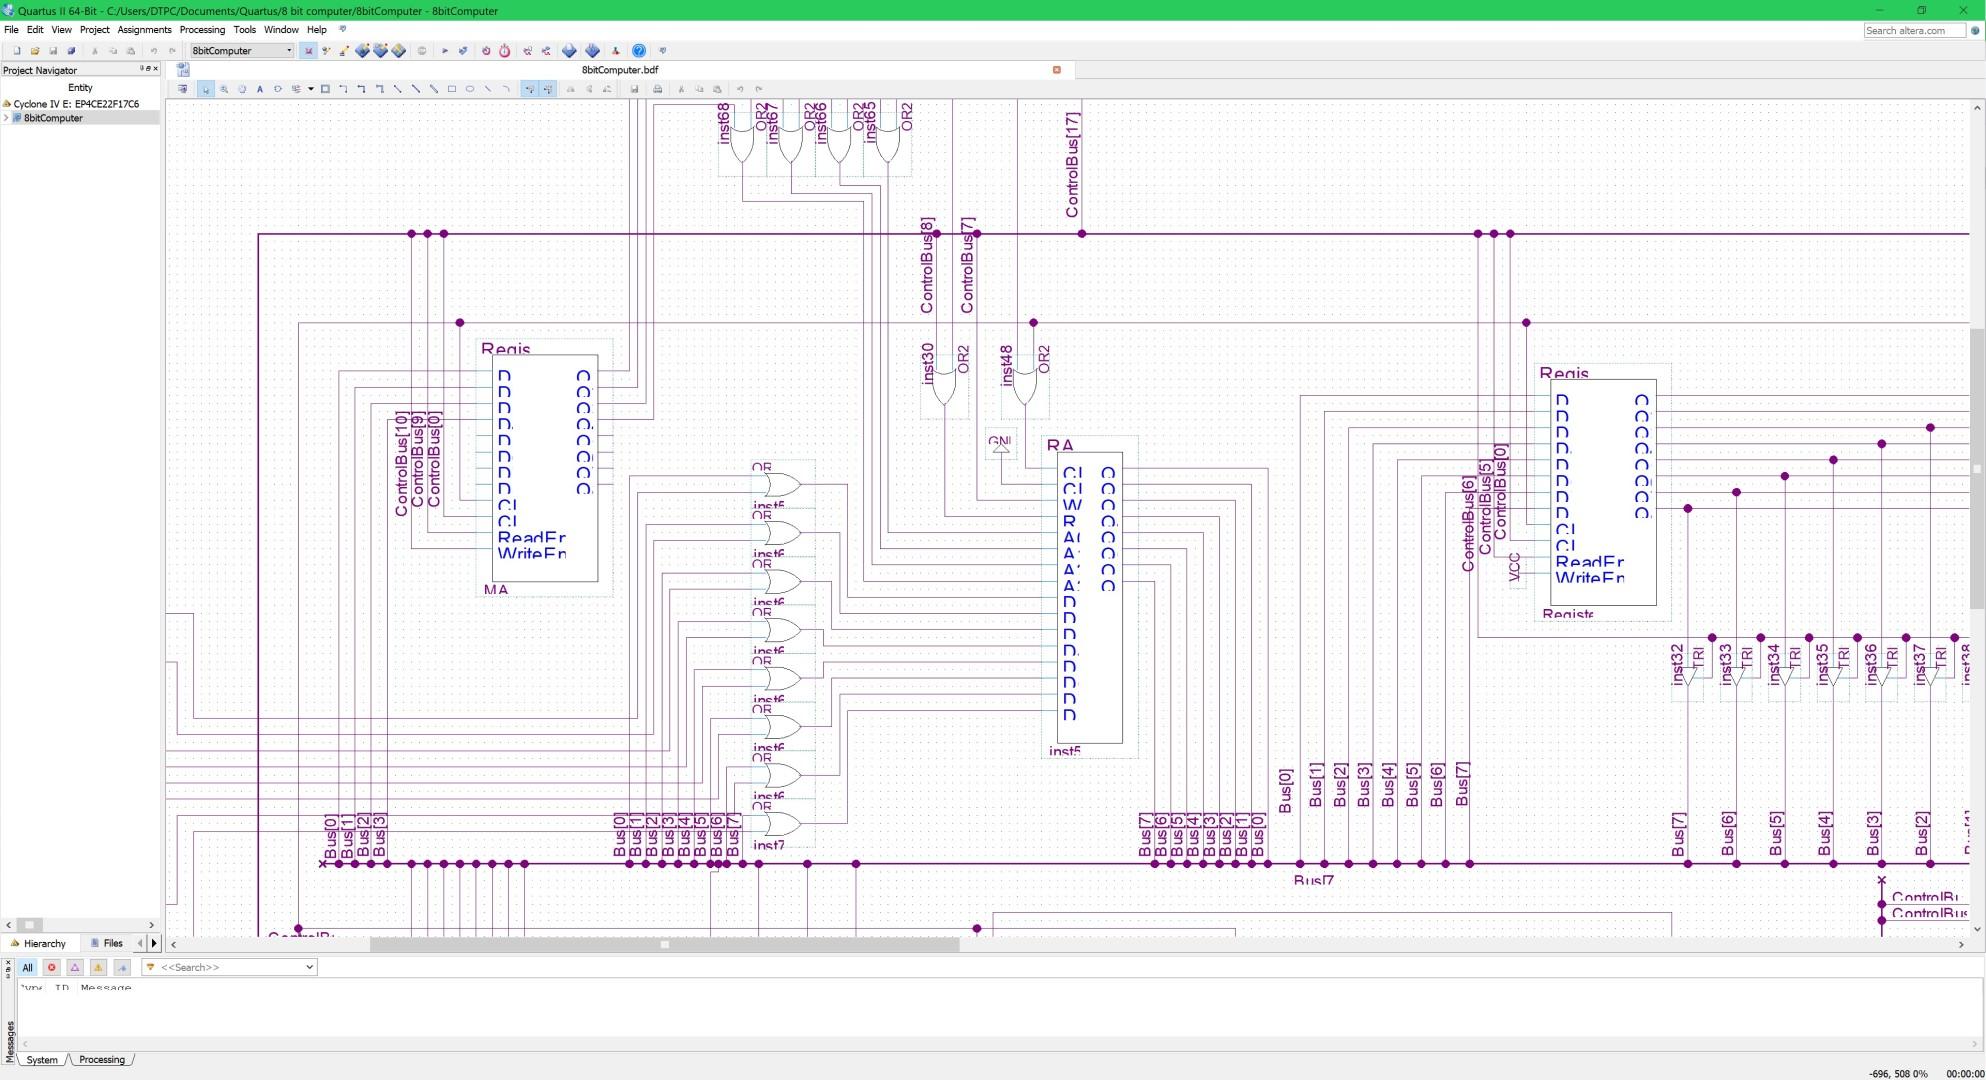
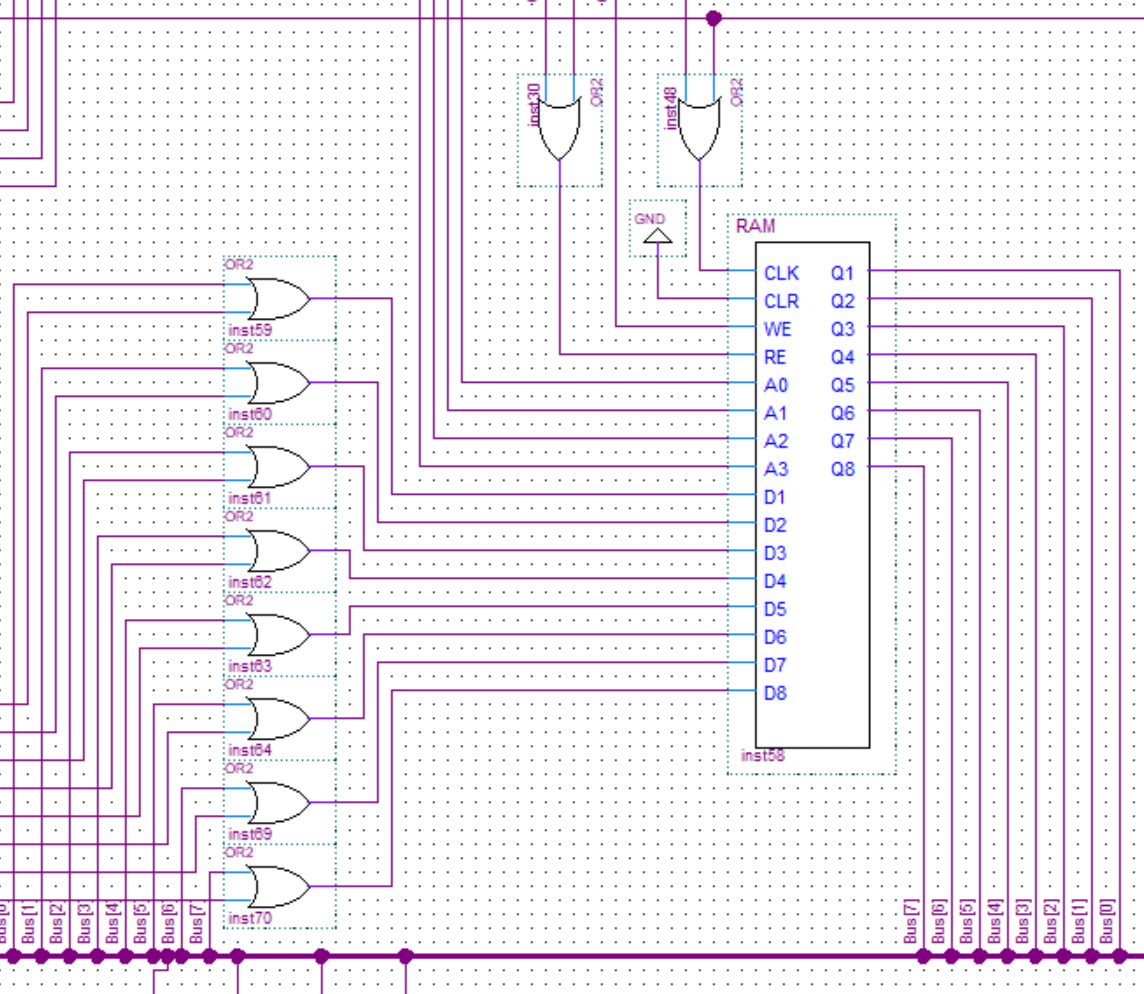
RAM

8-Bit Computer RAM

In this post, I will describe how I implemented the RAM in my 8-bit computer. The RAM size is very small, 16 cells(words) each one with 8 bits. It’s a small and simple computer so a program and its variables will be directly loaded into memory using a programmer. Results and any temporary variables are also all just stored in RAM. The only exception is if you want to output a value you can directly load it into the output

encoder and decoder

8-Bit Computer Encoders and Decoders

In my 8-bit computer build, I only used decoders. However, I will still cover encoders in this post for the sake of completeness. You can see the decoders being used in the RAM, multiplexers, and the control unit of the computer. Decoders decode the binary value on the input to an individual selection on the output. The encoder will of course do the exact opposite.

In this post, we’ll take a look at encoders/decoders with 4 inputs/outputs because it’s easier to understand how they work. The logic is the same for more inputs/outputs, the logic circuit just gets scaled up.

quartus multiplexer

8-Bit Computer Multiplexer and Demultiplexer

In this post, we’ll take a look at multiplexers and demultiplexers. In my 8-bit computer build, I only used multiplexers, you can see them being used in the clock generation circuits. I will however still cover demultiplexers in this post for the sake of completeness. Multiplexers are used to select one of the multiple inputs and output it to one common output. Demultiplexers do the opposite of that and take in one input and put it out through one of the multiple outputs that was selected. Let’s just take a look at the brief explanations and schematic bellow for a better understanding.

Register Design

8-Bit Computer Registers

In this post, I will show how I made the registers for my 8-bit computer. I will use the flip-flops I made in this post. And just like with the flip-flops you could use premade register provided in Quartus. However, I wanted to build my own from scratch to truly understand how they work.

8-bit computer in an FPGA Arduino controller and programmer

8-Bit Computer Arduino Programmer

This post is about the Arduino programmer I made for the 8-Bit Computer in an FPGA. I will show how to use it, connect it, and briefly explain how it works. If you are interested in the source code you can get it all here on Github. This programmer should also be compatible with a normal breadboard computer like the one Ben Eater made in his video series.

D flip flop

8-Bit Computer Flip-Flop Design

In this post, we’ll take a look at the flip-flop which is one of the most common and essential logic blocks used in digital logic design. It can be used used for lots of different things. If you take a look at my 8-bit computer build you will see that flip-flops are used all over the place. 

You can use premade flip-flops provided in Quartus. However, I wanted to build my own from scratch to truly understand how they work.

8-bit computer in an FPGA thumbnail

8-Bit Computer In An FPGA

This project of mine was inspired by Ben Eater and the 8-Bit breadboard computer he made. I would in fact highly recommend you check out his complete video series on it. When I first saw his computer on Hackaday I thought it was awesome and immediately wanted to build my own.

DIY Quiet Air Compressor

DIY Quiet Air Compressor

In this post, I will show my DIY quiet air compressor. I took the compressor from an old fridge and used an old whipped cream dispenser as an air tank. The compressor is very quiet and can thus be kept indoors(under my table in fact). The air capacity isn’t the greatest but it’s good enough for my needs(doing some pneumatics experiments, solder dispenser, …). The air pressure, however, can easily get up to 8 bar(around 120 psi). In addition to compressed air, you also get a vacuum line. You could, for example, use that for making a vacuum chamber or a vacuum pick up tool.

Advertisment ad adsense adlogger