


In this code snippet, we’ll find out what the unchecked keyword does in C#.
The unchecked keyword is used to suppress arithmetic overflow exceptions. We will try to add two integers whose sum will exceed the size of the integer data type. This will cause an overflow to occur. The overflow would normally throw an exception, but if we wrap the expression with unchecked the exception will get suppressed and the integer will just overflow.
Note: You can also use the checked keyword to explicitly check for arithmetic overflow and throw an exception if it occurs.
Let’s check out the code example below.
using System;

namespace Unckecked
{
    class Program
    {
        static void Main(string[] args)
        {
            int a = 2147483647;
            int b = 2147483647;

            //This will throw an overflow exception.
            //int c = a + b;

            //This will not throw an overflow exception and will just overflow.
            int c = unchecked(a + b);

            Console.WriteLine(c);

            Console.ReadLine();
        }
    }
} 
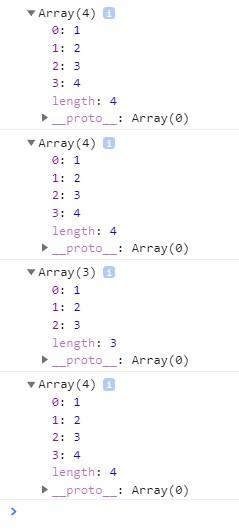
In this code snippet, we’ll learn how to copy an array in Javascript.
In Javascript, if you assign an array to another array using the = assignment operator you won’t actually copy the values from one array into the other. What you will do is make another reference to the first array, so now you just have to variables pointing at the same array.
To copy the actual array you need to do this arrayCopy = […originalArray ].
Let’s see the example below.
//Make array.
array = [1, 2, 3];

//Copy the array.(well not really)
arrayCopy = array;
//Add an element.
arrayCopy.push(4);

//Print the arrays.
//We would expect the contents of the first array to be 1 2 3 and contents of the second array to be 1 2 3 4.
console.log(array);
console.log(arrayCopy);

//Reset array to original values.
array = [1, 2, 3];

//Now we are actualy copying the array and not just the reference.
arrayCopy = [...array];
//Add element.
arrayCopy.push(4);

//Now we will get the expected output.
console.log(array);
console.log(arrayCopy);

This post contains a list Javascript code snippets. In the code snippets, you can find Javascript related topics with a quick explanation and a code example. I made this collection of code snippets so that if I ever forget something I can just come here to refresh my memory.
Hopefully, you’ll find it useful too.
Here you won’t find a complete set of step by step tutorials but rather a list of quick tutorials with code examples.
If you want to quickly test out some of the code snippets you can copy and paste them into something like jsfiddle.
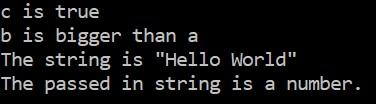
In this code snippet, we will learn how to use the if, else if and switch decision statements in C#.
The if decision statement will evaluate the expression provided in the brackets. If the expression is true the first code block executes else the other code block executes.
The switch statement is useful when you have a lot of checks to perform. You pass the value to be compared into the switch statement. Then you can write multiple cases for different possible values.
Now let’s see how to do it in the code below.
using System;

namespace DecisionStatements
{
    class Program
    {
        static void Main(string[] args)
        {
            //The if decison statement will evaluate the provided expression.
            //If the expression is true the first code block executes else the other code block executes.

            //Here are some examples of the if descison statement.
            bool c = true;

            if (c)
            {
                Console.WriteLine("c is true");
            }


            int a = 5;
            int b = 10;

            if (a > b)
            {
                Console.WriteLine("a is bigger than b");
            }
            else
            {
                Console.WriteLine("b is bigger than a");
            }


            string str = "Hello World";

            //Multiple checks can be added with the else if statement.
            if (str == "Hello World")
            {
                Console.WriteLine("The string is \"Hello World\"");
            }
            else if (str == "Hello")
            {
                Console.WriteLine("The string is \"Hello\"");
            }
            else
            {
                Console.WriteLine("The string contains something else: " + str);
            }


            //The switch statement is useful when you have a lot of checks to perform.
            string strNumber = "1";

            switch (strNumber)
            {
                case "1" : Console.WriteLine("The passed in string is a number.");
                break;

                case "2": Console.WriteLine("The passed in string is a number.");
                break;

                case "3": Console.WriteLine("The passed in string is a number.");
                break;

                case "4": Console.WriteLine("The passed in string is a number.");
                break;

                //If the value passed into the switch statement doesn't match up with any of the cases above the default case will execute.
                default: Console.WriteLine("The passed in string is not a number between 1 and 4.");
                break;
            }

            Console.ReadLine();
        }
    }
} 

In this code snippet, we’ll find out how to break out of multiple loops in Javascript.
Suppose we have an array that contains multiple 2D arrays and we want to find out if each of those 2D arrays contains a specific number.
The way to do this is to make three nested loops. The first one to iterate through the array of 2D arrays. Then two loops each one for one of the array indexes.
Inside the third loop, there would be an if statement checking if the value at the current indexes is equal to the number we are looking for. If so we would print out the indexes.
But the loops wouldn’t stop looping upon finding the number. To make this more efficient we need to break out of the second and third loop upon finding the number. This is done by “naming”(for a lack of a better term) the loop. Then when we break out of the loop using the break keyword we specify the name of the outer most loop that we want to break out of. Like so break loop2.
To see how exactly this is done let’s take a look at the code below.
//For this example we will make 3 2D arrays filled with some numbers.
var TwoDArray1 = [
[3, 2, 5],
[7, 8, 9],
[8, 6, 7]
];
var TwoDArray2 = [
[1, 2, 3],
[4, 5, 6],
[7, 8, 9]
];
var TwoDArray3 = [
[4, 8, 3],
[2, 5, 3],
[1, 6, 5]
];
//Here we'll maeke an array of our arrays.
var ArrayOfArrays = [
TwoDArray1,
TwoDArray2,
TwoDArray3
];
loop1:
for(var i = 0; i < 3; i++){
//First loop loops through ArrayOfArrays to get the individual 2D array.
var TwoDArray = ArrayOfArrays[i];
//Loop 2 and 3 loop through the 2D array.
loop2:
for(var j = 0; j < 3; j++){
loop3:
for(var k = 0; k < 3; k++){
//Let's say that want to find out if the 2D array contains the number 5.
//If we find it there is no need to keep looking for it, so we can just move to the next array.
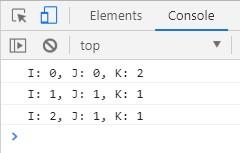
if(TwoDArray[j][k] == 5){
//Print index of the number 5.
console.log("I: " +i+ ", J: " +j+ ", K: " +k);
break loop2; //This will break out of the second loop(and third as well of course).
}
}
}
}
In this code snippet, we’ll make a struct in C#.
A struct is like a lightweight class but unlike a class(reference type) it’s value type. This can give you better performance in some cases.
You can use structs as a grouping mechanism to make a small “object” that contains multiple members instead of having them scattered around. If your struct grows too big(has too many properties/methods) you should consider making a class instead.
Note: A struct can’t inherit from another struct.
Let’s see how to make a struct in the code below.
using System;

namespace Struct
{
    class Program
    {
        static void Main(string[] args)
        {
            //A struct is kind of a "light" version of a class.
            myStruct st = new myStruct();

            st.myMethod();

            Console.WriteLine(st.myProperty);
            Console.ReadLine();
        }
    }

    struct myStruct
    {
        public string myProperty { get; set; }

        public void myMethod()
        {
            Console.WriteLine("From myMethod.");
        }
    }
} 
In this code snippet, we’ll take a look at the sealed keyword in C#.
In the following example, we will make a sealed class and a sealed method. Then we’ll try inheriting from the sealed class and overriding the sealed method. As you will be able to see we’ll get an error as sealed methods can’t be overridden and sealed classes can’t be inherited from.
So the whole purpose of the sealed keyword is to “seal” a class or method and thus prevent inheriting/overriding.
Let’s see how to use the sealed keyword in the code example below.
using System;

namespace Sealed
{
    class Program
    {
        static void Main(string[] args)
        {
        }
    }

    class MyClass
    {
        public virtual void MyMethod()
        {
            Console.WriteLine("Some text.");
        }
    }

    sealed class MySecondClass : MyClass
    {
        public sealed override void MyMethod()
        {
            Console.WriteLine("Some text.");
        }
    }

    //As you can see we can't inherit from a sealed class.
    class MyThirdClass : MySecondClass
    {
        //As you can see we can't override a sealed method.
        public override void MyMethod()
        {
            Console.WriteLine("Some text.");
        }
    }
} 
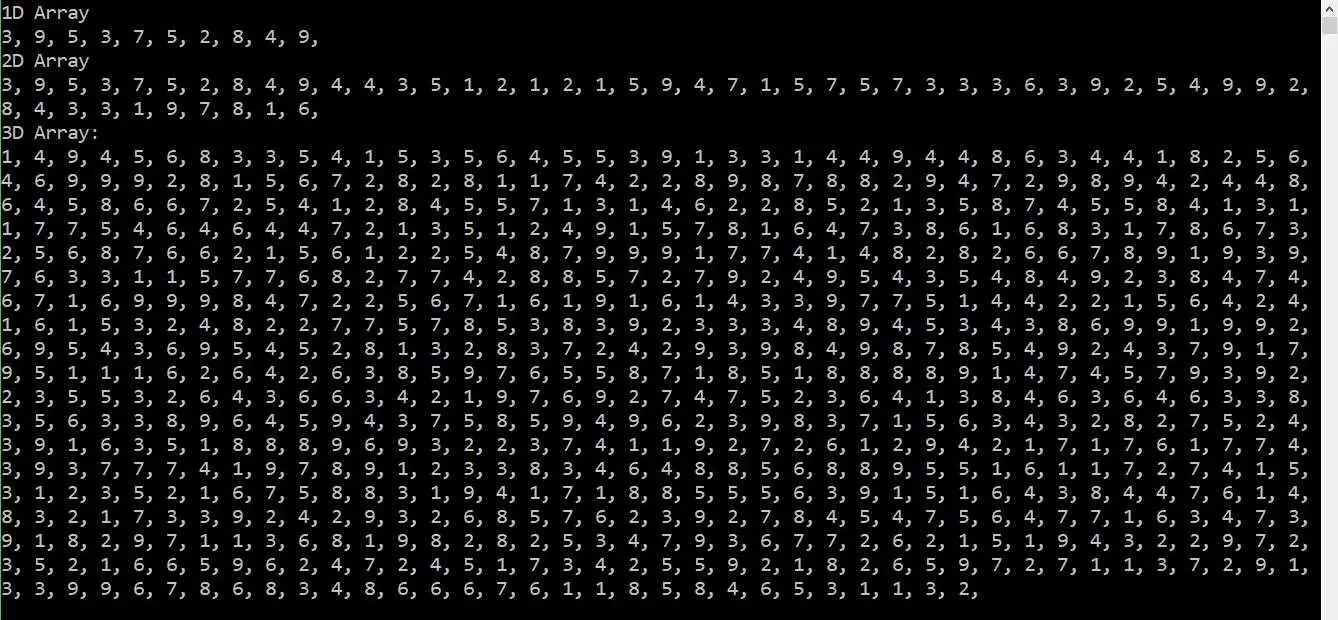
In this code snippet, we’ll find out how to loop through arrays in C#.
The following C# code snippet contains the code for looping through 1D, 2D, and 3D arrays, filling them up with random numbers and then writing out the values from the arrays.
using System;

namespace ArrayLooping
{
    class Program
    {
        static void Main(string[] args)
        {
            //Make empty array.(Each "dimension" of a multidimnensional array can have a different size.)
            int[] oneDimensionalArray = new int[10];
            int[,] twoDimensionalArray = new int[10,5];
            int[,,] threeDimensionalArray = new int[10,5,15];

            //Fill the arrays with random numbers.
            oneDimensionalArray = fill1DArray(oneDimensionalArray);
            twoDimensionalArray = fill2DArray(twoDimensionalArray);
            threeDimensionalArray = fill3DArray(threeDimensionalArray);

            //Write out the contents of the arrays.
            Console.WriteLine("1D Array");
            print1DArray(oneDimensionalArray);
            Console.WriteLine("");

            Console.WriteLine("2D Array");
            print2DArray(twoDimensionalArray);
            Console.WriteLine("");

            Console.WriteLine("3D Array:");
            print3DArray(threeDimensionalArray);

            Console.ReadLine();
        }

        public static void print1DArray(int[] array)
        {
            for (int i = 0; i < array.Length; i++)
            {
                Console.Write(array[i]+", ");
            }
        }

        public static void print2DArray(int[,] array)
        {
            //Loop through array. (We use array.GetLength(0) with the index of the "dimension" to get the size.)
            for (int i = 0; i < array.GetLength(0); i++)
            {
                for (int j = 0; j < array.GetLength(1); j++)
                {
                    Console.Write(array[i,j] + ", ");
                }
            }
        }

        public static void print3DArray(int[,,] array)
        {
            //Loop through array. (We use array.GetLength(0) with the index of the "dimension" to get the size.)
            for (int i = 0; i < array.GetLength(0); i++)
            {
                for (int j = 0; j < array.GetLength(1); j++)
                {
                    for (int k = 0; k < array.GetLength(2); k++)
                    {
                        Console.Write(array[i,j,k] + ", ");
                    }
                }
            }
        }

        public static int[] fill1DArray(int[] array)
        {
            Random rnd = new Random();

            //Loop through array.
            for (int i = 0; i < array.Length; i++)
            {
                //Save a random number form 1-10 into array.
                array[i] = rnd.Next(1, 10);
            }

            return array;
        }

        public static int[,] fill2DArray(int[,] array)
        {
            Random rnd = new Random();

            //Loop through array. (We use array.GetLength(0) with the index of the "dimension" to get the size.)
            for (int i = 0; i < array.GetLength(0); i++)
            {
                for (int j = 0; j < array.GetLength(1); j++)
                {
                    //Save a random number form 1-10 into array.
                    array[i, j] = rnd.Next(1, 10);
                }
            }

            return array;
        }

        public static int[,,] fill3DArray(int[,,] array)
        {
            Random rnd = new Random();

            //Loop through array. (We use array.GetLength(0) with the index of the "dimension" to get the size.)
            for (int i = 0; i < array.GetLength(0); i++)
            {
                for (int j = 0; j < array.GetLength(1); j++)
                {
                    for (int k = 0; k < array.GetLength(2); k++)
                    {
                        //Save a random number form 1-10 into array.
                        array[i, j, k] = rnd.Next(1, 10);
                    }
                }
            }

            return array;
        }
    }
} 


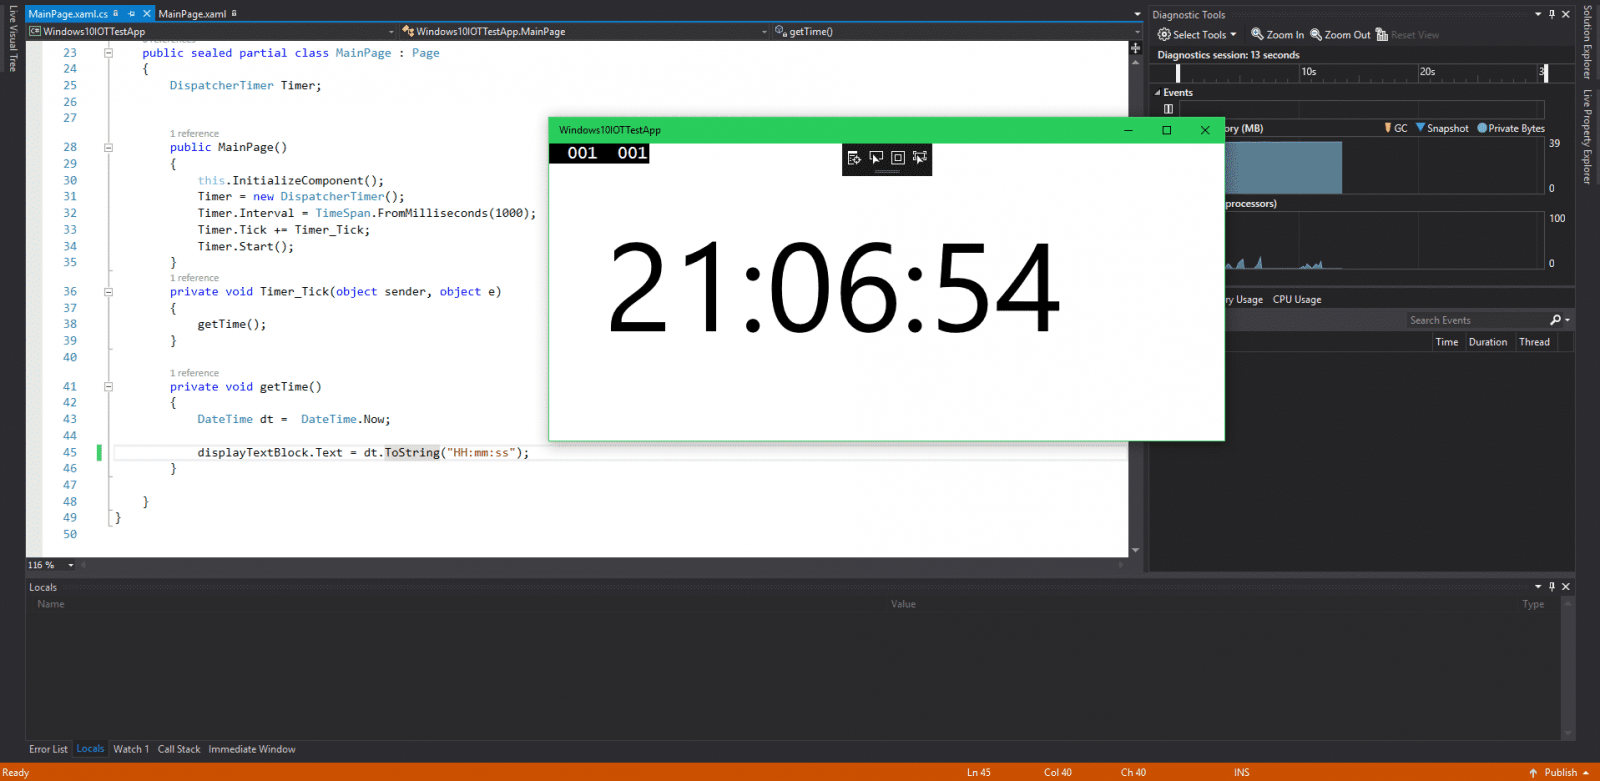
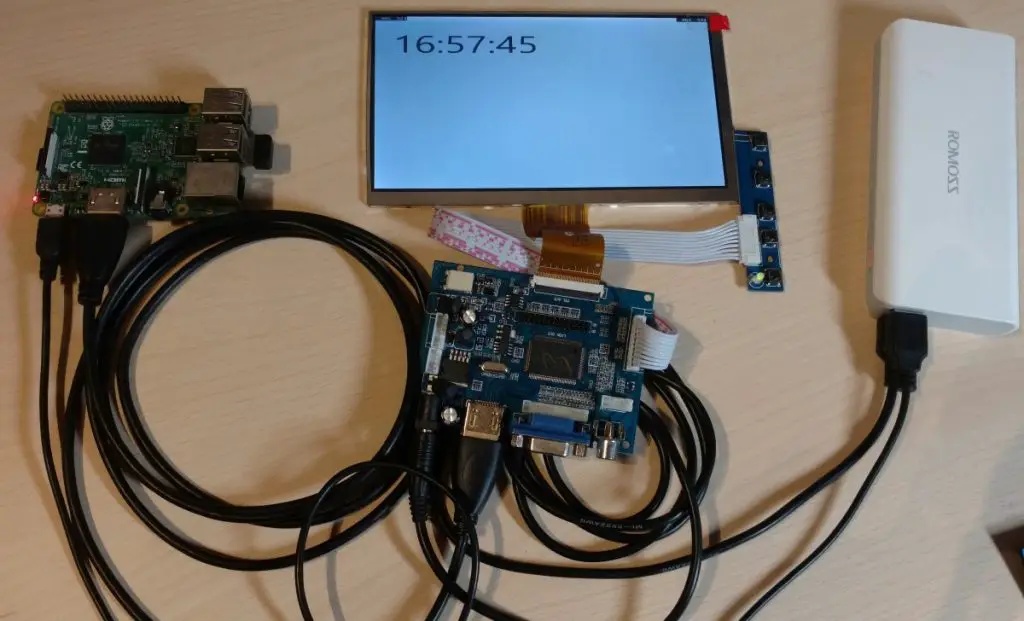
Next is the C# code for the functionality of the app. The code is pretty straight forward. There is a timer that triggers an event every second. That event then calls the getTime() method that gets the current time and displays it in the text block.