Home


About
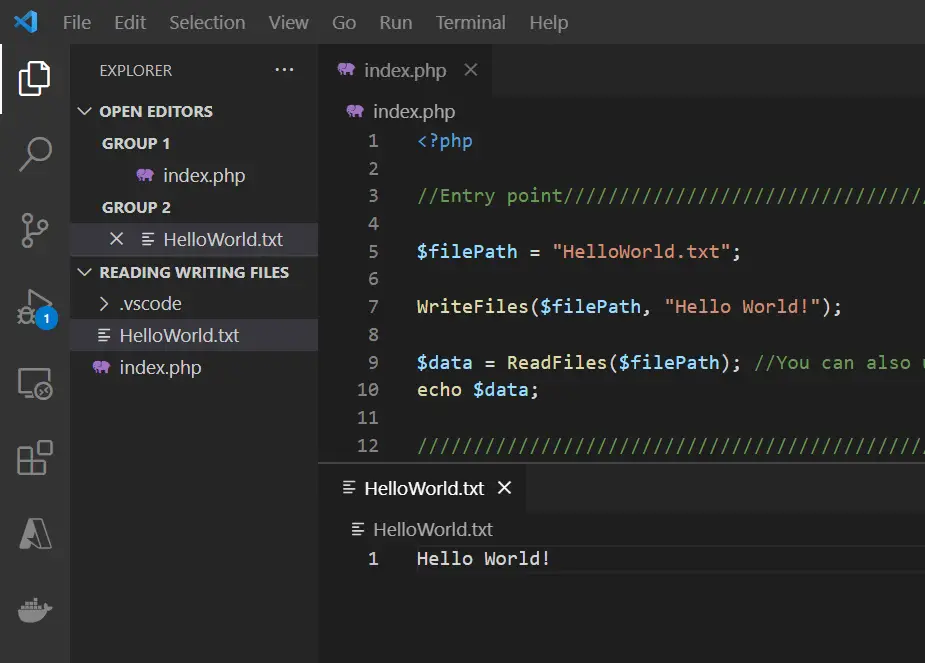
In this code snippet, we’ll learn how to read and write files with PHP.
Let’s see the example below.
Code:
<?php

//Entry point////////////////////////////////////////////////////////////////////////////////////

$filePath = "HelloWorld.txt";

WriteFiles($filePath, "Hello World!");

$data = ReadFiles($filePath); //You can also use file_get_contents($filePath).
echo $data;

/////////////////////////////////////////////////////////////////////////////////////////////////


//Functions//////////////////////////////////////////////////////////////////////////////////////

function ReadFiles($filePath){
	//Create/open file.
	$file = fopen($filePath, "r") or die("An error occured while trying to open the file."); //More info. about second parameter: https://www.php.net/manual/en/function.fopen.php
	//Read data from file.
	$data = fread($file, filesize($filePath));
	//Close file.
	fclose($file);

	return $data;
}

function WriteFiles($filePath, $data){
	//Create/open file.
	$file = fopen($filePath, "w") or die("An error occured while trying to open the file."); //More info. about second parameter: https://www.php.net/manual/en/function.fopen.php
	//Write data to file.
	fwrite($file, $data);
	//Close file.
	fclose($file);
}

//////////////////////////////////////////////////////////////////////////////////////////////////
Resulting output:

About
In this code snippet, we’ll learn how to upload files with Javascript.
We will use the input HTML element and set it’s type to “file”. Then javascript can be used to retrive the selected file from the input element and send it to the backend. You can use whatever you want for your backend: nodejs, PHP, Java or in this case I will use a C# Azure function.
Let’s see the example below.
Frontend Code:
I also added a second way of sending the file to the backend by only using a form and completely avoiding javascript. Both examples will produce the same result.
html
<!DOCTYPE html>
<html>
    <head>
        <title>File Upload</title>
    </head>
    <script src="code.js"></script>
    <body>
        <div>
            <h1>File Upload</h1>

            <br>

            <h3>Send with javascript</h3>
            <input id="fileUpload" name="file" type="file" />

            <br>

            <h3>Send directly from form</h3>
            <form enctype="multipart/form-data" action="http://localhost:7071/api/FileUpload" method="post">
                <input name="file" type="file" /> <br>
                <input type="submit">
            </form>
        </div>
    </body>
</html>
Javascript will grab the file from the file input, create a FormData object and add the file to it. This object will then be sent to the backend using fetch().
javascript
//Run this when the HTML gets loaded.
window.onload = () => {
  //Add event on the file input.
  document.getElementById("fileUpload").addEventListener("change", fileUploaded);
}

function fileUploaded(event){
  //Get the upload input element.
  const fileInput = event.target;
  //Get the first file.
  const fileData = fileInput.files[0];

  //Create a form data object.
  let formData = new FormData();
  //Add file.
  formData.append("file", fileData);

  //Set reqeust properties.
  const requestProperties = {
    method: "POST",
    body: formData //Add form data to request.
  };

  //Url of the backend where you want to upload the file to.
  const fileUploadURL = "http://localhost:7071/api/FileUpload";

  //Make the request.
  makeRequest(fileUploadURL, requestProperties);
}

async function makeRequest(url, requestProperties){
  let response = await fetch(url, requestProperties);
  console.log(response.status);
}
Backend Code:
As mentioned before you can use whatever you want for your backend but I will be using C# and Azure Functions in this example. The file will simply be read from the request and written to the file system.
C# Azure Function
using System;
using System.IO;
using System.Threading.Tasks;
using Microsoft.AspNetCore.Mvc;
using Microsoft.Azure.WebJobs;
using Microsoft.Azure.WebJobs.Extensions.Http;
using Microsoft.AspNetCore.Http;
using Microsoft.Extensions.Logging;

namespace Company.Function
{
    public static class FileUpload
    {
        [FunctionName("FileUpload")]
        public static async Task Run([HttpTrigger(AuthorizationLevel.Function, "put", "post", Route = null)] HttpRequest req, ILogger log)
        {
            try
            {
                //Read form data.
                var formData = await req.ReadFormAsync();
                //Get file.
                var file = formData.Files["file"];

                //For this demo I will save the file localy to the desktop.
                //In a real scenario you could process the file and return some sort of result or save it to a DB/Cloud storage.
                using(Stream outStream = File.OpenWrite(@"C:\Users\DTPC\Desktop\" + file.FileName))
                    file.CopyTo(outStream);

                //Return seccessful response.
                return new OkObjectResult("File was uploaded.");
            }
            catch (Exception ex)
            {
                return new BadRequestObjectResult(ex);
            }
        }
    }
}
Resulting output:
Uploading the file.

File saved by the Azure function.

About
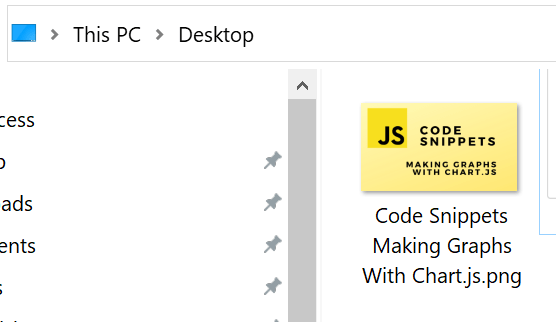
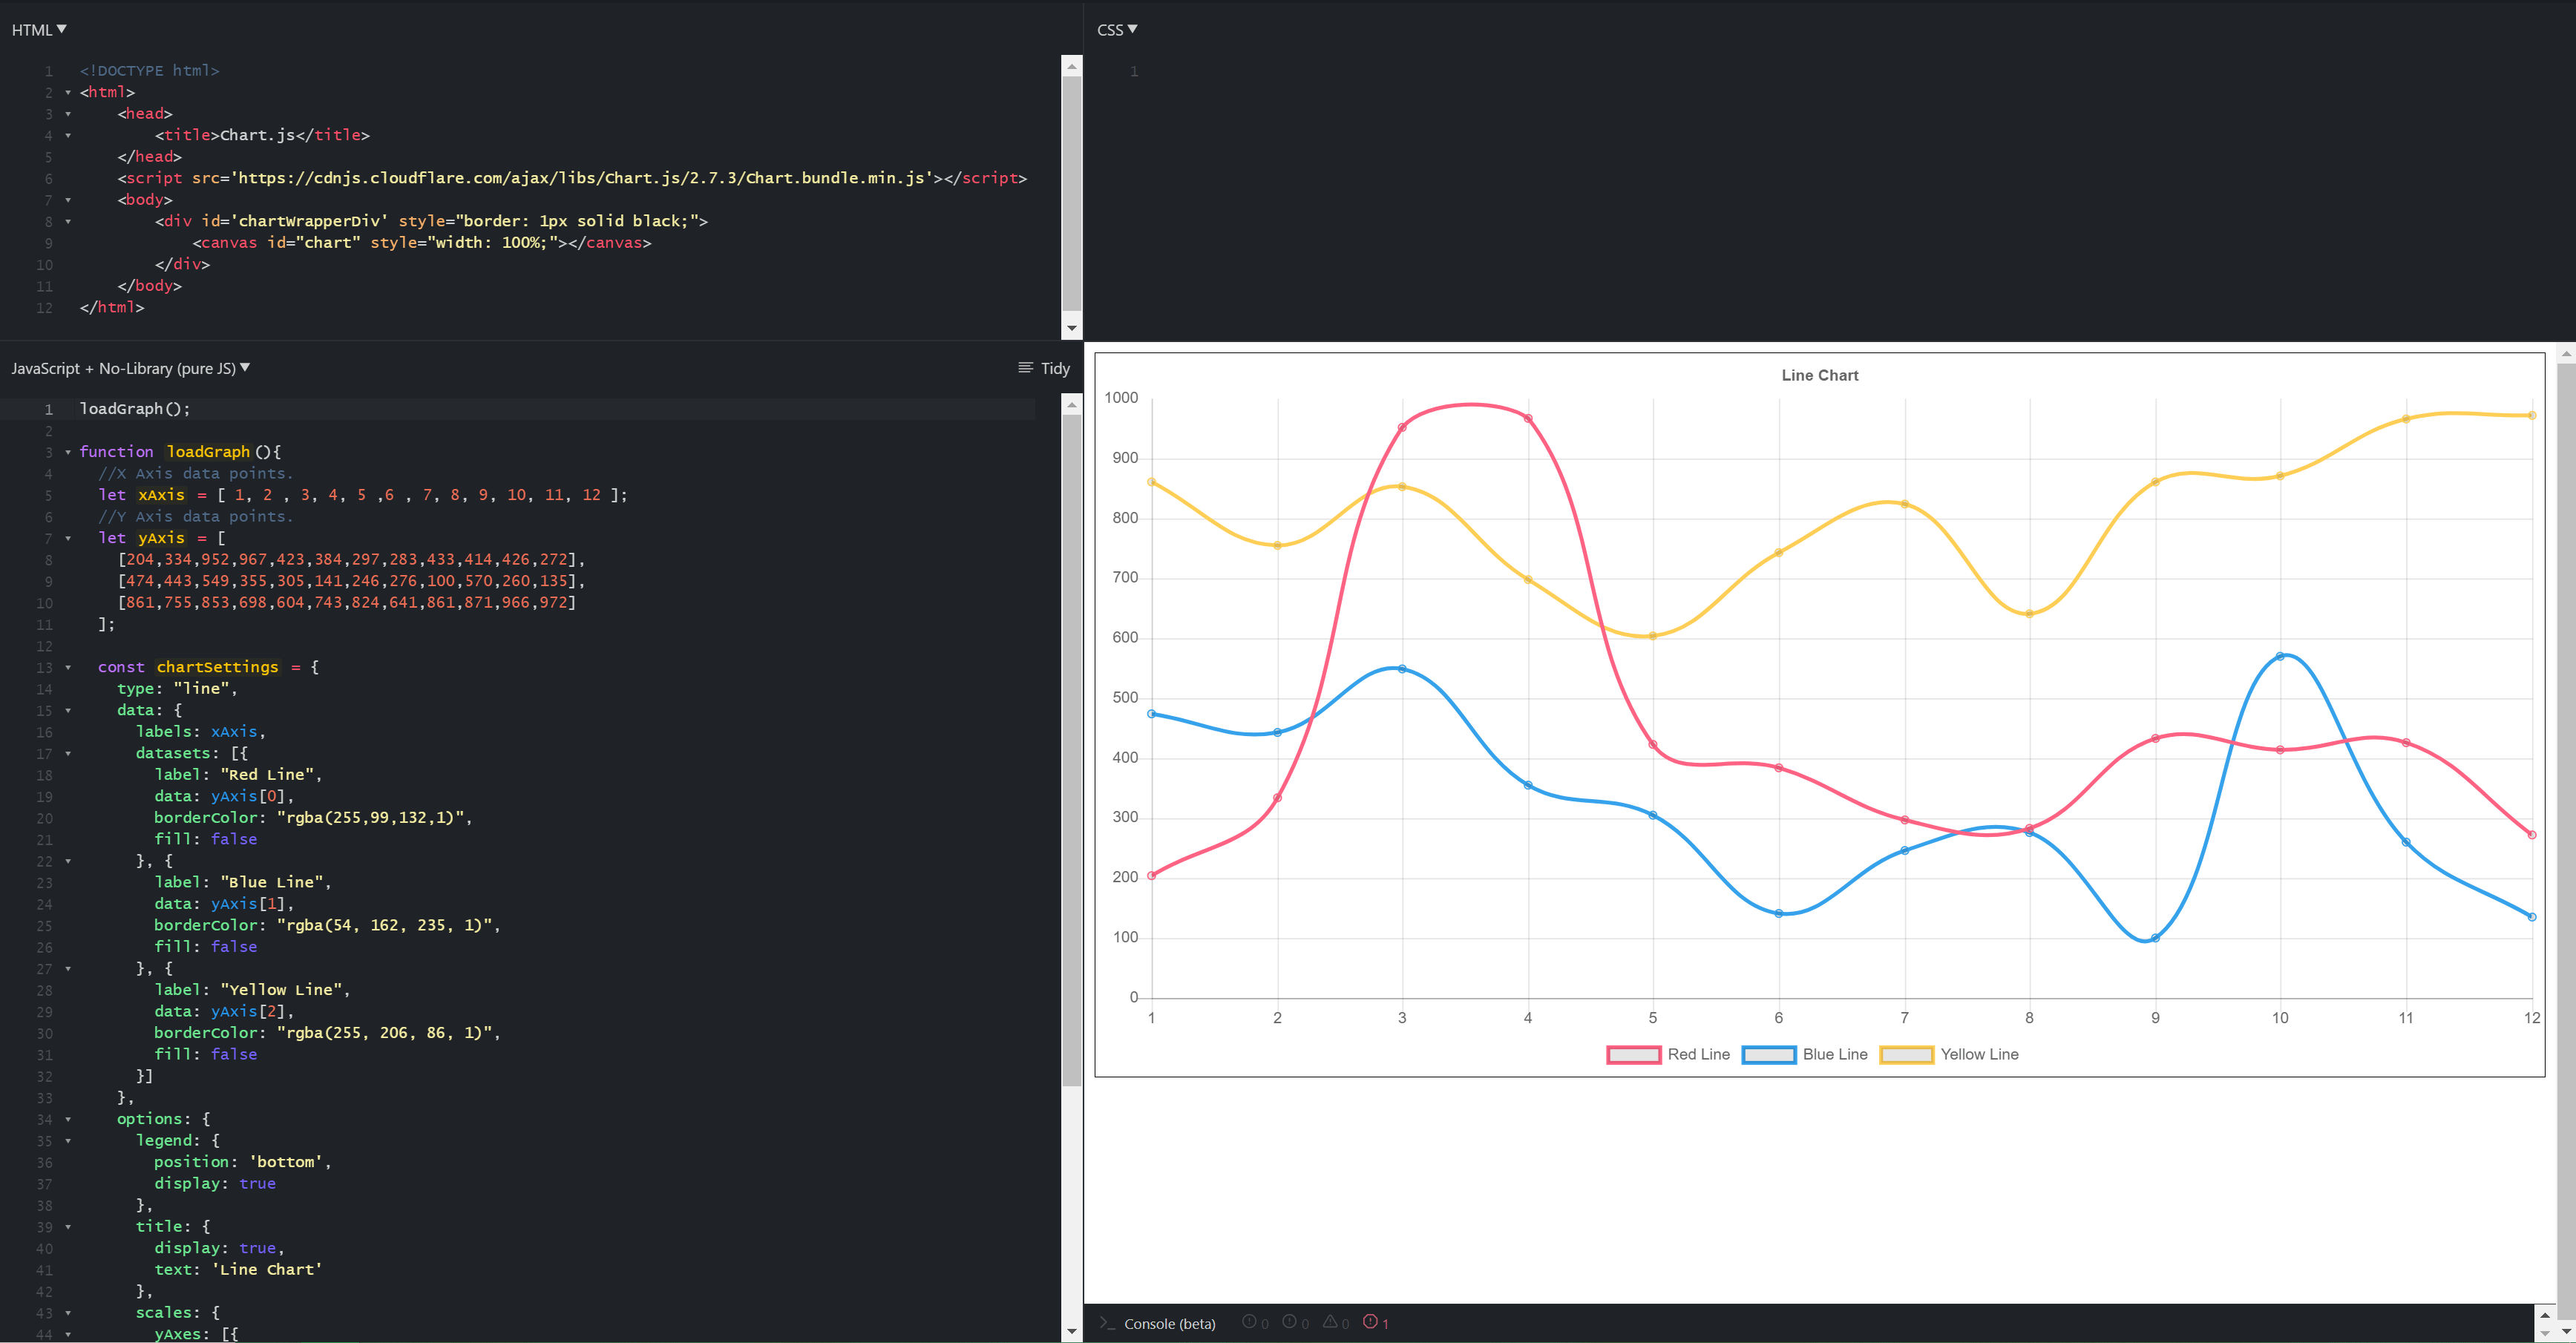
In this code snippet, we’ll learn how to make graphs with Chart.js in Javascript.
Chart.js is a very nice javascript library that allows you to visualize data by making different kinds of graphs/charts/plots. We’ll make a simple line graph in this example.
Note: If you want to know how to make other types of graphs(bar, scatter, pie, …) check out the official documentation here. I was going to cover that in this post but they have everything very well documented with nice code examples.
Let’s see the example below.
Code:
In the HTML we need to include the Chart.js library and add a canvas element with an id we’ll reference later from the code.
html
<!DOCTYPE html>
<html>
    <head>
        <title>Chart.js</title>
    </head>
    <script src='https://cdnjs.cloudflare.com/ajax/libs/Chart.js/2.7.3/Chart.bundle.min.js'></script>
    <body>
        <div id='chartWrapperDiv' style="border: 1px solid black;">
            <canvas id="chart" style="width: 100%;"></canvas>
        </div>
    </body>
</html>
javascript
loadGraph();

function loadGraph(){
  //X Axis data points.
  let xAxis = [ 1, 2 , 3, 4, 5 ,6 , 7, 8, 9, 10, 11, 12 ];
  //Y Axis data points.
  let yAxis = [
    [204,334,952,967,423,384,297,283,433,414,426,272],
    [474,443,549,355,305,141,246,276,100,570,260,135],
    [861,755,853,698,604,743,824,641,861,871,966,972]
  ];

  const chartSettings = {
    type: "line",
    data: {
      labels: xAxis,
      datasets: [{
      	label: "Red Line",
        data: yAxis[0],
        borderColor: "rgba(255,99,132,1)",
        fill: false
      }, {
      	label: "Blue Line",
        data: yAxis[1],
        borderColor: "rgba(54, 162, 235, 1)",
        fill: false
      }, {
     	 	label: "Yellow Line",
        data: yAxis[2],
        borderColor: "rgba(255, 206, 86, 1)",
        fill: false
      }]
    },
    options: {
      legend: {
      	position: 'bottom',
      	display: true
      },
      title: {
        display: true,
        text: 'Line Chart'
      },
      scales: {
      	yAxes: [{
        	ticks: {
          	beginAtZero:true,
         	}
        }]
      }
    }
  }

  //Get canvas.
  let canvas = document.getElementById("chart");

  //Make a new chart.
  let chart = new Chart(canvas, chartSettings);
}
Resulting output:

About
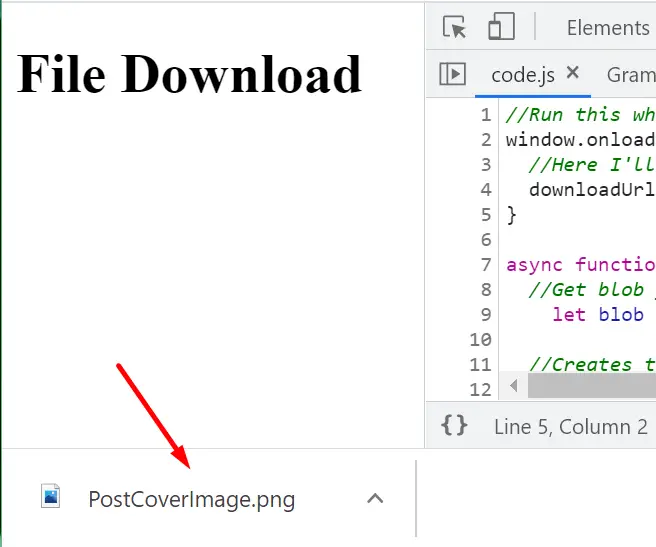
In this code snippet, we’ll learn how to perform downloads with Javascript.
File downloads can be programmatically started with javascript by creating a temporary link element that points to your file. Then you add it to the DOM and call its click function to initiate the download. Finally, you can remove the link.
Let’s see how to do it in the example below.
Code:
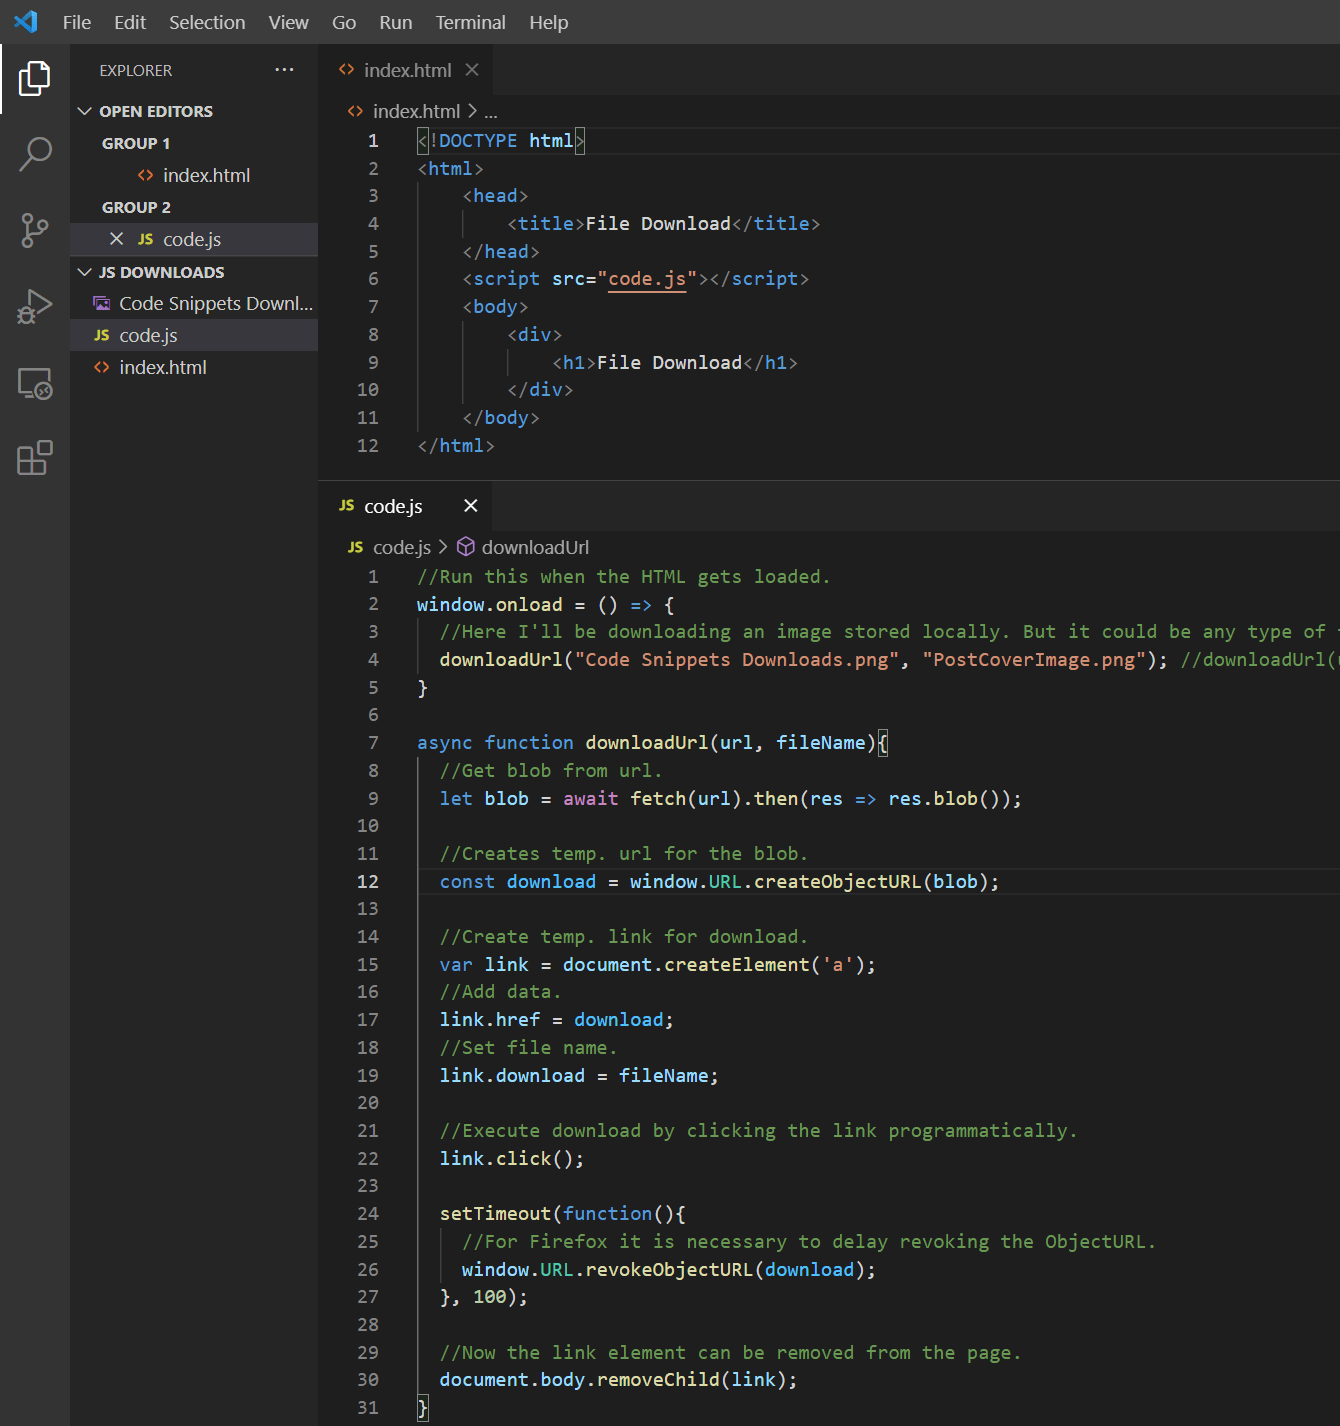
index.html
Nothing exciting here, this HTML is used just so we can add and run the code.js file for this demo.
<!DOCTYPE html>
<html>
    <head>
        <title>File Download</title>
    </head>
    <script src="code.js"></script>
    <body>
        <div>
            <h1>File Download</h1>
        </div>
    </body>
</html>
code.js
//Run this when the HTML gets loaded.
window.onload = () => {
  //Here I'll be downloading an image stored locally. But it could be any type of file from any url(with CORS enabled).
  downloadUrl("Code Snippets Downloads.png", "PostCoverImage.png"); //downloadUrl(url, file name, does it open in new tab or not)
}

async function downloadUrl(url, fileName){
  //Get blob from url.
	let blob = await fetch(url).then(res => res.blob());

  //Creates temp. url for the blob.
  const download = window.URL.createObjectURL(blob);

  //Create temp. link for download.
  var link = document.createElement('a');
  //Add data.
  link.href = download;
  //Set file name.
  link.download = fileName;

  //Execute download by clicking the link programatically.
  link.click();

  setTimeout(function(){
    //For Firefox it is necessary to delay revoking the ObjectURL.
    window.URL.revokeObjectURL(download);
  }, 100);
}
Resulting output:

About
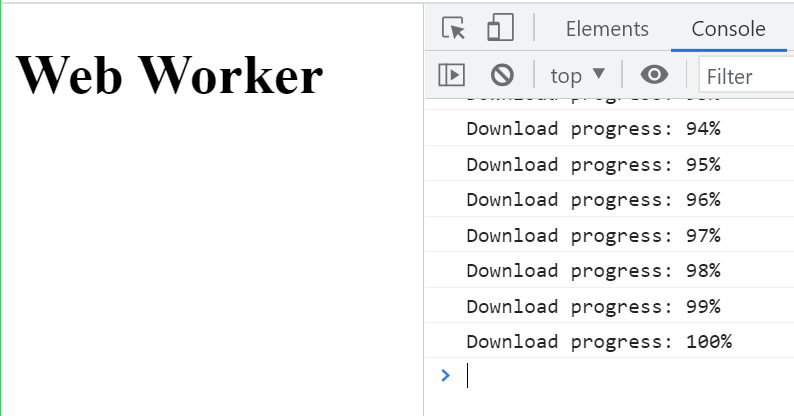
In this code snippet, we’ll look at web workers in Javascript.
A web worker is a script that can run in the background separate from the main page javascript. This can be used to prevent blocking code. It could be considered like “multithreading” in javascript … sort of.
Let’s see the example below.
Code:
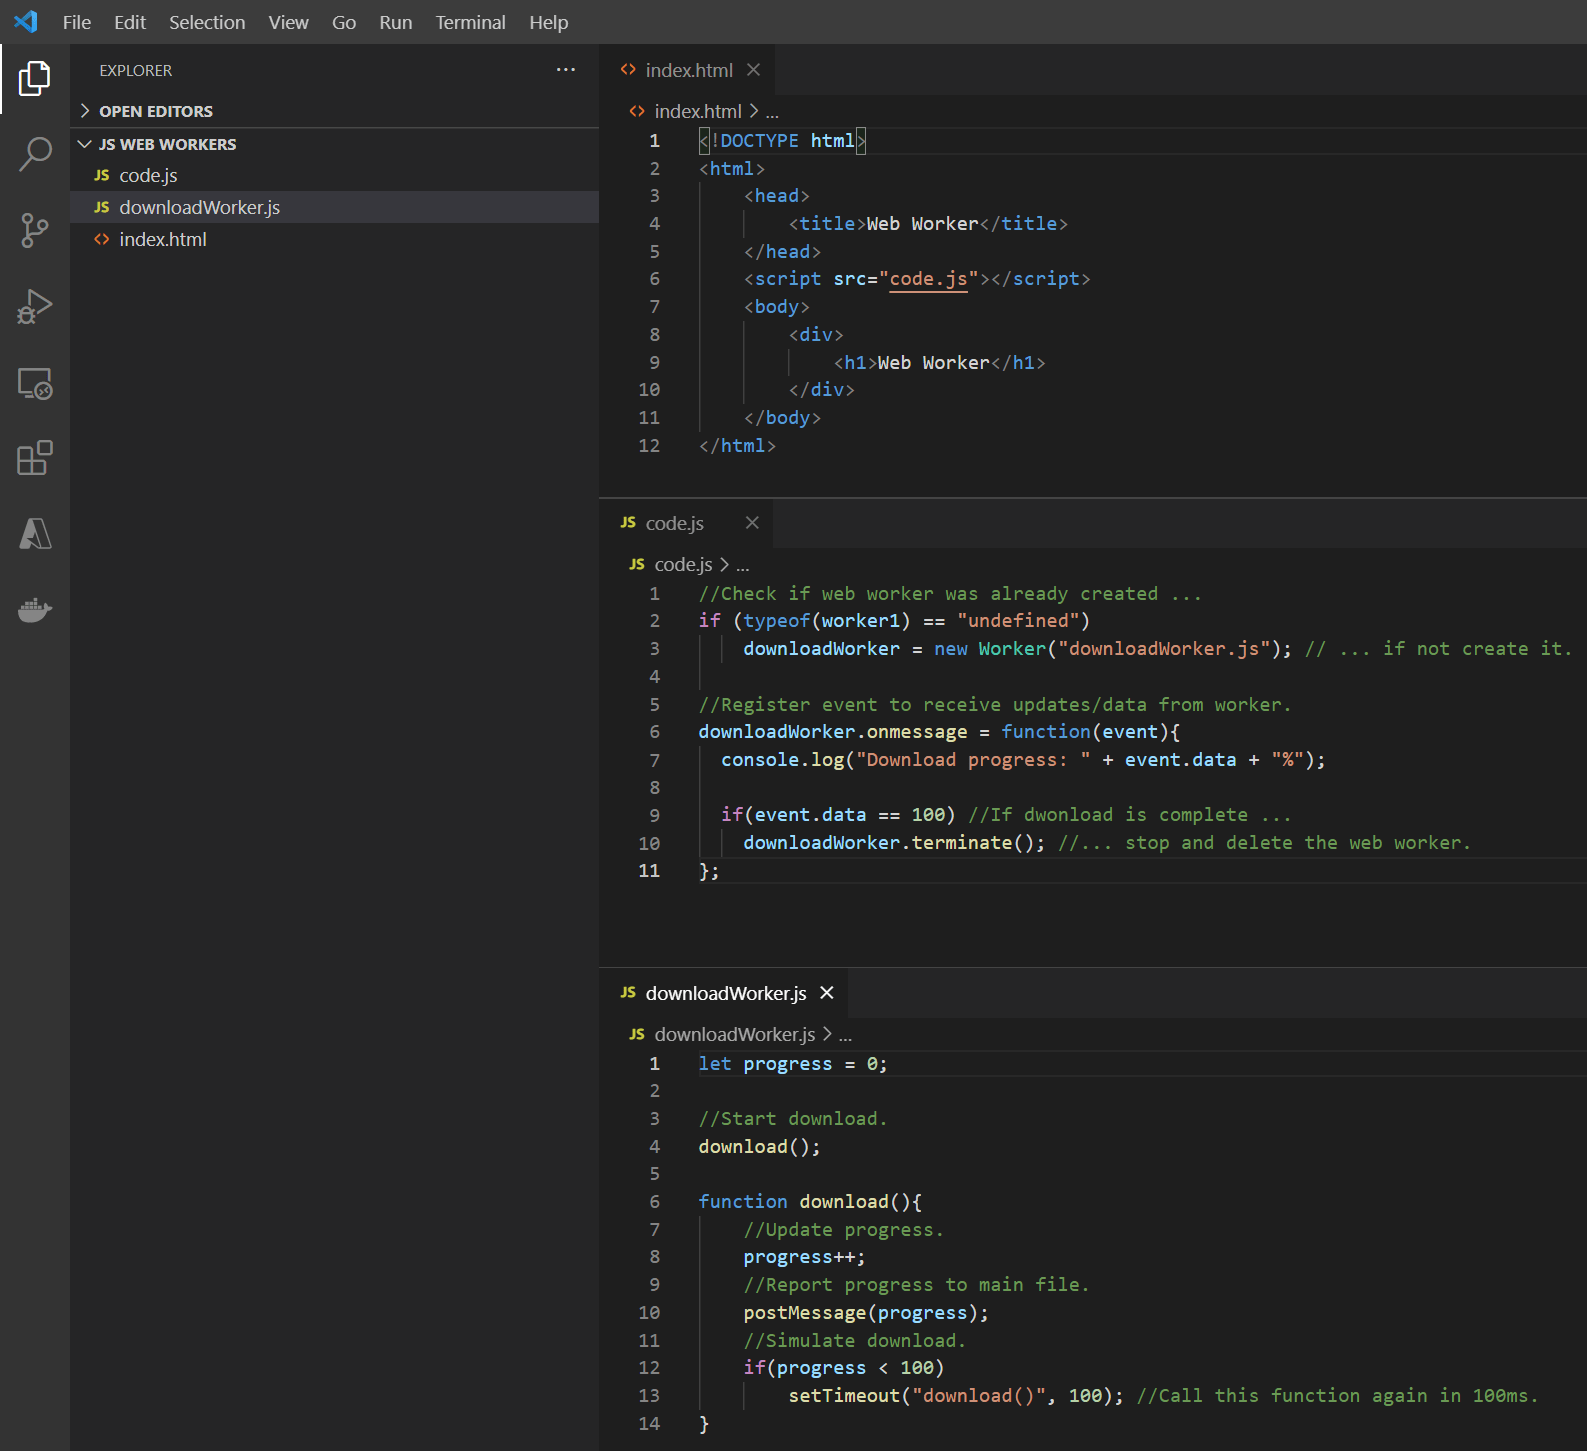
index.html
Nothing exciting here, this HTML is used just so we can add and run the code.js file for this demo.
<!DOCTYPE html>
<html>
    <head>
        <title>Web Worker</title>
    </head>
    <script src="code.js"></script>
    <body>
        <div>
            <h1>Web Worker</h1>
        </div>
    </body>
</html>
code.js
This is our main code file from where we will create the web worker.
//Check if web worker was already created ...
if (typeof(downloadWorker) == "undefined")
    downloadWorker = new Worker("downloadWorker.js"); // ... if not create it.

//Register event to receive updates/data from worker.
downloadWorker.onmessage = function(event){
  console.log("Download progress: " + event.data + "%");

  if(event.data == 100) //If dwonload is complete ...
    downloadWorker.terminate(); //... stop and delete the web worker.
};
dwonloadWorker.js
This file will be used to make our web worker.
let progress = 0;

//Start download.
download();

function download(){
    //Update progress.
    progress++;
    //Report progress to main file.
    postMessage(progress);
    //Simulate download.
    if(progress < 100)
        setTimeout("download()", 100); //Call this function again in 100ms.
}
Resulting output:

About
In this code snippet, we’ll learn how to make HTTP requests with fetch in Javascript.
The first example will demonstrate how to fetch a get request with the minimum amount of code required. In the second one, we’ll make a function that can make any generic HTTP request, can send headers and checks for a successful response before calling the provided callback function.
Note: These days you can use fetch() and JSON as a replacement for AJAX(Asynchronous JavaScript And XML) and the XMLHttpRequest.
Let’s see the examples below.
Simplest Way to Make A Request(Get):
makeRequest();
async function makeRequest(){
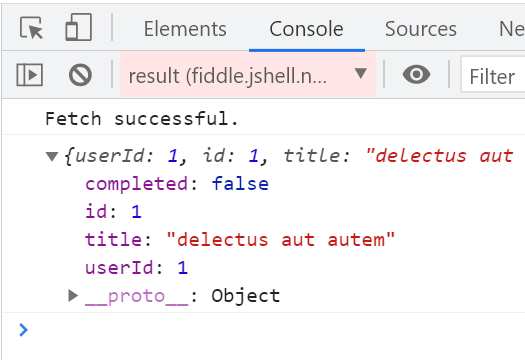
let response = await fetch("https://jsonplaceholder.typicode.com/todos/1");
let data = await response.json();
console.log(data);
} Resulting output:
Generic HTTP Requests:
The below defined makeRequest() function can make a generic HTTP request asynchronously. You simply need to pass it the URL to be called, HTTP request settings and a callback function which will be called upon the request completion(and will receive the data from the request). The requestProperties object contains: method type, headers and a body(if needed).
///////////////////////////////////////////////////////////
//Mock API url.
const url = "https://jsonplaceholder.typicode.com/posts";
//Json payload.
const json = JSON.stringify({
title: 'foo',
body: 'bar',
userId: 1,
});
//Here the method type, headers and body content can be set.
const requestProperties = {
method: "POST",
headers: {
"Content-Type": "application/json"
},
body: json
};
//Make request.
makeRequest(url, requestProperties, display);
///////////////////////////////////////////////////////////
///////////////////////////////////////////////////////////
//Request function.
async function makeRequest(url, requestProperties, callback) {
//Make request and await response.
let response = await fetch(url, requestProperties);
//Here we'll make sure the request was successful.
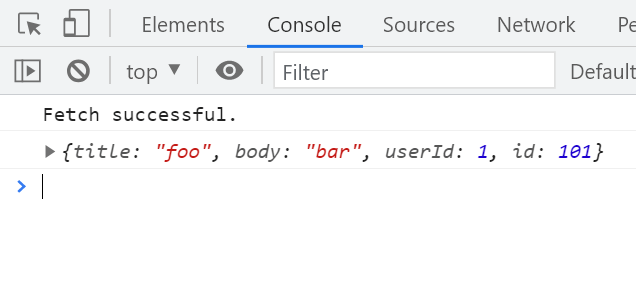
if(response.ok){
console.log("Fetch successful.")
//Get the json.
let json = await response.json();
//Call the callback and pass give it the body data.
callback(json);
}else{
console.log("Fetch error: Status Code: " + response.status + " Text: " + response.statusText);
}
}
//Displays data.
function display(data){
console.log(data);
}
/////////////////////////////////////////////////////////// Resulting output:

About
In this code snippet, we’ll learn how to access the browser local storage with Javascript.
If you have the need to store the users data locally on their browser you can utilize session or local storage. Session storage will store data until the window is closed meanwhile local storage will keep the data even after the browser is closed. Other than that they are the same.
Note: This type of storage is more appropriate for key-value pairs. If you need to store larger data like files using IndexedDB.
Let’s see the example below.
Code:
//Local storage//////////////////////////////////////
//Local storage stays in the browser even after it's closed.
//Add data as key value pair.
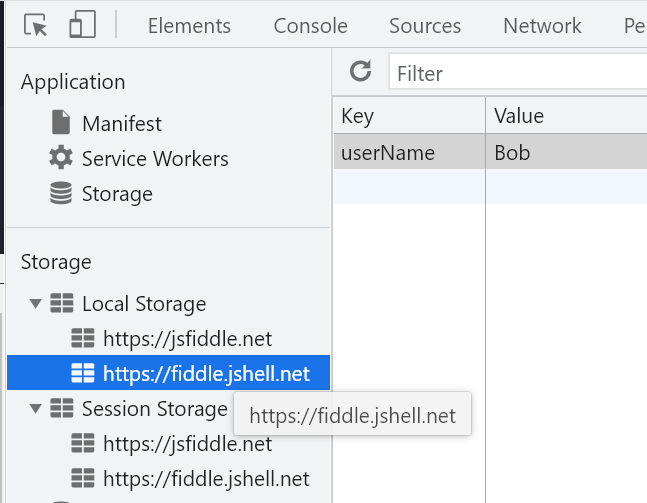
localStorage.setItem("userName", "Bob");
//Get data by key.
console.log(localStorage.getItem("userName"));
//Remove data by key.
localStorage.removeItem("userName");
/////////////////////////////////////////////////////
//Session storage////////////////////////////////////
//Local storage is clared when the browser is closed.
//Add data as key value pair.
sessionStorage.setItem("userName", "Bob");
//Get data by key.
console.log(sessionStorage.getItem("userName"));
//Remove data by key.
sessionStorage.removeItem("userName");
///////////////////////////////////////////////////// Resulting output:
Developer Tools(F12) > Application > Local/Session storage

About
In this code snippet, we’ll learn how to add/get cookies with Javascript.
Cookies allow a website to store information about a user in the browser. This way if the site refreshes or the user leaves and comes back later the data can be preserved. Cookies also get sent along with requests to the server. A server can give the browser a session cookie after the user logs in. This way every time the user sends something to the server it can just check for a valid session to make sure the user is authorized to perform a certain action.
Note: Keep in mind that the cookies will get sent to the server with every request so you should store a minimal amount of data in them. If you need more space or you don’t need to send data to the server with every request consider using the browser local storage.
Security considerations: If you plan on using cookies for authentication/authorization watch out for CSRF(Cross Site Request Forgery).
Let’s see the example below.
Code:
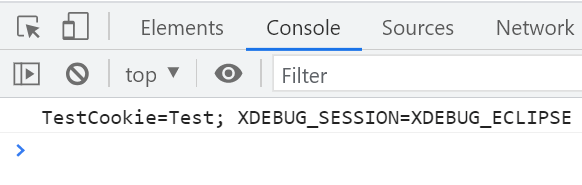
//Add a cookie://///////////////////////////////////////////
//window.document.cookie = "TestCookie=Test"; //window can be left out and it will still work.
document.cookie = "TestCookie=Test"; // "cookie name"="value you want to store"

//Setting the expiration date of a cookie.              //Year, month, day
document.cookie = "TestCookie=Test; expires=" + new Date(3021, 0, 1).toUTCString(); //This cookie would last for a 1000 years.

//Get cookies:///////////////////////////////////////////////
//You will get all the cookies as a string.
console.log(document.cookie);
Resulting output:
Adding a cookie

Getting cookies

About
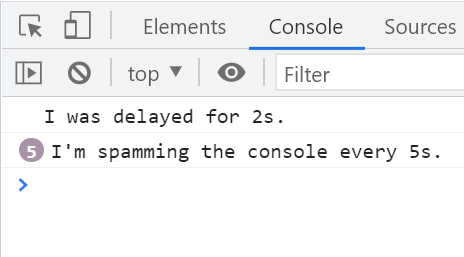
In this code snippet, we’ll learn how to use timers in Javascript.
Timers can be used to execute code at certain intervals. When we make a timer we need to specify the function that will be called on each tick and the interval length in milliseconds. We’ll also take a look at delays which opposed to timers only run once.
Let’s see the code example below.
Code:
//Timer.////////////////////////////////////////////////

function timerCallback(){
	console.log("I'm spamming the console every 5s.");
}

//The timerCallback() function will be called every 5000ms or 5s.
const timer = window.setInterval(timerCallback, 5000);

//The timer can be stopped like so:
//window.clearInterval(timer);

////////////////////////////////////////////////////////

//Delay.////////////////////////////////////////////////

function delayCallback(){
	console.log("I was delayed for 2s.");
}

//The delayCallback() function will be called(only once) after 5000ms or 5s.
const delay = window.setTimeout(delayCallback, 2000);

//The delay can be stopped like so:
//window.clearTimeout(delay);

////////////////////////////////////////////////////////
Resulting output:

About
In this code snippet, we’ll learn how to access the browser object model(BOM) with Javascript.
We can use the BOM to interact with the browser itself and get information like screen resolution, window size, OS, language, … We can also open/close windows/tabs, navigate back/forward in history.
Note: There are too many properties in the window object to cover here. Consult the MDN documentation for anything more specific.
Let’s see some examples below.
Code:
//Page////////////////////////////////////
//All properties: https://developer.mozilla.org/en-US/docs/Web/API/Window
window.open(); //Opens new tab.
window.close(); //Closes tab.

//window.navigator////////////////////////
//All properties: https://developer.mozilla.org/en-US/docs/Web/API/Navigator
console.log(window.navigator.appName);
console.log(window.navigator.appCodeName);
console.log(window.navigator.platform);
console.log(window.navigator.userAgent);

//window.location.///////////////////////
//All properties: https://developer.mozilla.org/en-US/docs/Web/API/Window/location
console.log(window.location.href);
console.log(window.location.hostname);
console.log(window.location.pathname);
console.log(window.location.protocol);
window.location.reload(); //Reloads page.

//window.history/////////////////////////
//All properties: https://developer.mozilla.org/en-US/docs/Web/API/Window/history
window.history.back() //One page back.
window.history.forward(); //One page forward.


//window.Screen/////////////////////////
//All properties: https://developer.mozilla.org/en-US/docs/Web/API/Window/screen
console.log(window.screen.width);
console.log(window.screen.height);
console.log(window.screen.pixelDepth);