About
In this post, I’ll show you how to create and use a C# class library and a private NuGet package for it, including the CI/CD pipeline in Azure DevOps for publishing new versions. Finally, I will also show you how to use the NuGet package from the private feed we will create in another project/Azure CI/CD pipeline.
Table Of Contents
Creating a C# Class Library
You can use the following commands:
dotnet new sln
dotnet new classlib -o MyCsharpLibrary
dotnet sln add MyCsharpLibrary/MyCsharpLibrary.csproj
dotnet build
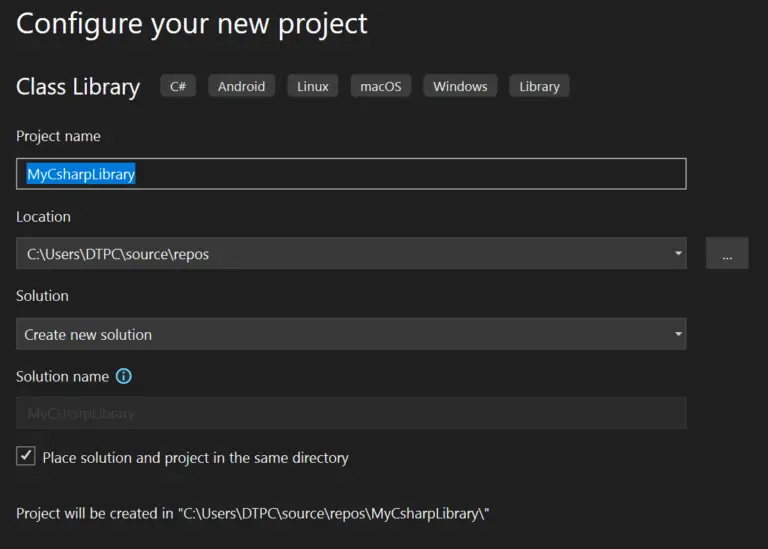
Or you can create a new Class Library project in Visual Studio like so:
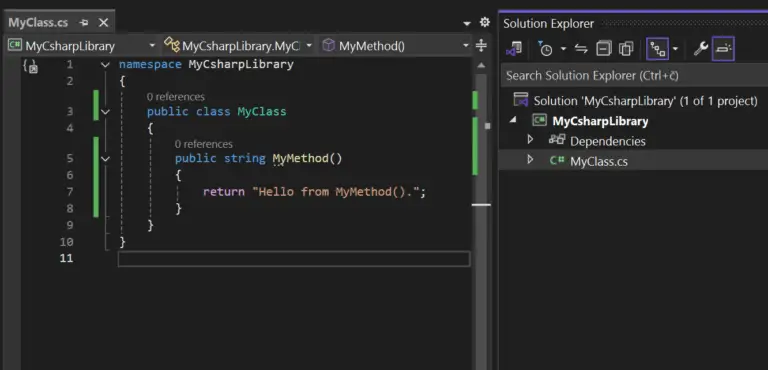
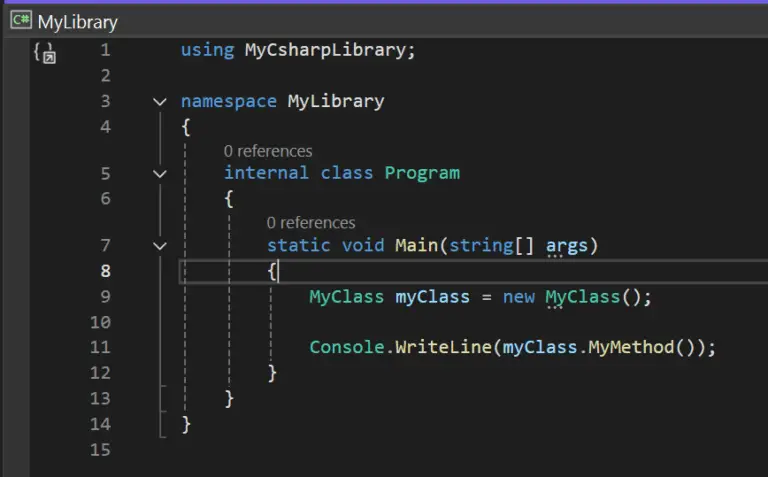
I will add a very simple method into the class library for demo purposes.
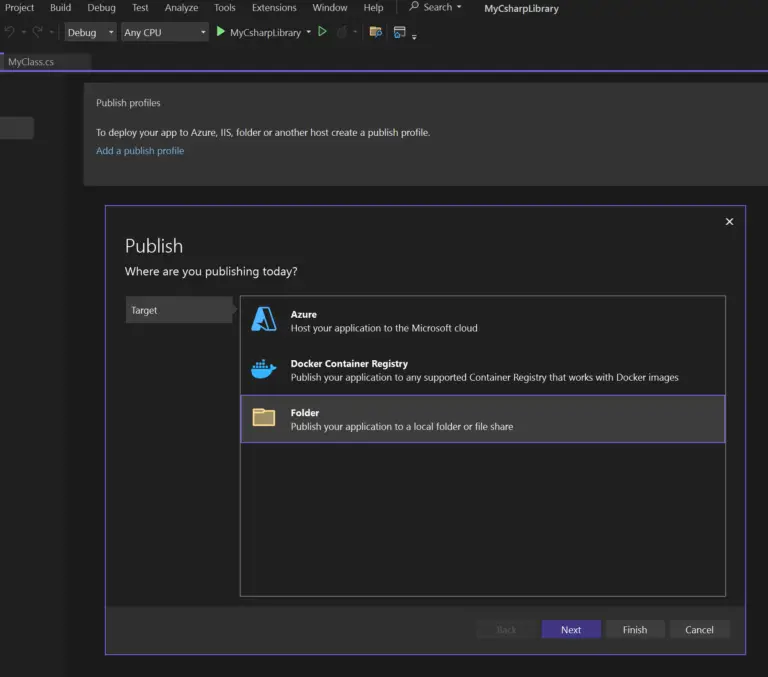
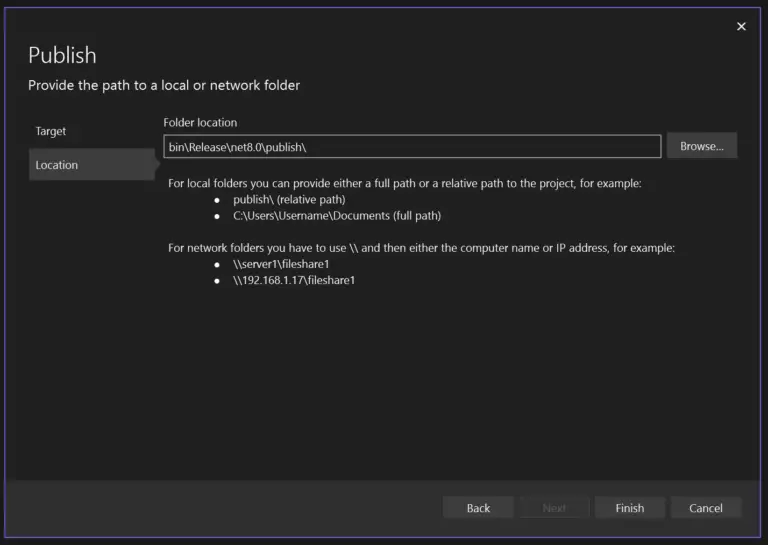
Next, we will create a publish profile and then we’ll publish the library(create the actual .dll). In the “Build” tab select “Publish Selection”.
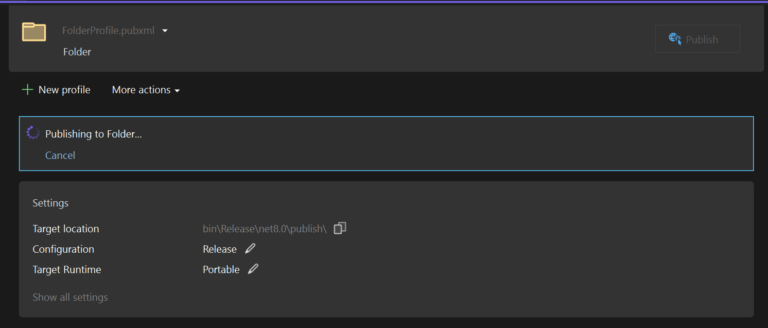
After the publish profile is created click the “Publish” button.
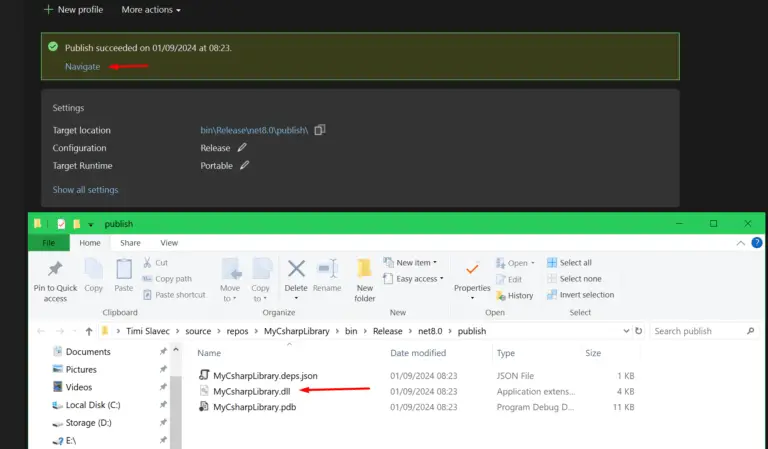
And here is our .dll
Using The Class Library
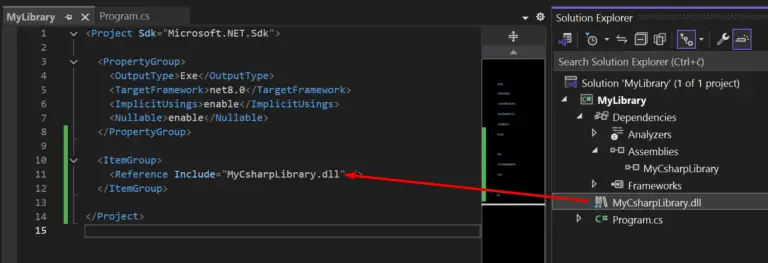
To use the .dll above copy it into the directory of another project. Then add a reference in the .csproj file like so:
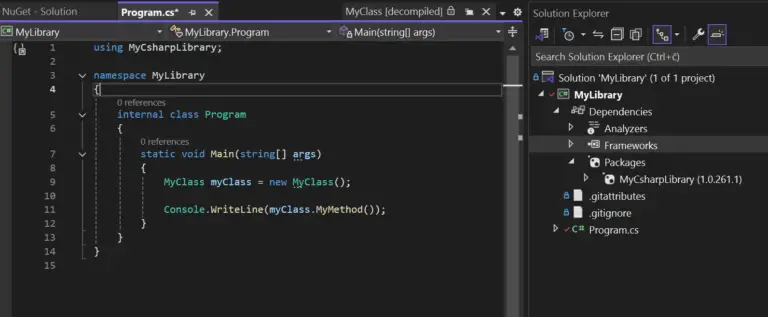
And we can use it like any other package/library.
Creating a Private NuGet Package
In this section, I will show you how to make a private NuGet. We’ll create a CI/CD pipeline in Azure DevOps that automatically creates a new version of the NuGet package when a code change is pushed into the library repository.
Create a Git repository and publish it as a private repository on GitHub. I won’t cover how to do this here as it’s very easy and I would assume you already know how to do it if you are reading this post.
Then create a new project in Azure DevOps and connect it to your private GitHub repository. I covered how to do that in this section of another post I made.
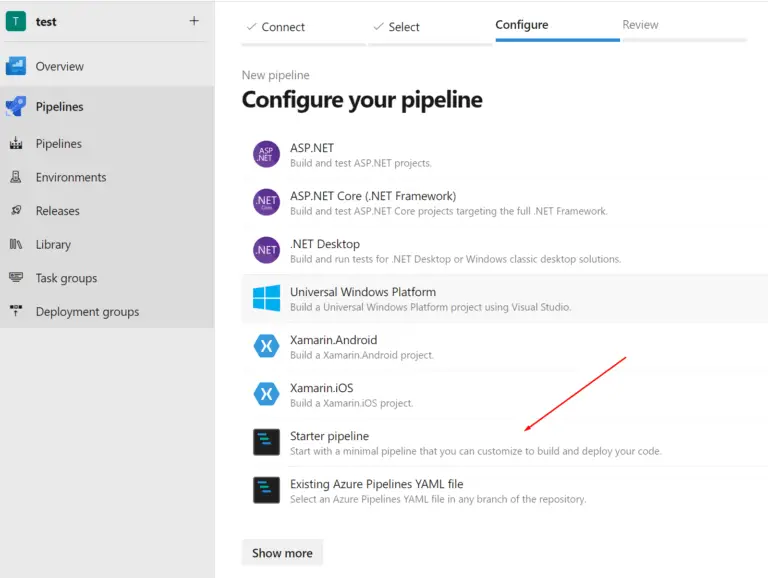
The only difference is that here we’ll select a starter .yaml template unlike in the linked post where I used the Azure Functions template.
Now add the following .yaml to the template and save it. Note: Make sure to replace publishVstsFeed: ‘test/MyLibPrivateFeed’ with the name of your project and the name of the feed you will create in the next step in the artifacts.
name: 1.0.$(DayOfYear).$(Rev:r) #Sets name/version. More about build numbers: https://learn.microsoft.com/en-us/azure/devops/pipelines/process/run-number?view=azure-devops&tabs=yaml

trigger:
  - master  #Run pipeline when a new commit is addded to the master branch.

pool:
  name: Azure Pipelines #Set your worker pool name
  vmImage: 'windows-latest'  #Use the latest Windows VM build agent.
  demands:
  - msbuild
  - visualstudio

#Your build pipeline references the ‘BuildPlatform’ variable, which you’ve selected to be settable at queue time. Create or edit the build pipeline for this YAML file, define the variable on the Variables tab, and then select the option to make it settable at queue time. See https://go.microsoft.com/fwlink/?linkid=865971
#Your build pipeline references the ‘BuildConfiguration’ variable, which you’ve selected to be settable at queue time. Create or edit the build pipeline for this YAML file, define the variable on the Variables tab, and then select the option to make it settable at queue time. See https://go.microsoft.com/fwlink/?linkid=865971
variables:
  solution: '**\*.sln'
  BuildConfiguration: release
  BuildPlatform: any cpu
  system.debug: false

steps:

- task: NuGetToolInstaller@0
  displayName: 'Use NuGet 5.8.1'
  inputs:
    versionSpec: 5.8.1

- task: bleddynrichards.Assembly-Info-Task.Assembly-Info-NetCore.Assembly-Info-NetCore@2
  displayName: 'Set Assembly Manifest Data'
  inputs:
    Path: '$(Build.SourcesDirectory)'
    InsertAttributes: true
    VersionNumber: '$(Build.BuildNumber)'
    FileVersionNumber: '$(Build.BuildNumber)'
    PackageVersion: '$(Build.BuildNumber)'

- task: NuGetCommand@2
  displayName: 'NuGet restore'
  inputs:
    restoreSolution: '$(solution)'

- task: VSBuild@1
  displayName: 'Build solution **\*.sln'
  inputs:
    solution: '$(solution)'
    msbuildArgs: '/t:pack'
    platform: '$(BuildPlatform)'
    configuration: '$(BuildConfiguration)'

- task: NuGetCommand@2
  displayName: 'NuGet push'
  inputs:
    command: push
    feedsToUse: 'select'
    packagesToPush: '$(Build.SourcesDirectory)/**/*.nupkg;!$(Build.SourcesDirectory)/**/*.symbols.nupkg'
    nuGetFeedType: 'internal'
    publishVstsFeed: 'test/MyLibPrivateFeed' #'project name / feed name (from artifacts)'
    versioningScheme: 'off'
    allowPackageConflicts: true
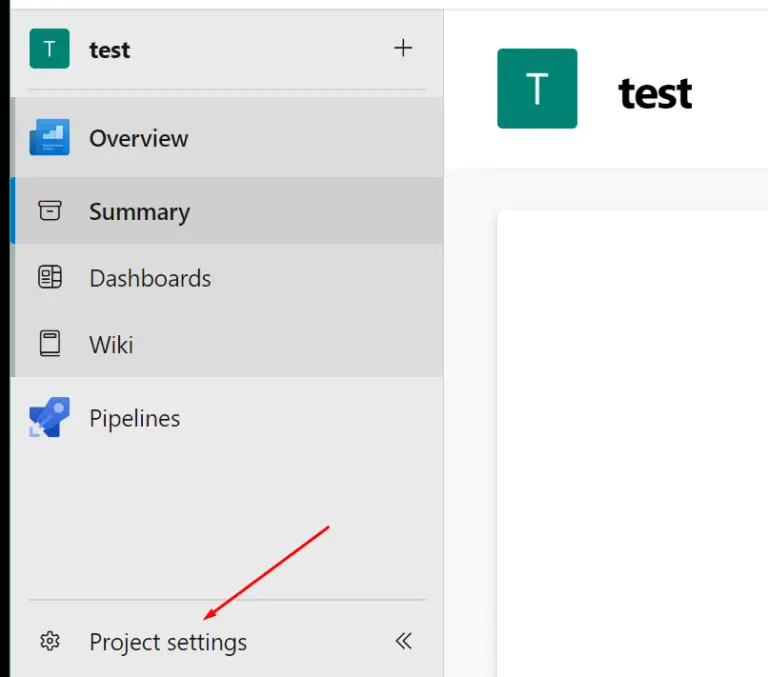
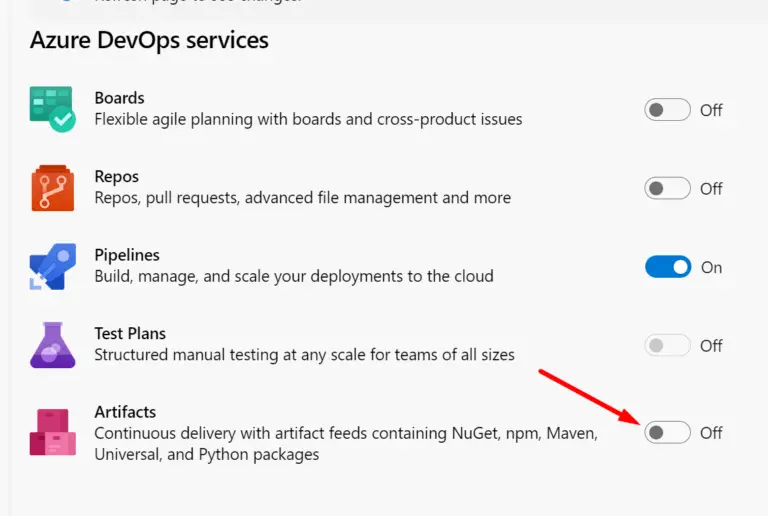
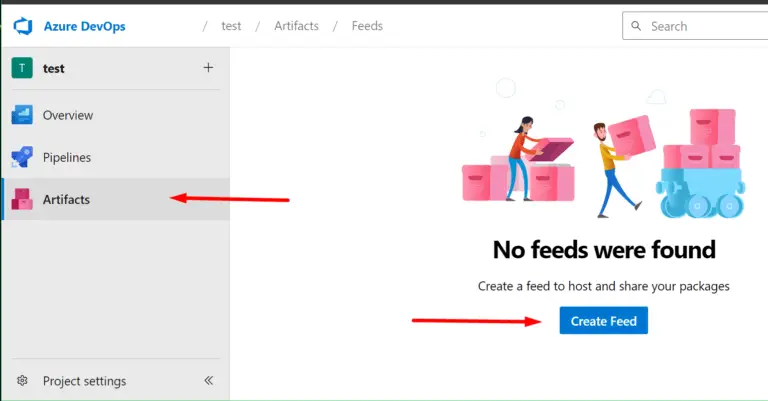
First, we need to enable artifacts under the project settings so we can create a private package feed.
Now create a new feed under the artifacts.
Use the name you specified in the .yaml file(last task, value of publishVstsFeed after /).
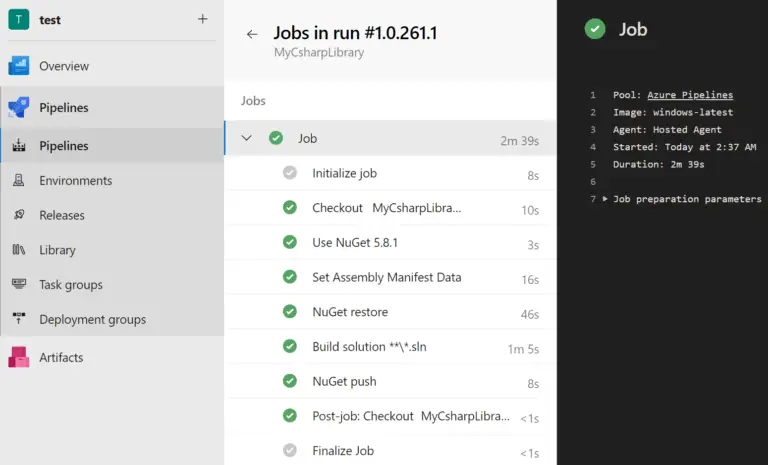
Finally, you can run the pipeline manually or just push a code change to the repository and have the pipeline run automatically.
The resulting output of the pipeline will be a package/artifact.
Consuming a Private NuGet Package
Here I’ll show you how to use/consume the private Nuget package.
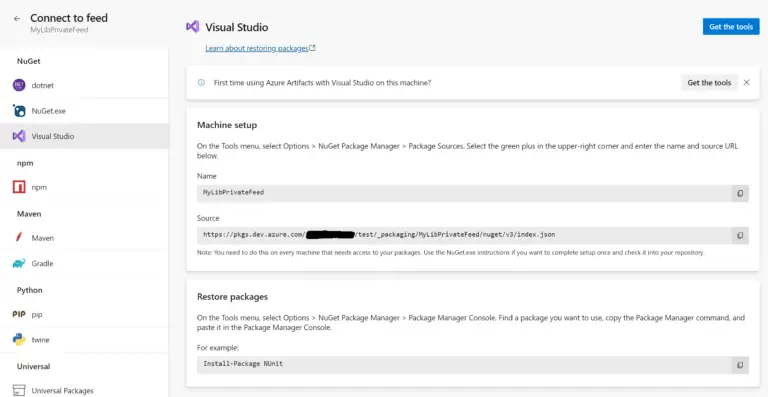
If you click on the “Connect to feed” button you will be provided with the instruction for different package managers. I will show you how to add the private feed and package to Visual Studio with NuGet.
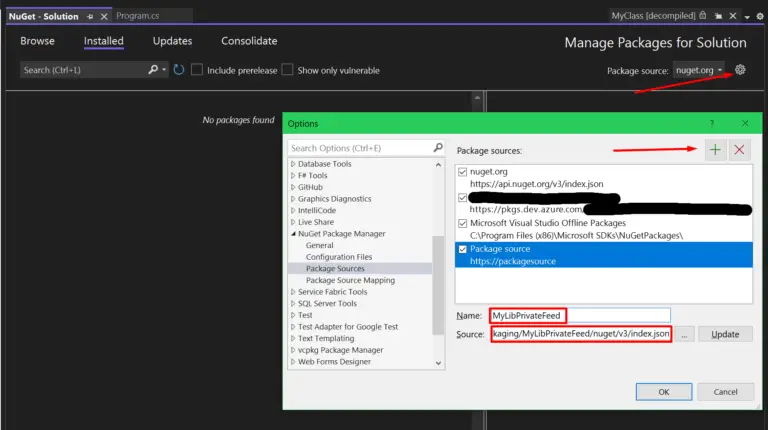
Open up the NuGet package manager in Visual Studio: Tools > NuGet Package Manager > Manage NuGet Packages for Solution
Then, click the settings gear icon next to the “Package source” drop-down and add your private feed.
Click on the “Browse” tab and select your feed under “Package Source”. You should now see the package which you can add to your project.
We can now remove the .dll we used before as we have added it to our project as a NuGet package.
Adding The Feed To An Azure DevOps CI/CD Pipeline(Azure Functions example)
In this final section, I will show you how to add this private feed to an Azure DevOps CI/CD pipeline of another project. I will use an existing Azure Functions CI/CD pipeline I made in this post.
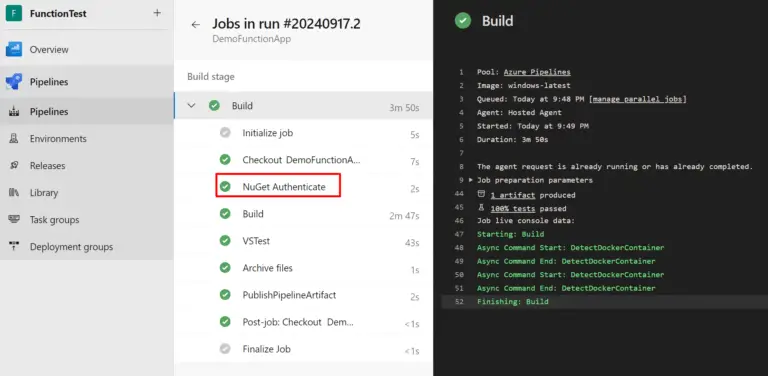
We simply have to add an extra step/task NuGetAuthenticate@1 before the DotNetCoreCLI@2 step/task to authorize access to our private package feed. I will name the nuGetServiceConnections ‘NuGet_MyLibPrivateFeed’ later we will have to create a private feed connection with the same name.
    - task: NuGetAuthenticate@1
      displayName: 'NuGet Authenticate'
      inputs:
        nuGetServiceConnections: 'NuGet_MyLibPrivateFeed'
Additionally, I also like to increase the timeout variables as the NuGetAuthenticate@1 task sometimes takes a bit longer to authenticate.
NUGET.PLUGIN.HANDSHAKE.TIMEOUT.IN.SECONDS: 20
NUGET.PLUGIN.REQUEST.TIMEOUT.IN.SECONDS: 20
Here’s the updated build pipeline .yaml file(original from this post).
# .NET Core Function App to Windows on Azure
# Build a .NET Core function app and deploy it to Azure as a Windows function App.
# Add steps that analyze code, save build artifacts, deploy, and more:
# https://docs.microsoft.com/en-us/azure/devops/pipelines/languages/dotnet-core

trigger:
- master

variables:
  # Azure Resource Manager connection created during pipeline creation
  azureSubscription: 'your subscription id'

  # Function app name
  functionAppName: 'DemoFunctionApp20240617043450'

  # Agent VM image name
  vmImageName: 'windows-latest'

  # Working Directory
  workingDirectory: '$(System.DefaultWorkingDirectory)/'

  # Prevents 'NuGet Authenticate' task timeout as it sometimes takes a bit longer to authenticate.
  NUGET.PLUGIN.HANDSHAKE.TIMEOUT.IN.SECONDS: 20
  NUGET.PLUGIN.REQUEST.TIMEOUT.IN.SECONDS: 20

stages:
- stage: Build
  displayName: Build stage

  jobs:
  - job: Build
    displayName: Build
    pool:
      vmImage: $(vmImageName)

    steps:

    - task: NuGetAuthenticate@1
      displayName: 'NuGet Authenticate'
      inputs:
        nuGetServiceConnections: 'NuGet_MyLibPrivateFeed'

    - task: DotNetCoreCLI@2
      displayName: Build
      inputs:
        command: 'build'
        projects: |
          $(workingDirectory)/DemoFunctionApp/*.csproj
        arguments: --output $(System.DefaultWorkingDirectory)/DemoFunctionApp/publish_output --configuration Release

    - task: VSTest@3
      inputs:
        testSelector: 'testAssemblies'
        testAssemblyVer2: |
          **\*test*.dll
          !**\*TestAdapter.dll
          !**\obj\**
        searchFolder: '$(System.DefaultWorkingDirectory)/DemoFunctionAppTests'

    - task: ArchiveFiles@2
      displayName: 'Archive files'
      inputs:
        rootFolderOrFile: '$(System.DefaultWorkingDirectory)/DemoFunctionApp/publish_output'
        includeRootFolder: false
        archiveType: zip
        archiveFile: $(Build.ArtifactStagingDirectory)/$(Build.BuildId).zip
        replaceExistingArchive: true

    - publish: $(Build.ArtifactStagingDirectory)/$(Build.BuildId).zip
      artifact: drop
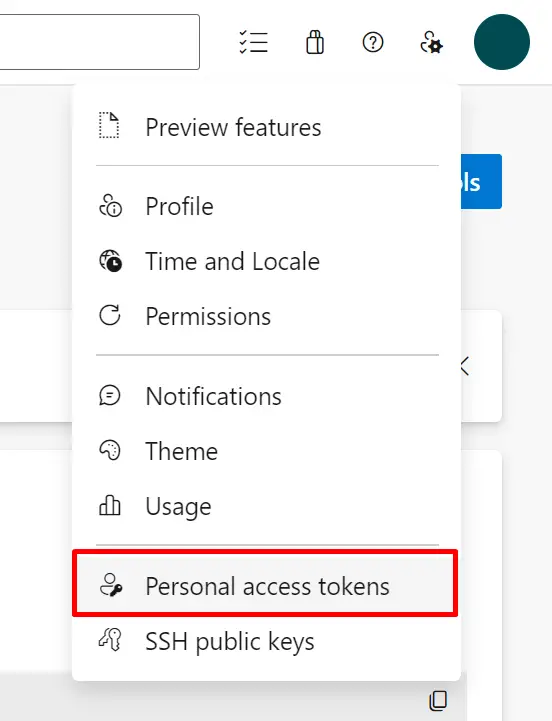
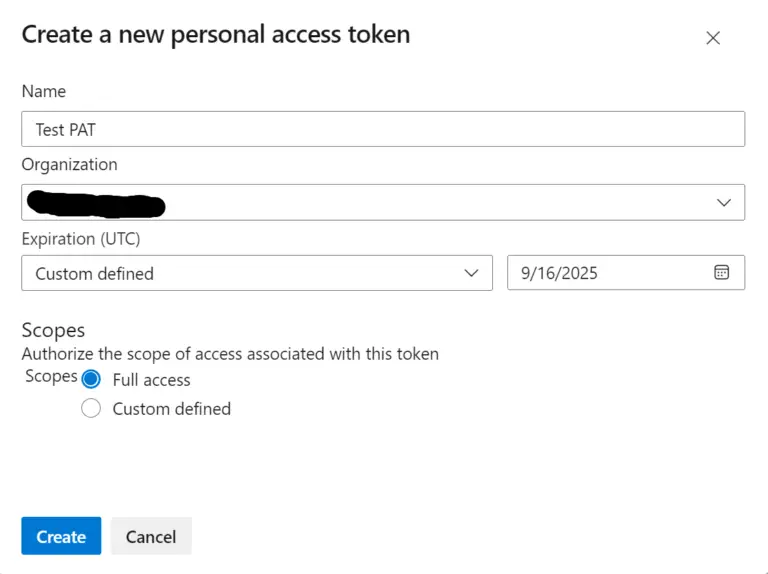
Before we add a NuGet service connection we need to create a PAT(personal access token).
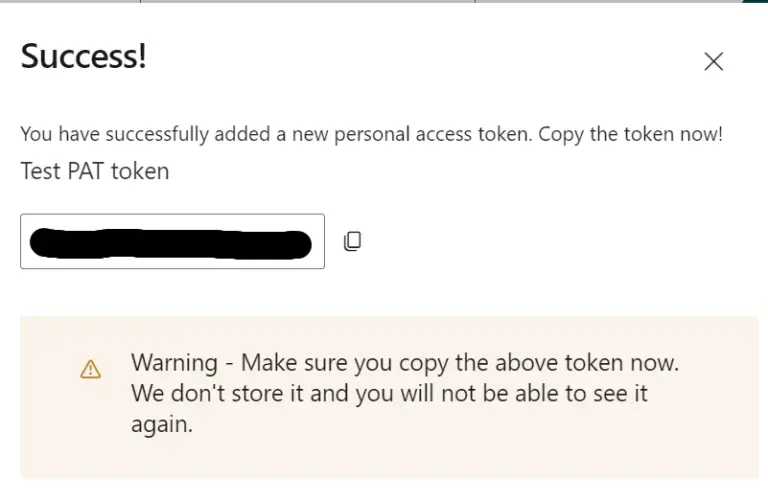
Create the token, copy it, and save it for later.
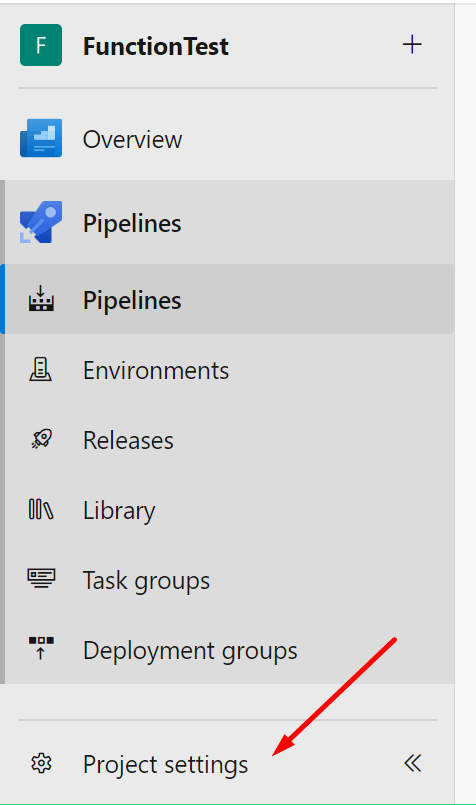
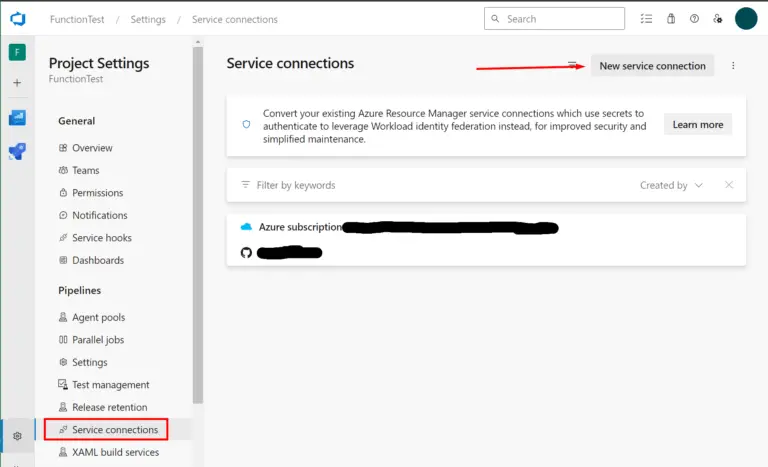
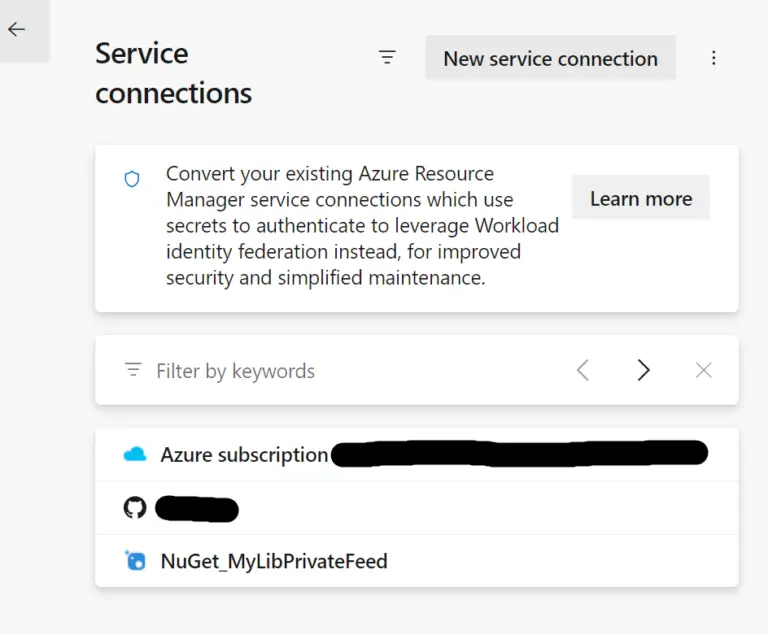
Now let’s create a private feed connection. Start by going to the “Projects Settings” then “Service connections” and “New service connection”.
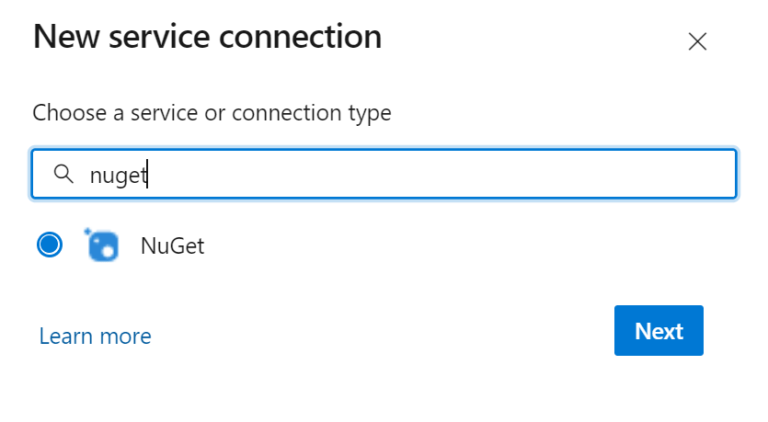
Add a NuGet service connection.
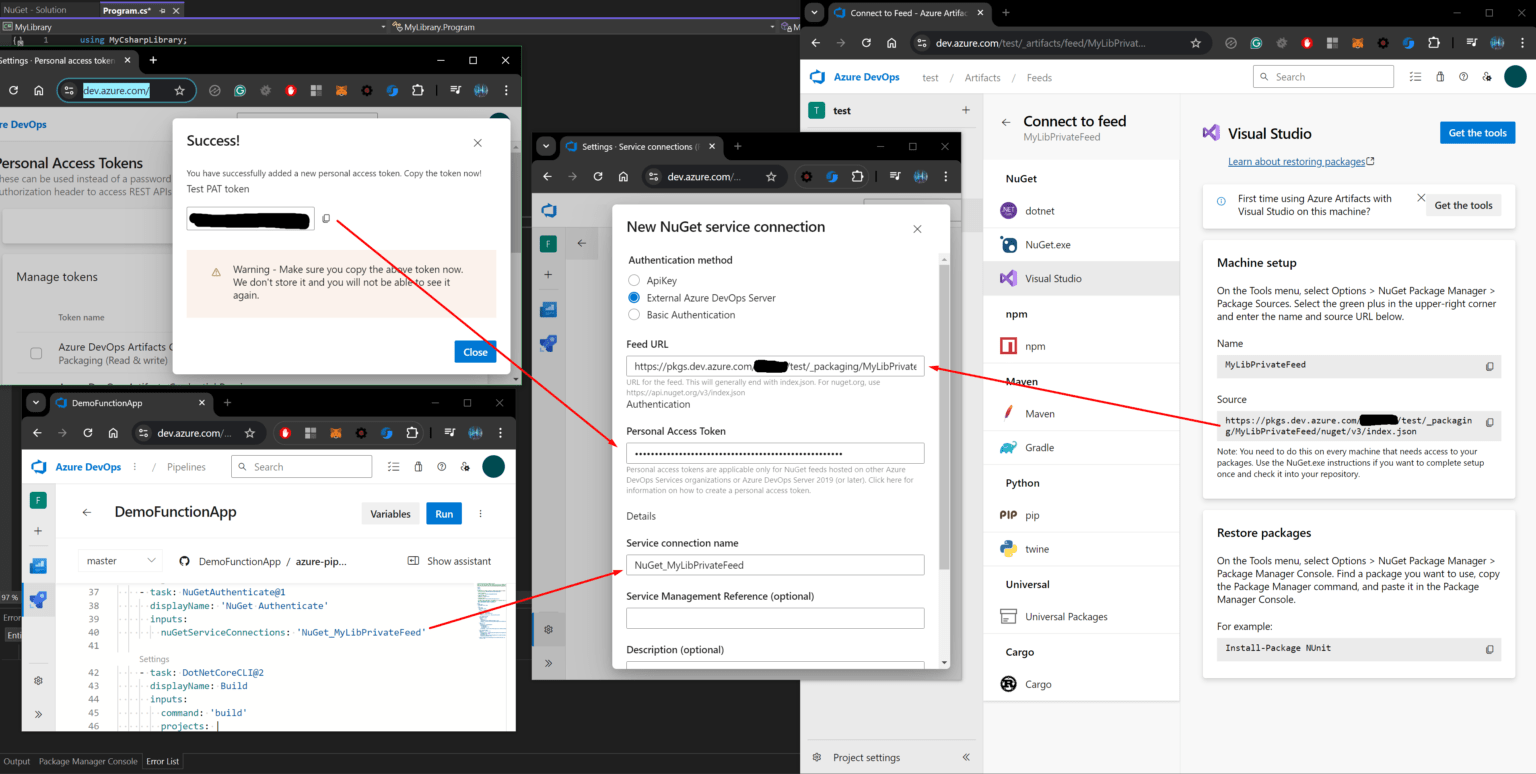
This is how it all comes together in the end to create a service connection. The PAT you just created, the name of the service connection you put into the .yaml file, and the feed URL from the library project.
And here it is, a new NuGet private feed service connection.
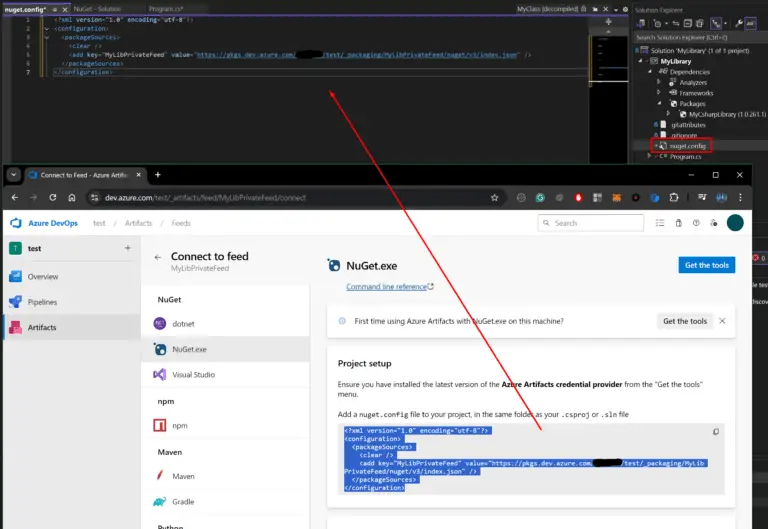
Next, we need to add a nuget.config file to the Azure Functions project that uses the package. To get the XML to put into the file go to your library/NuGet package project in Azure DevOps, select “Artifacts”, “connect to feed” and finally select “NuGet.exe”.
Now you can use the library in the project and whenever a change is made and our Azure Function project pipeline is run it will be able to access the NuGet package from the private feed.
