About
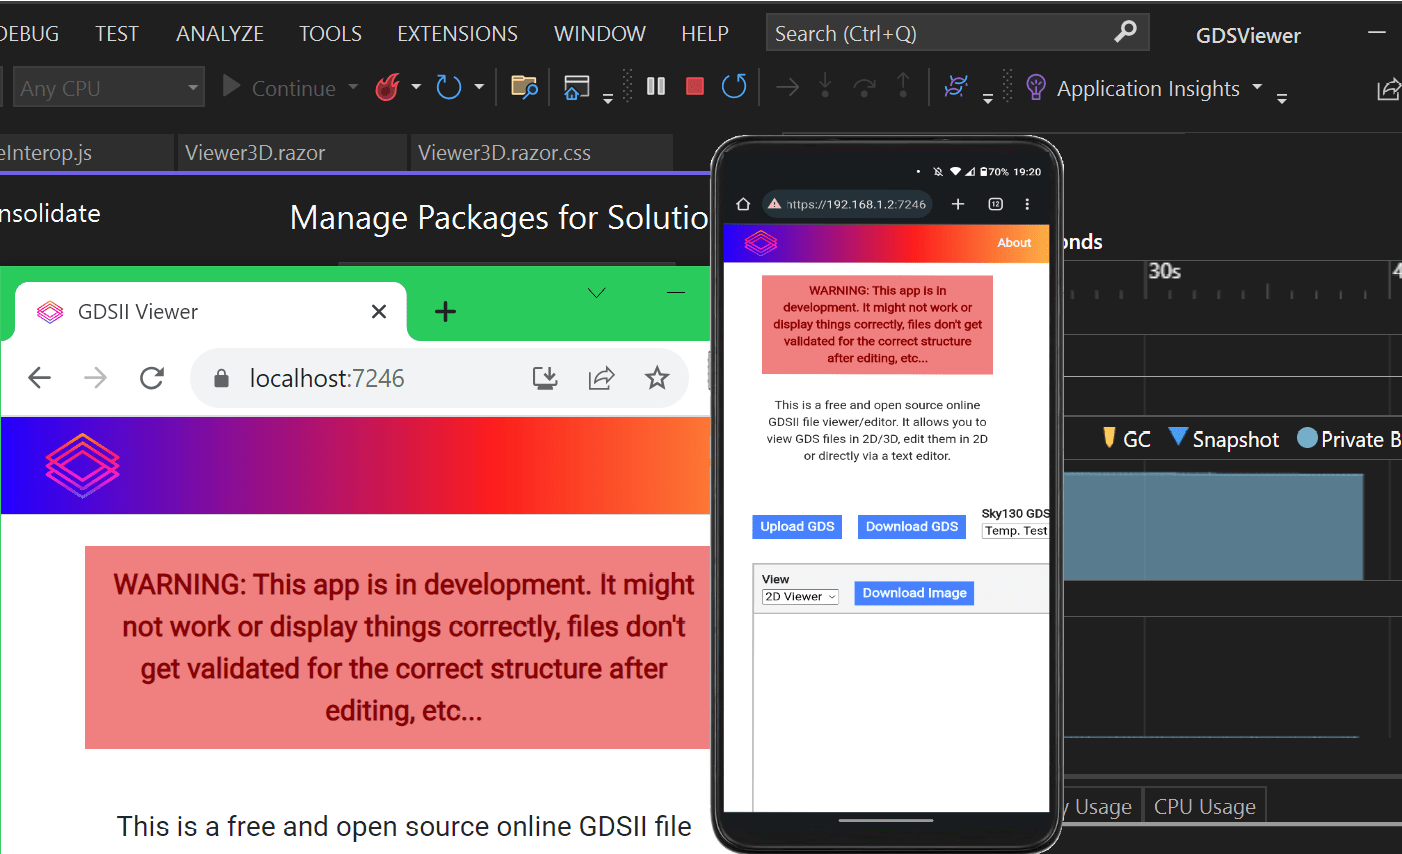
In this post, I will show you how to access a local website running on localhost(Windows). Specifically, I will show you how to do this for Visual Studio when you are running/debugging your web app/server during development.
This can be very useful for checking if your website works properly on mobile and allows other people(within your network, unless you port forward) to test your site without having to deploy your site on some remote dev./test server.
How To:
First, you need to get the IP of your PC. You can do this by opening CMD and running the ipconfig command.
Note: This IP can change with time as the router might assign you a different IP. This means you will have to repeat this and the next few steps whenever this happens. You might want to go into your router settings and assign a static IP for your PC to avoid this.
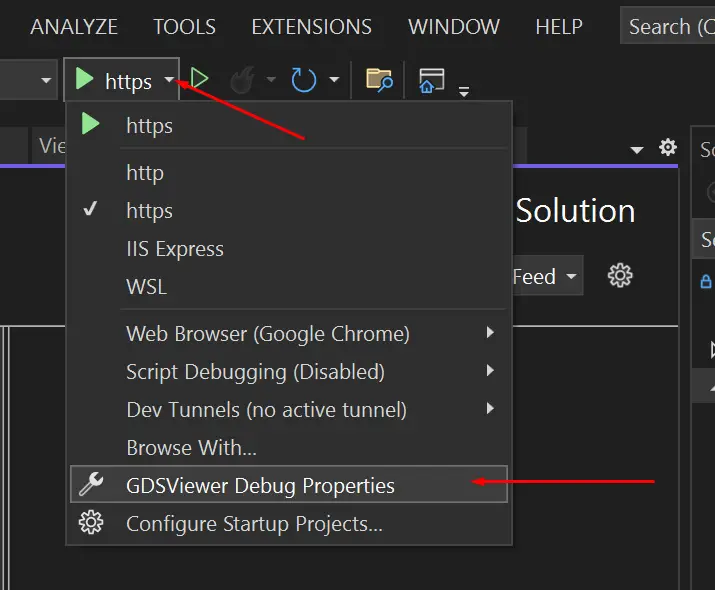
Next, open debug properties in Visual Studio.
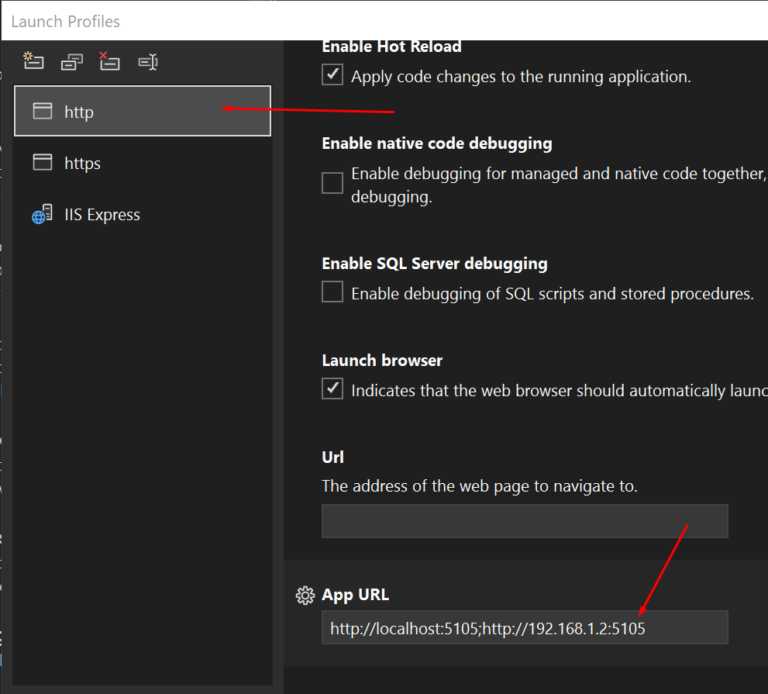
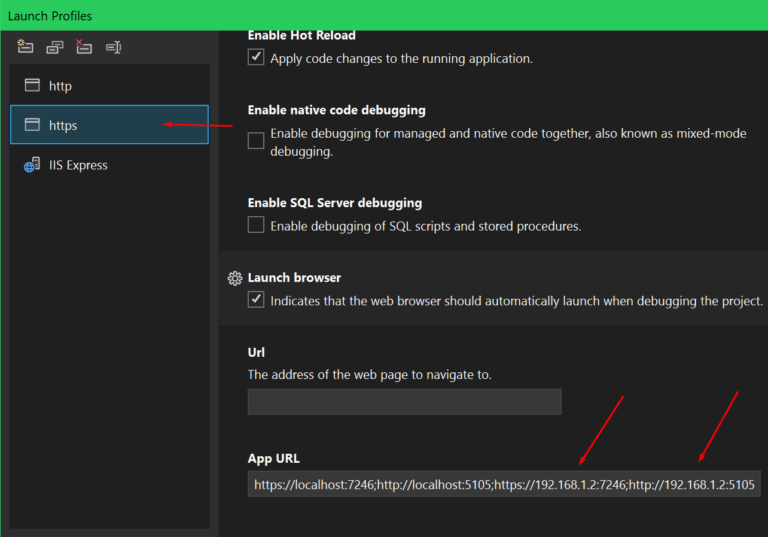
Go to both the http and https sections and add the url with your computers IP (192.168.1.2 in my case) followed by the port(for https 7246 and for http 5105 in my case). Separate the multiple urls with ;
To be sure we can access the server we’ll also add a firewall rule allowing the ports 7246 and 5015.
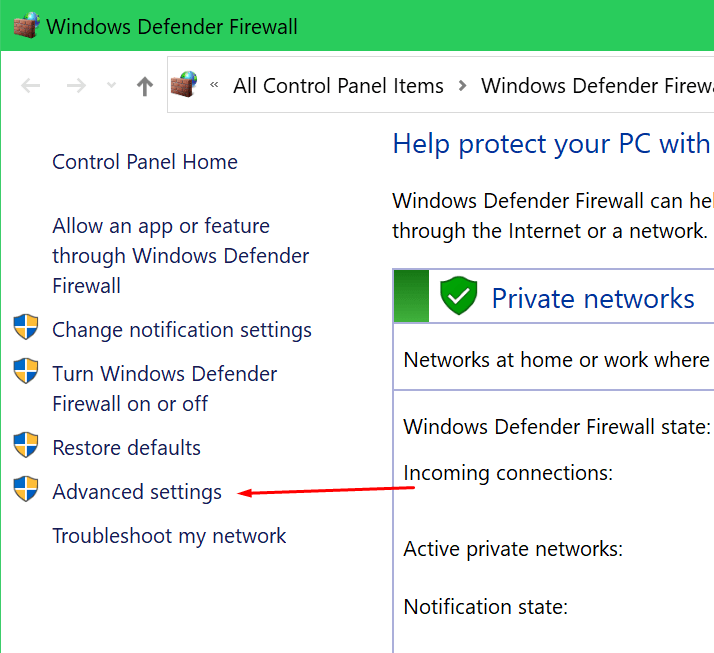
Open Windows Defender Firewall and select Advanced settings on the left.
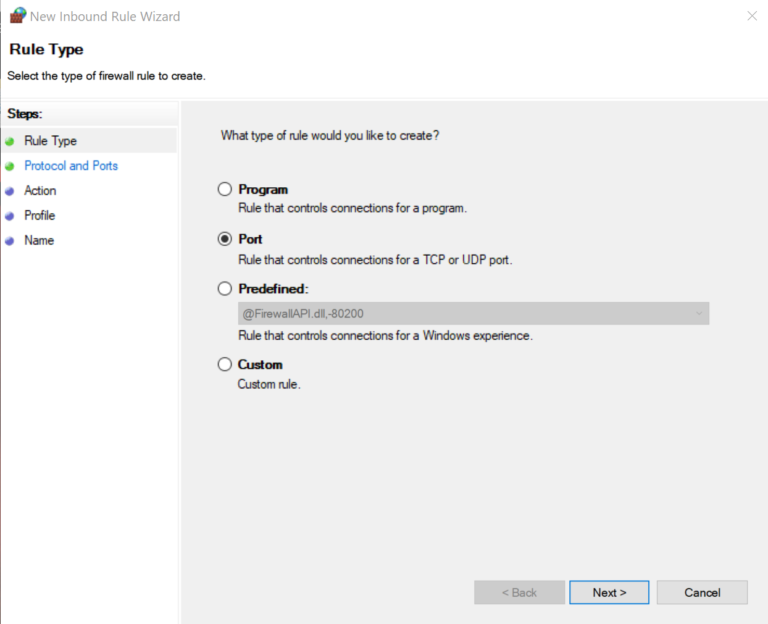
Then select Inbound Rules and New Rule.
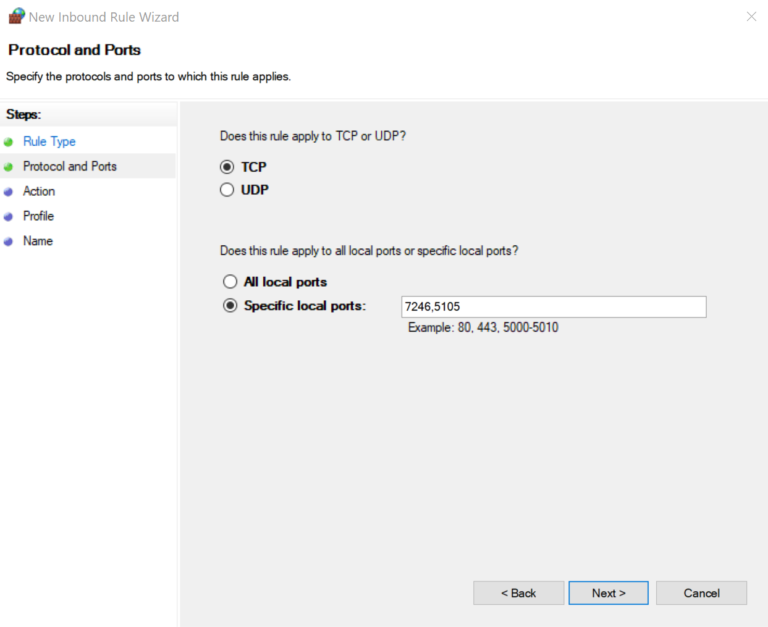
Select Port. Next, select TCP and Specific local ports. Finally, enter your ports separated by a ,
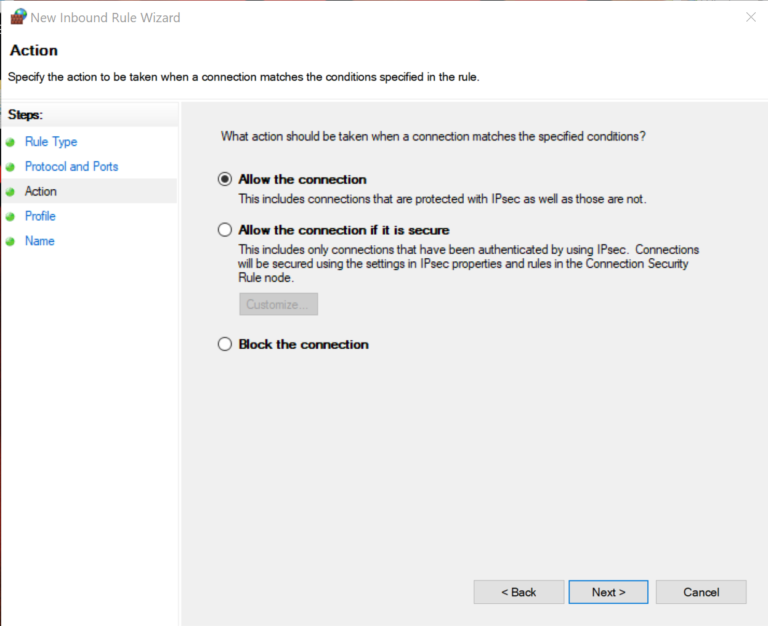
Select Allow the connection.
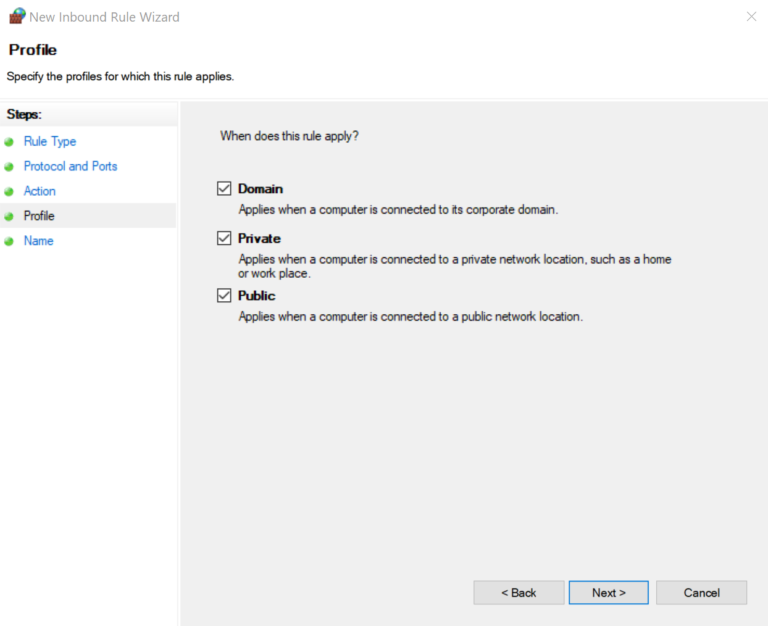
Note: If you leave Public checked anyone in a public network can access your site/server. As this is my desktop PC that is always connected to my private network this doesn’t matter.
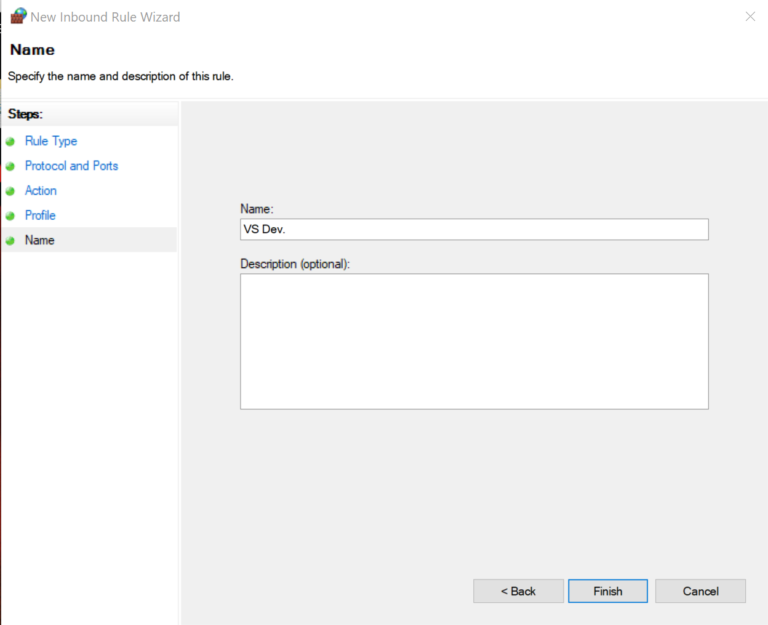
And finally give your rule a name.
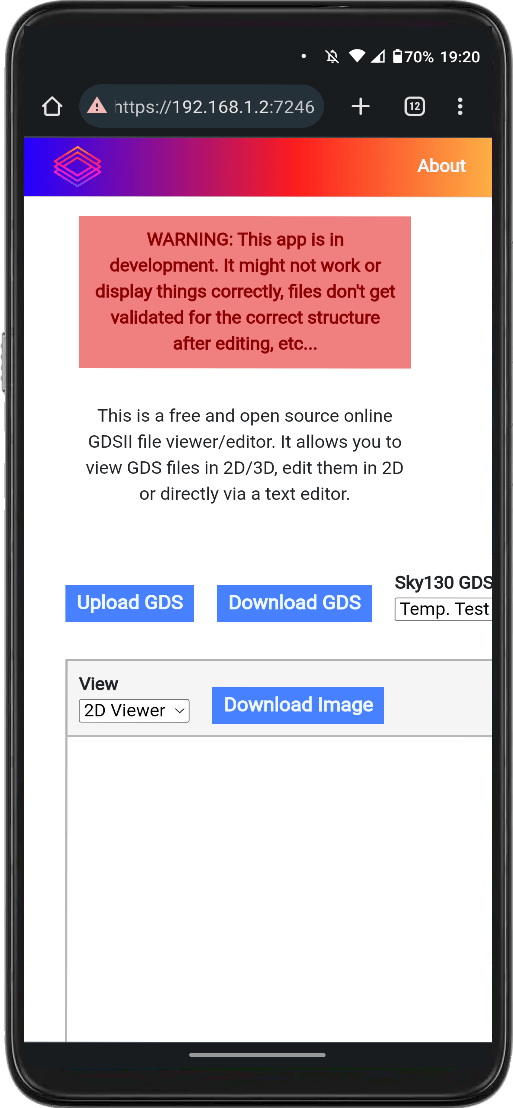
If you now visit one of the urls added to the debug settings you should be able to see the website on your phone.
