Windows 10 IOT Deploying a Simple App To The Raspberry Pi

Windows 10 IOT Raspberry Pi 3App Deployed
Share:

About

In this tutorial, we will cover the deployment of a simple UWP app onto a Raspberry Pi 3 running Windows 10 IOT. All the app will do is display the current time. The deployment of the app will be done over the network.

Hardware Used

Making the App​

Start by creating a UWP app project in Visual Studio. 
All the UI part consists of is a text block.
The UI in XAML code.
  1. <Page
  2. x:Class="Windows10IOTTestApp.MainPage"
  3. xmlns="http://schemas.microsoft.com/winfx/2006/xaml/presentation"
  4. xmlns:x="http://schemas.microsoft.com/winfx/2006/xaml"
  5. xmlns:local="using:Windows10IOTTestApp"
  6. xmlns:d="http://schemas.microsoft.com/expression/blend/2008"
  7. xmlns:mc="http://schemas.openxmlformats.org/markup-compatibility/2006"
  8. mc:Ignorable="d">
  9.  
  10. <Grid Background="{ThemeResource ApplicationPageBackgroundThemeBrush}">
  11. <TextBlock x:Name="displayTextBlock" HorizontalAlignment="Left" Margin="66,63,0,0" TextWrapping="Wrap" Text="" VerticalAlignment="Top" Height="945" Width="1779" FontSize="150"/>
  12. </Grid>
  13. </Page>

Next is the C# code for the functionality of the app. The code is pretty straight forward. There is a timer that triggers an event every second. That event then calls the getTime() method that gets the current time and displays it in the text block.

  1. using System;
  2. using System.Collections.Generic;
  3. using System.IO;
  4. using System.Linq;
  5. using System.Runtime.InteropServices.WindowsRuntime;
  6. using Windows.Foundation;
  7. using Windows.Foundation.Collections;
  8. using Windows.UI.Xaml;
  9. using Windows.UI.Xaml.Controls;
  10. using Windows.UI.Xaml.Controls.Primitives;
  11. using Windows.UI.Xaml.Data;
  12. using Windows.UI.Xaml.Input;
  13. using Windows.UI.Xaml.Media;
  14. using Windows.UI.Xaml.Navigation;
  15. // The Blank Page item template is documented at http://go.microsoft.com/fwlink/?LinkId=402352&clcid=0x409
  16. namespace Windows10IOTTestApp
  17. {
  18. /// <summary>
  19. /// An empty page that can be used on its own or navigated to within a Frame.
  20. /// </summary>
  21. public sealed partial class MainPage : Page
  22. {
  23. DispatcherTimer Timer;
  24. public MainPage()
  25. {
  26. this.InitializeComponent();
  27. Timer = new DispatcherTimer();
  28. Timer.Interval = TimeSpan.FromMilliseconds(1000);
  29. Timer.Tick += Timer_Tick;
  30. Timer.Start();
  31. }
  32. private void Timer_Tick(object sender, object e)
  33. {
  34. getTime();
  35. }
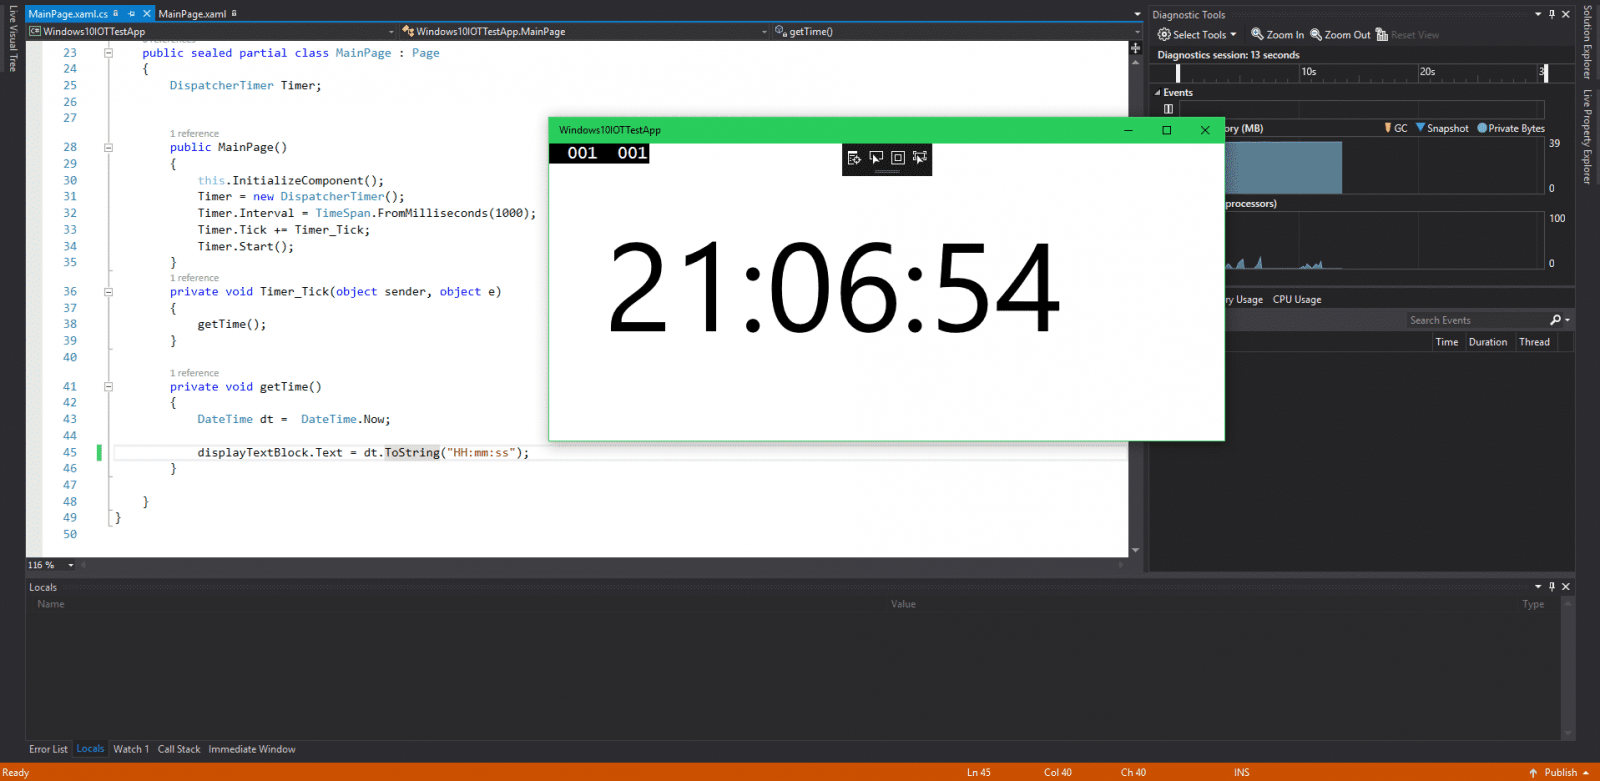
  36. private void getTime()
  37. {
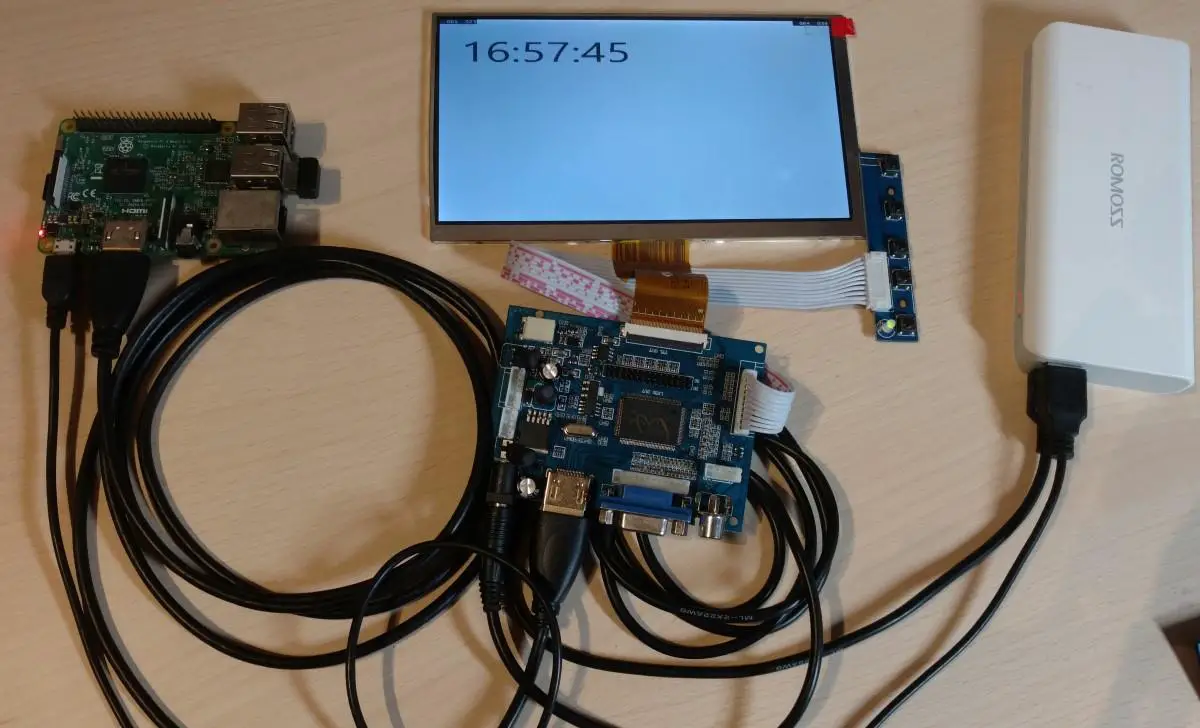
  38. DateTime dt = DateTime.Now;
  39. displayTextBlock.Text = dt.ToString("HH:mm:ss");
  40. }
  41. }
  42. }

Testing the App on PC

This is what our app is supposed to look like.

Deploying the App to the Raspberry Pi​

Before deploying  the app change the architecture from x86/64 to ARM.
For the device select Remote Machine.
Go to project properties.
Select  Debug, under Start options choose remote machine for the target device, enter the IP of your windows IOT device and select Universal for authentication mode.
Now just click the green debug button or press F5 and your app will be deployed to your device. It might take quite a long time to deploy (1-2 minutes). 
Share:

Leave a Reply

Your email address will not be published. Required fields are marked *

The following GDPR rules must be read and accepted:
This form collects your name, email and content so that we can keep track of the comments placed on the website. For more info check our privacy policy where you will get more info on where, how and why we store your data.

Advertisment ad adsense adlogger