Windows 10 IOT Install on The Raspberry Pi 3

windows 10 IOT respberry pi bootscreen
Share:

About

In this tutorial, you will learn how to install Windows 10 IOT on the Raspberry Pi 3.

Hardware Used

About Winndows 10 IOT

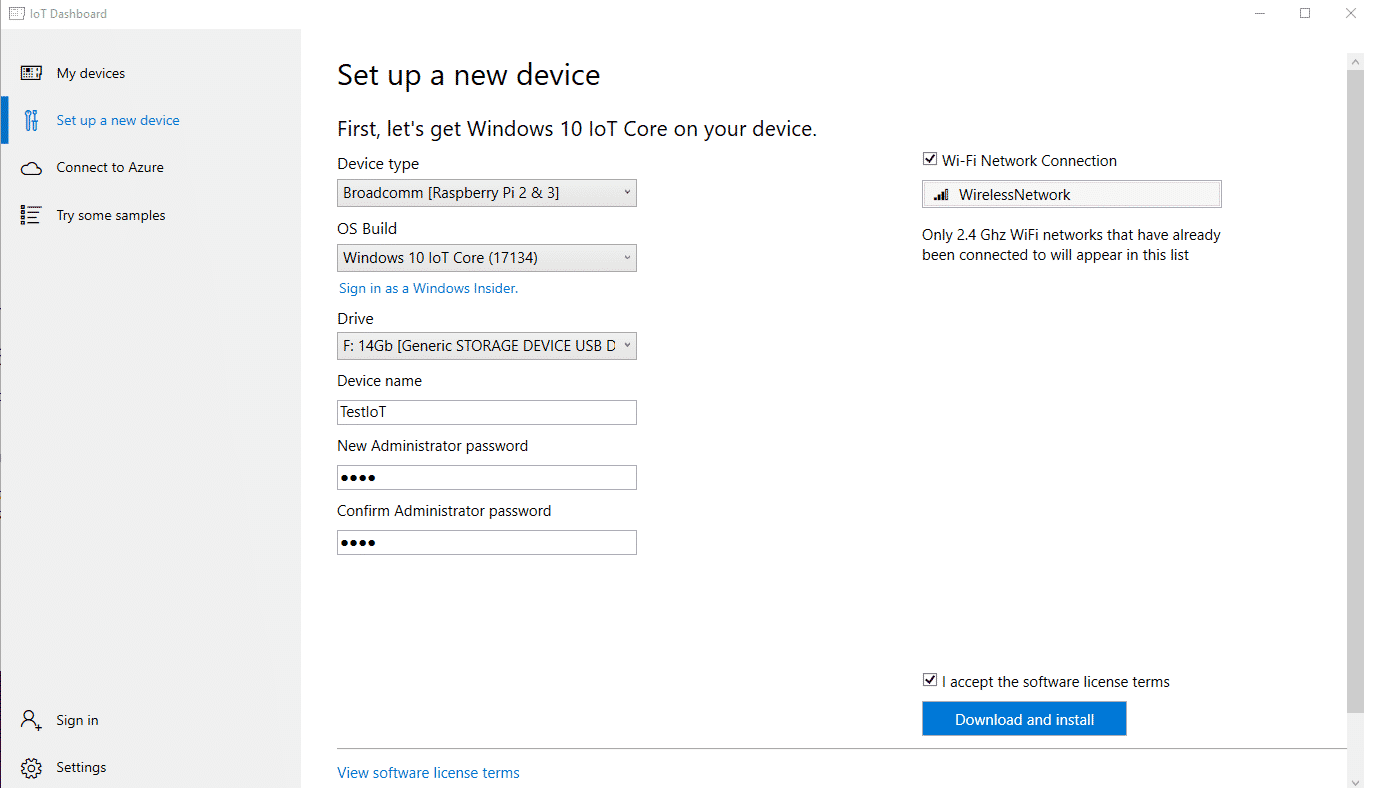
I won’t really go in too much detail about Windows 10 IOT. You can read about all the boring details here. Long story short it is a version of Windows meant for IOT(internet of things) purposes. It can run UWP apps(see how to do that here) and can be used with the following supported chips. Most notably it can be run on a Raspberry Pi.

Installing Windows 10 IOT on a Raspberry Pi

First, get the IOT Dashboard here: https://docs.microsoft.com/en-us/windows/iot-core/connect-your-device/iotdashboard, download, install and open it.
Click on Set up a new device  and then:
    1. Select Raspberry Pi as your board.
    2. Select Windows IOT Core as the OS.
    3. Plug in the sd card and select it.
    4. Name the device and set a password.
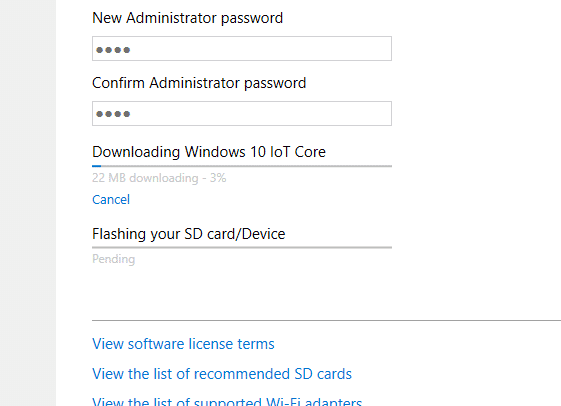
    5. Finally, click Download and install and wait for the installation to complete.
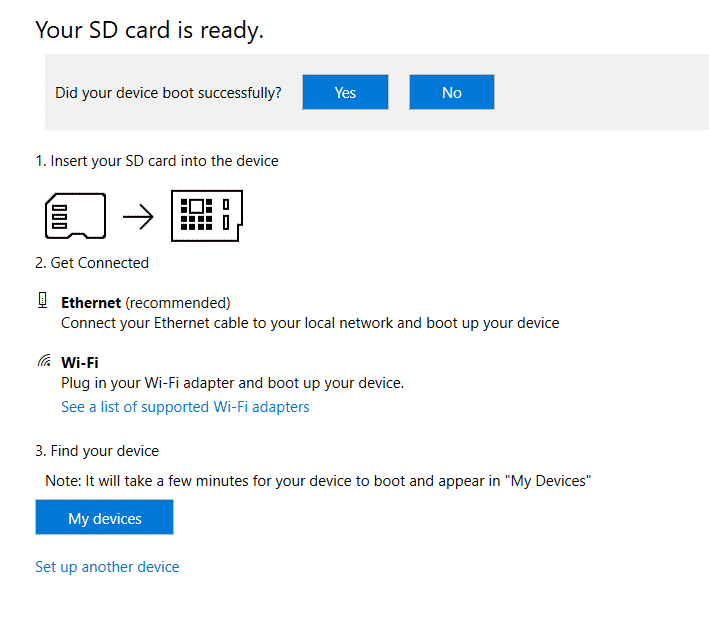
All done.
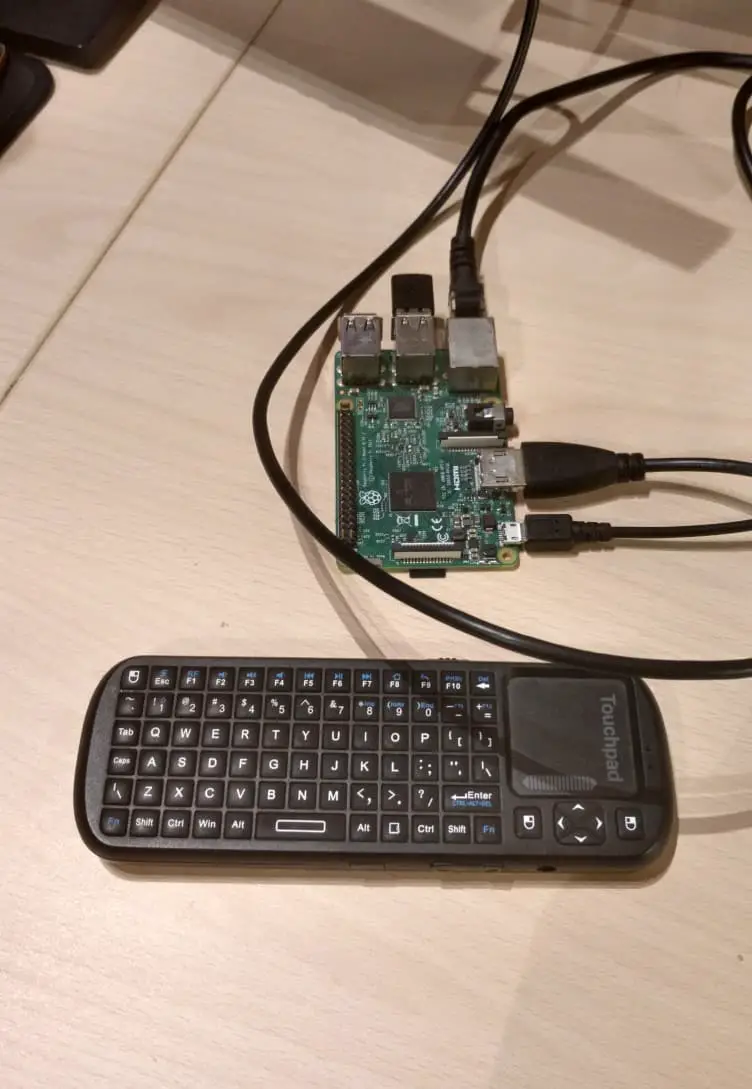
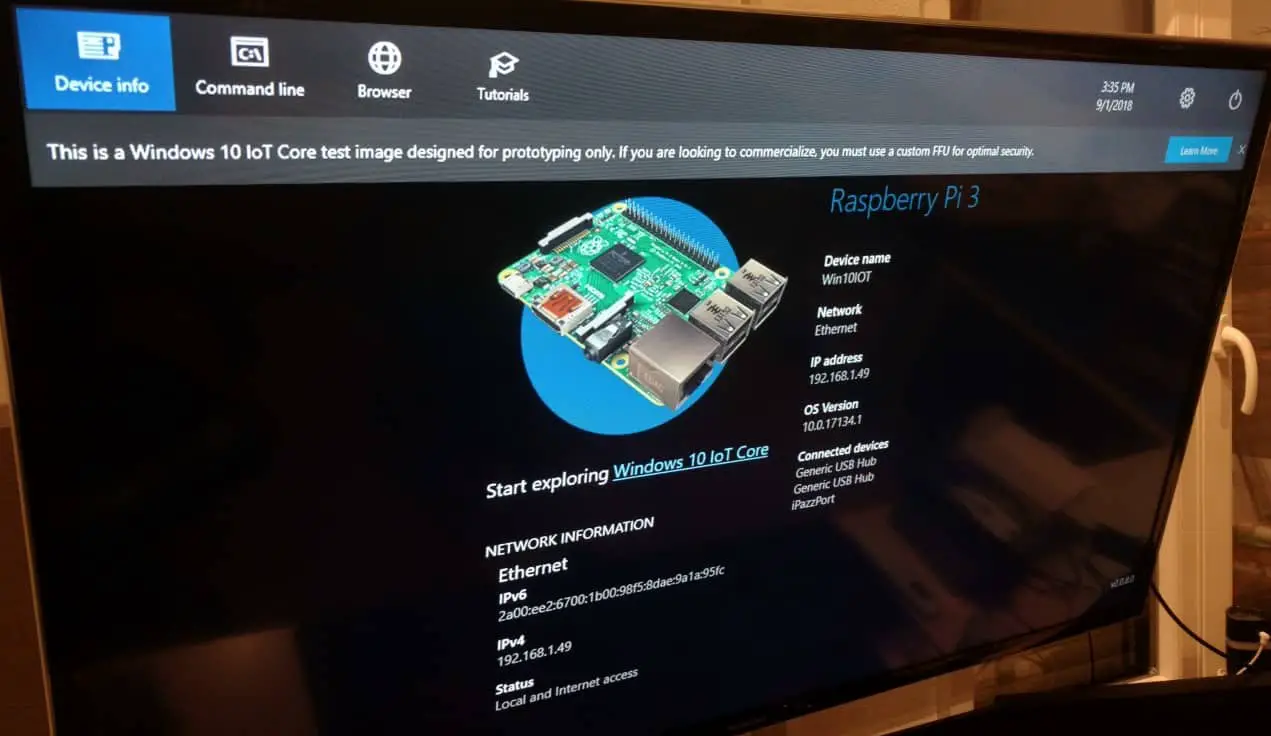
Insert the SD card into your Raspberry Pi and connect power to it. Windows IOT will begin to boot up automatically.
Upon the first boot up, you will have to set up a few basic settings like the internet connection, Cortana settings, language,  etc, … It’s all pretty intuitive and straight forward stuff so I just left it out of the tutorial.
And you are all done! If you are interested in making an app and deploying it to the Raspberry Pi running Windows 10 IOT check out this post.
Share:

Leave a Reply

Your email address will not be published. Required fields are marked *

The following GDPR rules must be read and accepted:
This form collects your name, email and content so that we can keep track of the comments placed on the website. For more info check our privacy policy where you will get more info on where, how and why we store your data.

Advertisment ad adsense adlogger