DIY Portable 100W LED Torch

DIY 100W LED Torch Floodlight
Share:

About

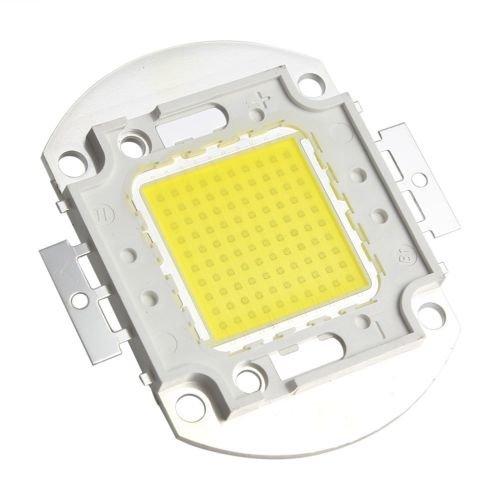
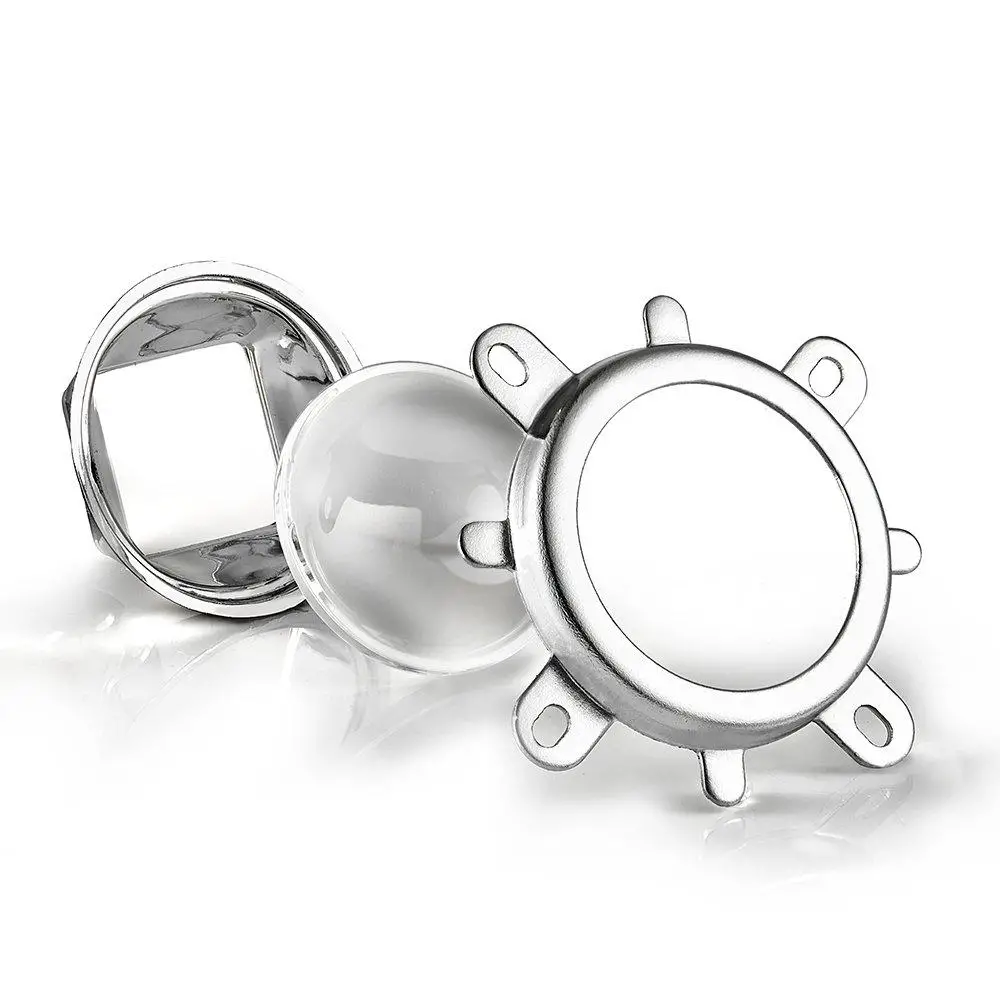
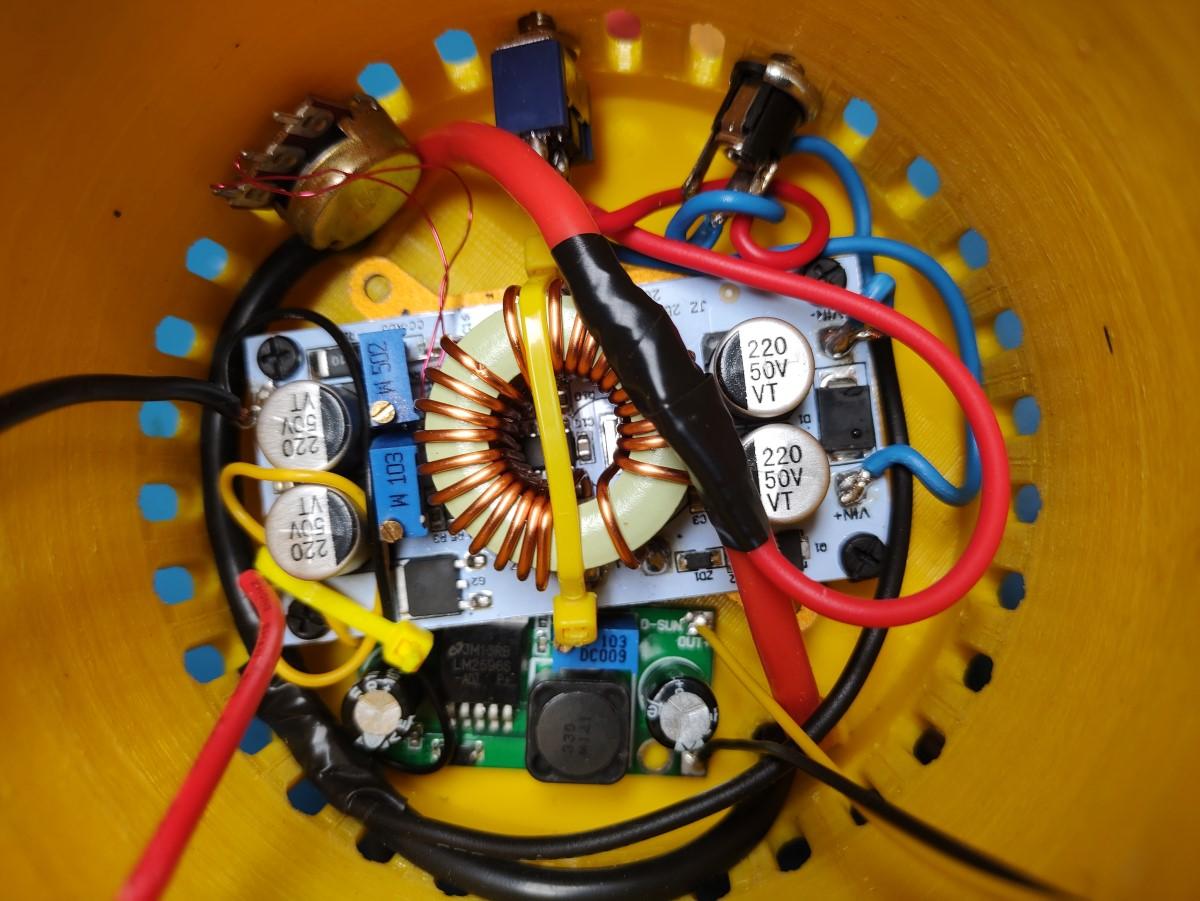
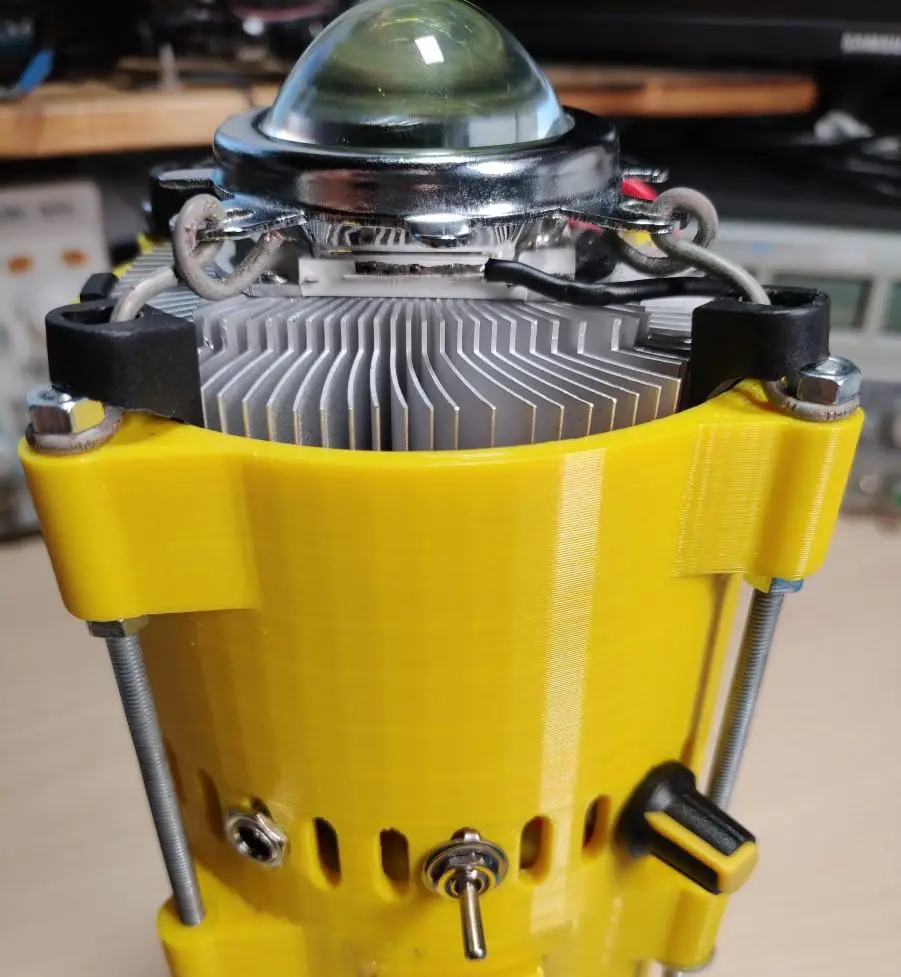
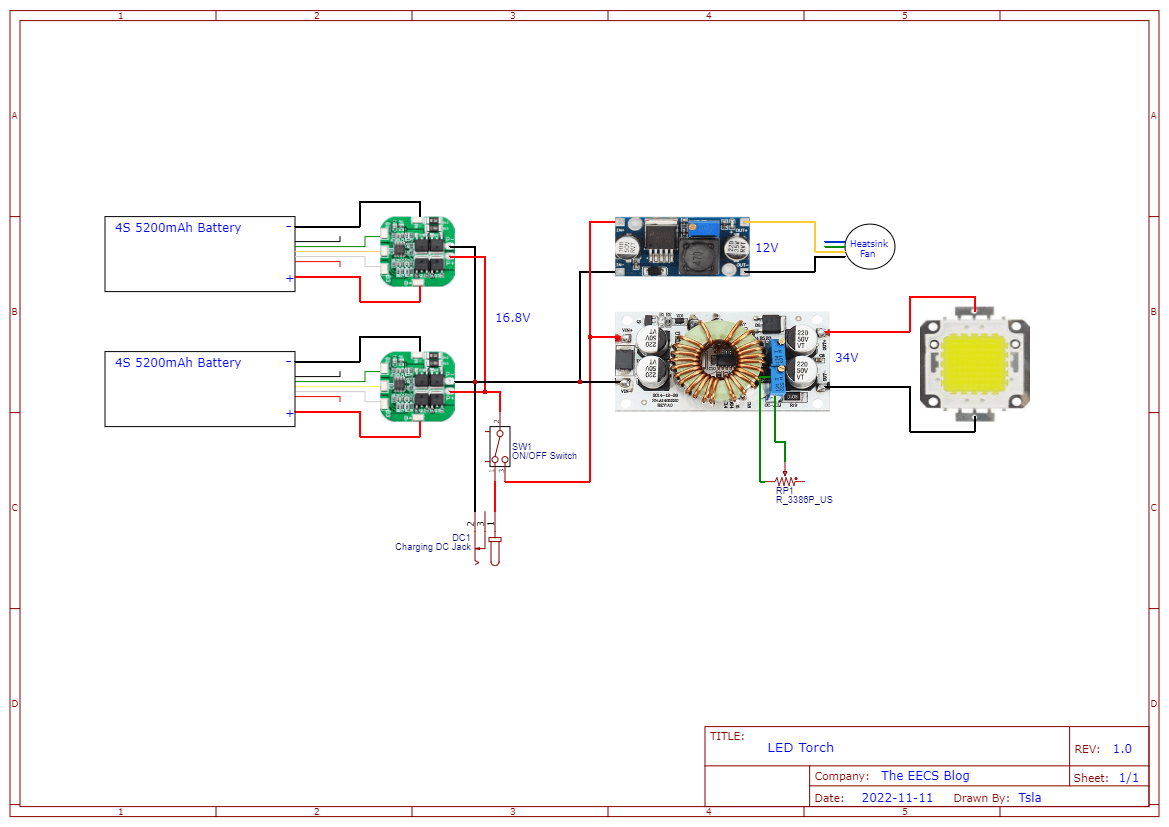
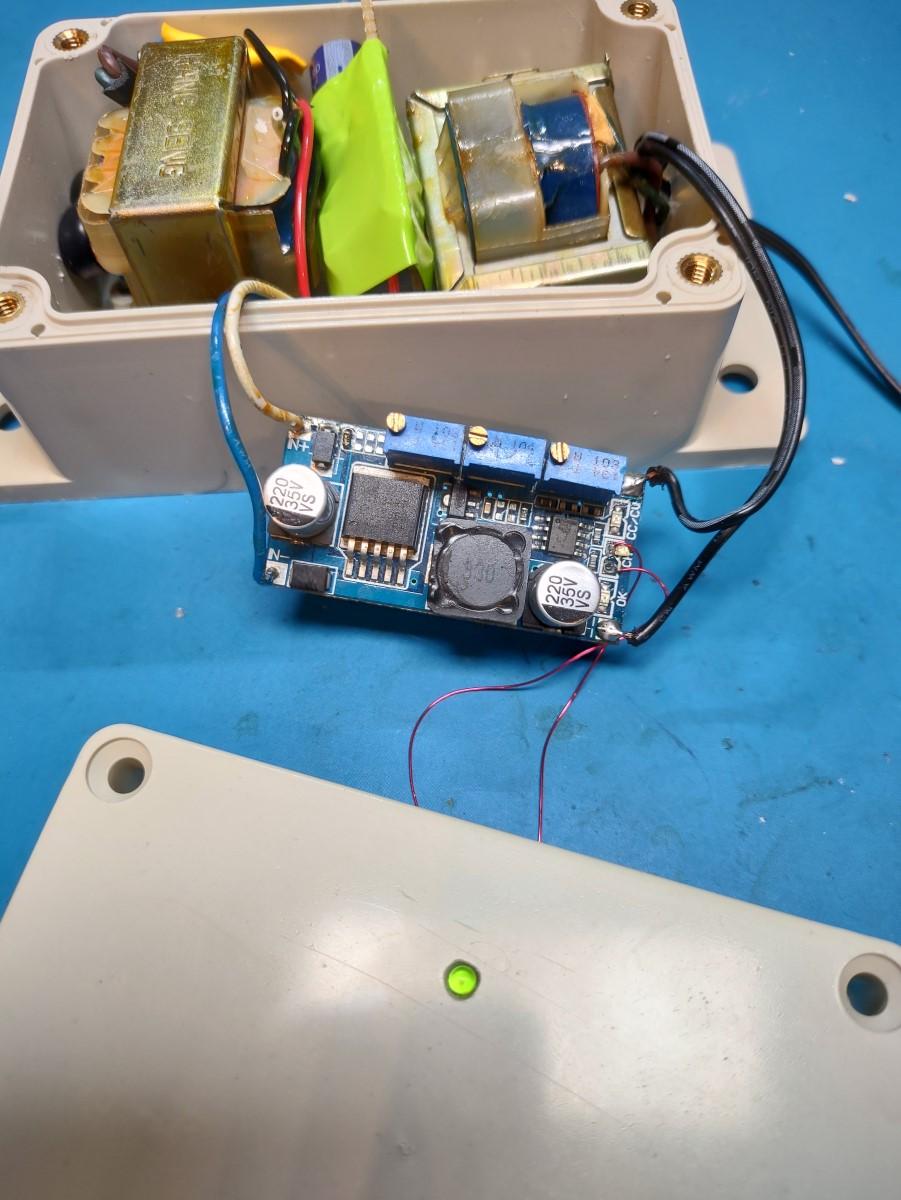
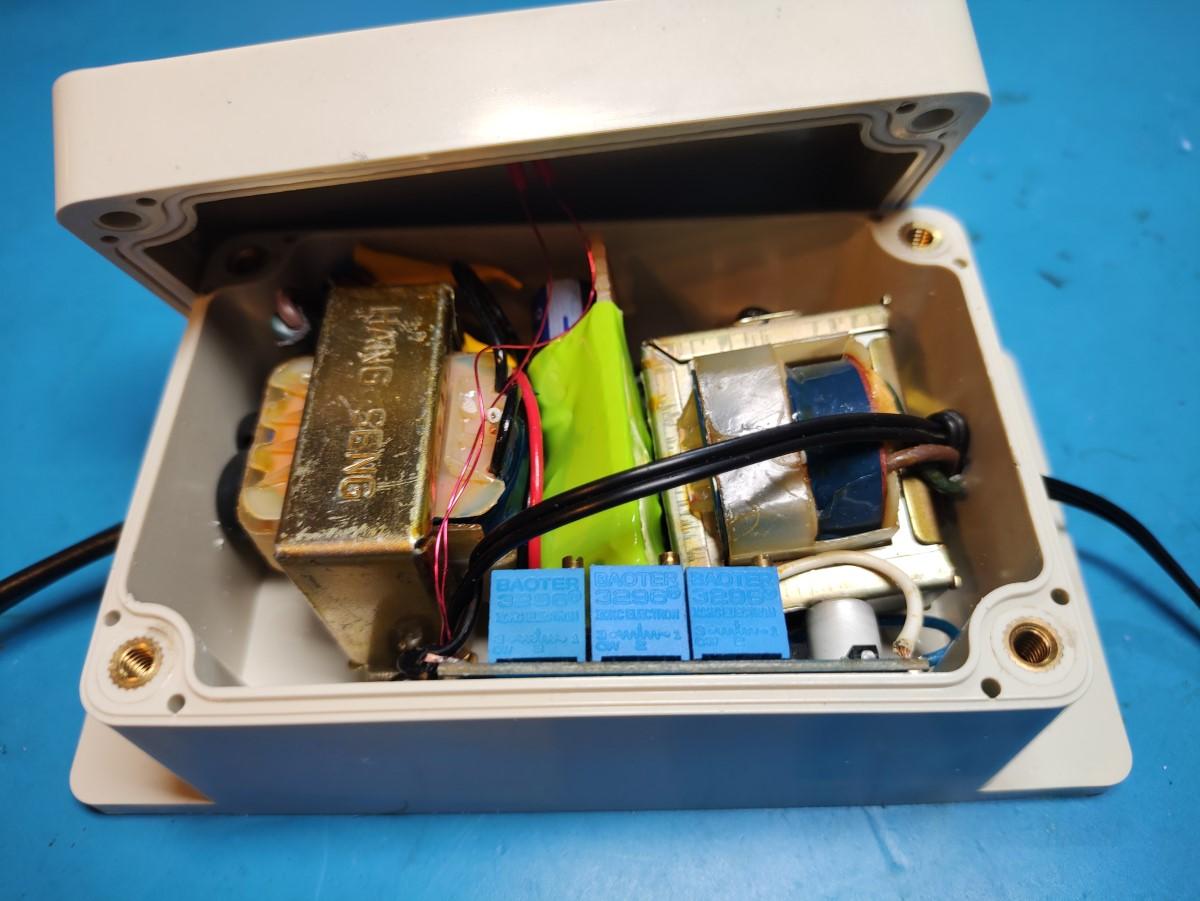
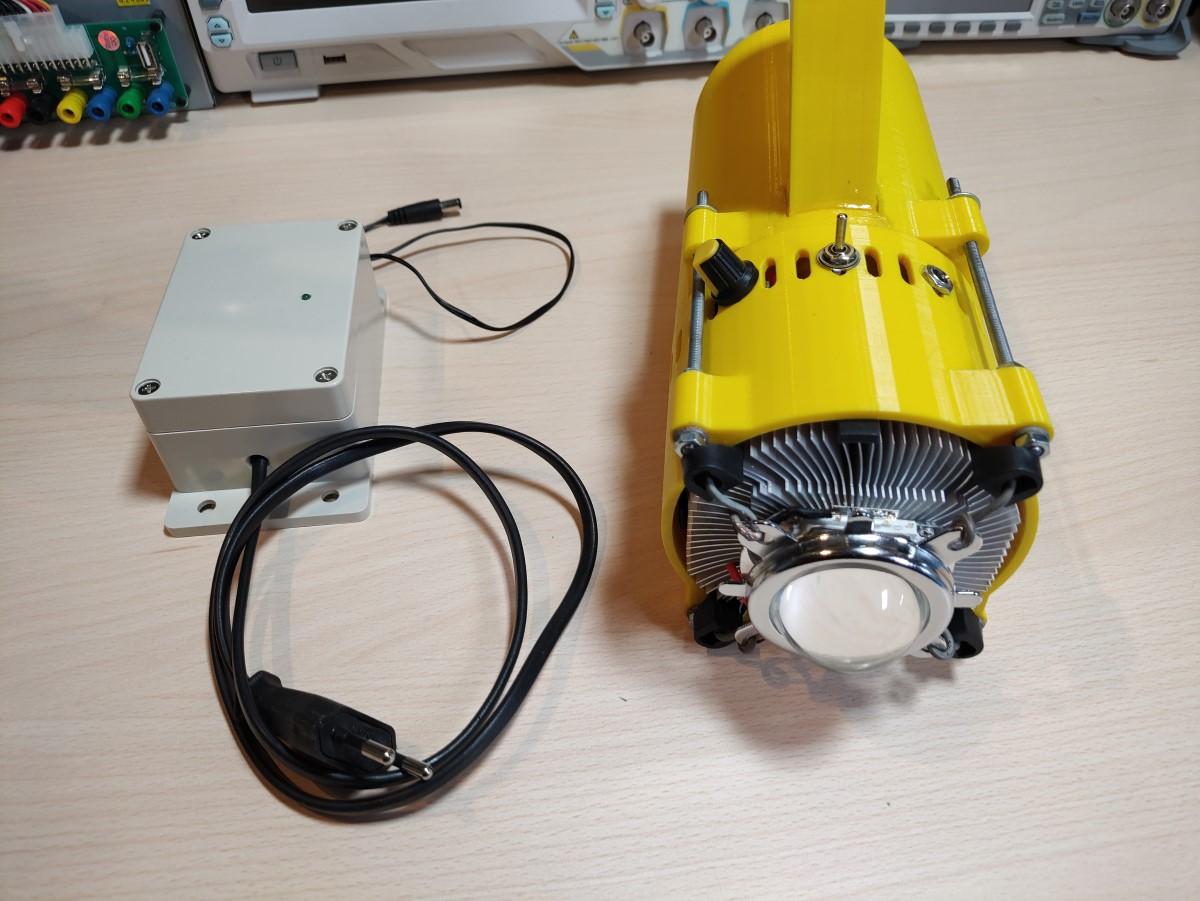
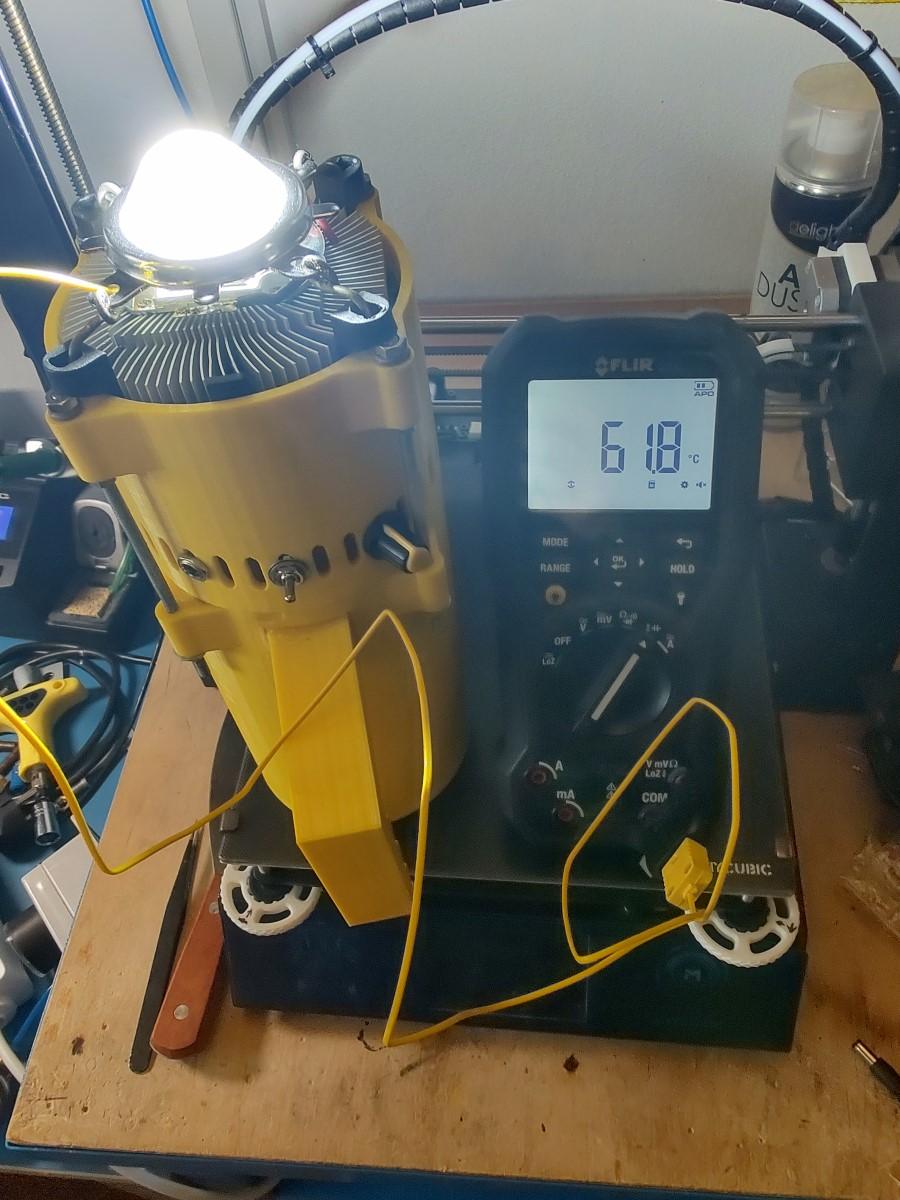
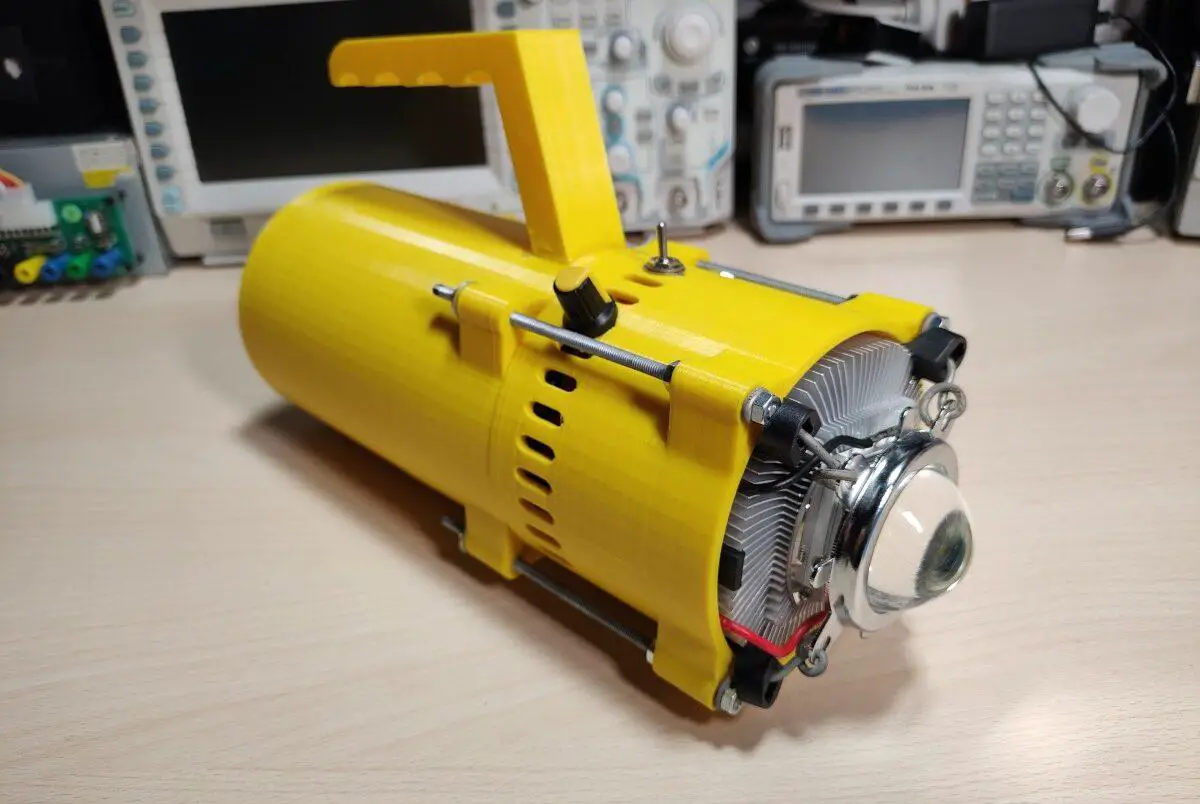
In this post, I’ll show the portable 100W LED torch floodlight I made. I originally bought the 100W LED and lens kit many years ago but have just recently decided I would finally make an LED flashlight out of it. A lot of the flashlights online usually don’t have a very large battery capacity and need to be recharged quite often if you use them for an extended period. The problem is a lot of those flashlights also use 16850 batteries that have to be taken out of the flashlight to be recharged with a charger. This prompted me to create my own flashlight with a large battery capacity that is also easily rechargeable without having to take out the batteries every time.

Hardware used:

Housing 3D Files

Note: The diameter was a bit too small to fit in the round Intel CPU cooler. I solved this by filing down the plastic edges of the cooler. If you 3D print this consider scaling up the housing so that you get a few extra millimeters of clearance on each side.

LED Torch

I 3D printed the housing. The handle was printed separately and later attached with some screws and epoxy. Later I also added a metal backplate to reinforce the area as it seemed kind of flimsy.

The 3D print was just a bit undersized and I had to file down the plastic of the CPU cooler to make it fit in the top piece. Also, some of the holes were drilled later because I wasn’t sure how everything is going to fit together when I was first designing the case.

The LED torch is made out of two pieces. The bottom one houses the batteries and the BMS while the top one contains the electronics, heatsink and the LED itself. The two halves are held together with threaded rods and nuts. To hold the lens in place I simply used some thick wire to pull down on the bracket which holds it and the and reflector in place. The LED chip is screwed directly into the heatsink with some screws(even though this might’ve not been necessary). Before doing that I applied some thermal compound between the LED and the heatsink.

The wiring here is a bit oversized for the task but this was the only wire gauge I had(left over from a quadcopter build).
Here is the schematic for all the electronics of the LED torch. The voltage/current has to be set with the trimmer pots according to the specifications of the LED chip(see below).

Charger

I also built a charger. I didn’t have any power supplies that got to the required 16.8V for charging so I made a good old linear power supply with two transformers joined together. The first board rectifies the AC into DC and the second one does the regulation and charging.
And here it is all assembled. It’s hard to see but both of the transformers are screwed into the case preventing them from moving around.
Here is the schematic for the charger. The charging cutoff voltage(16.8V) and current have to be set with the trimmer pots.

Testing And Demonstration

I performed a test at full power and the temperature settled at around 62°C which according to the specification of the LED chip falls well within the operating temperature range(-30°C to 85°C).
Technical specification of the LED chip(100W).
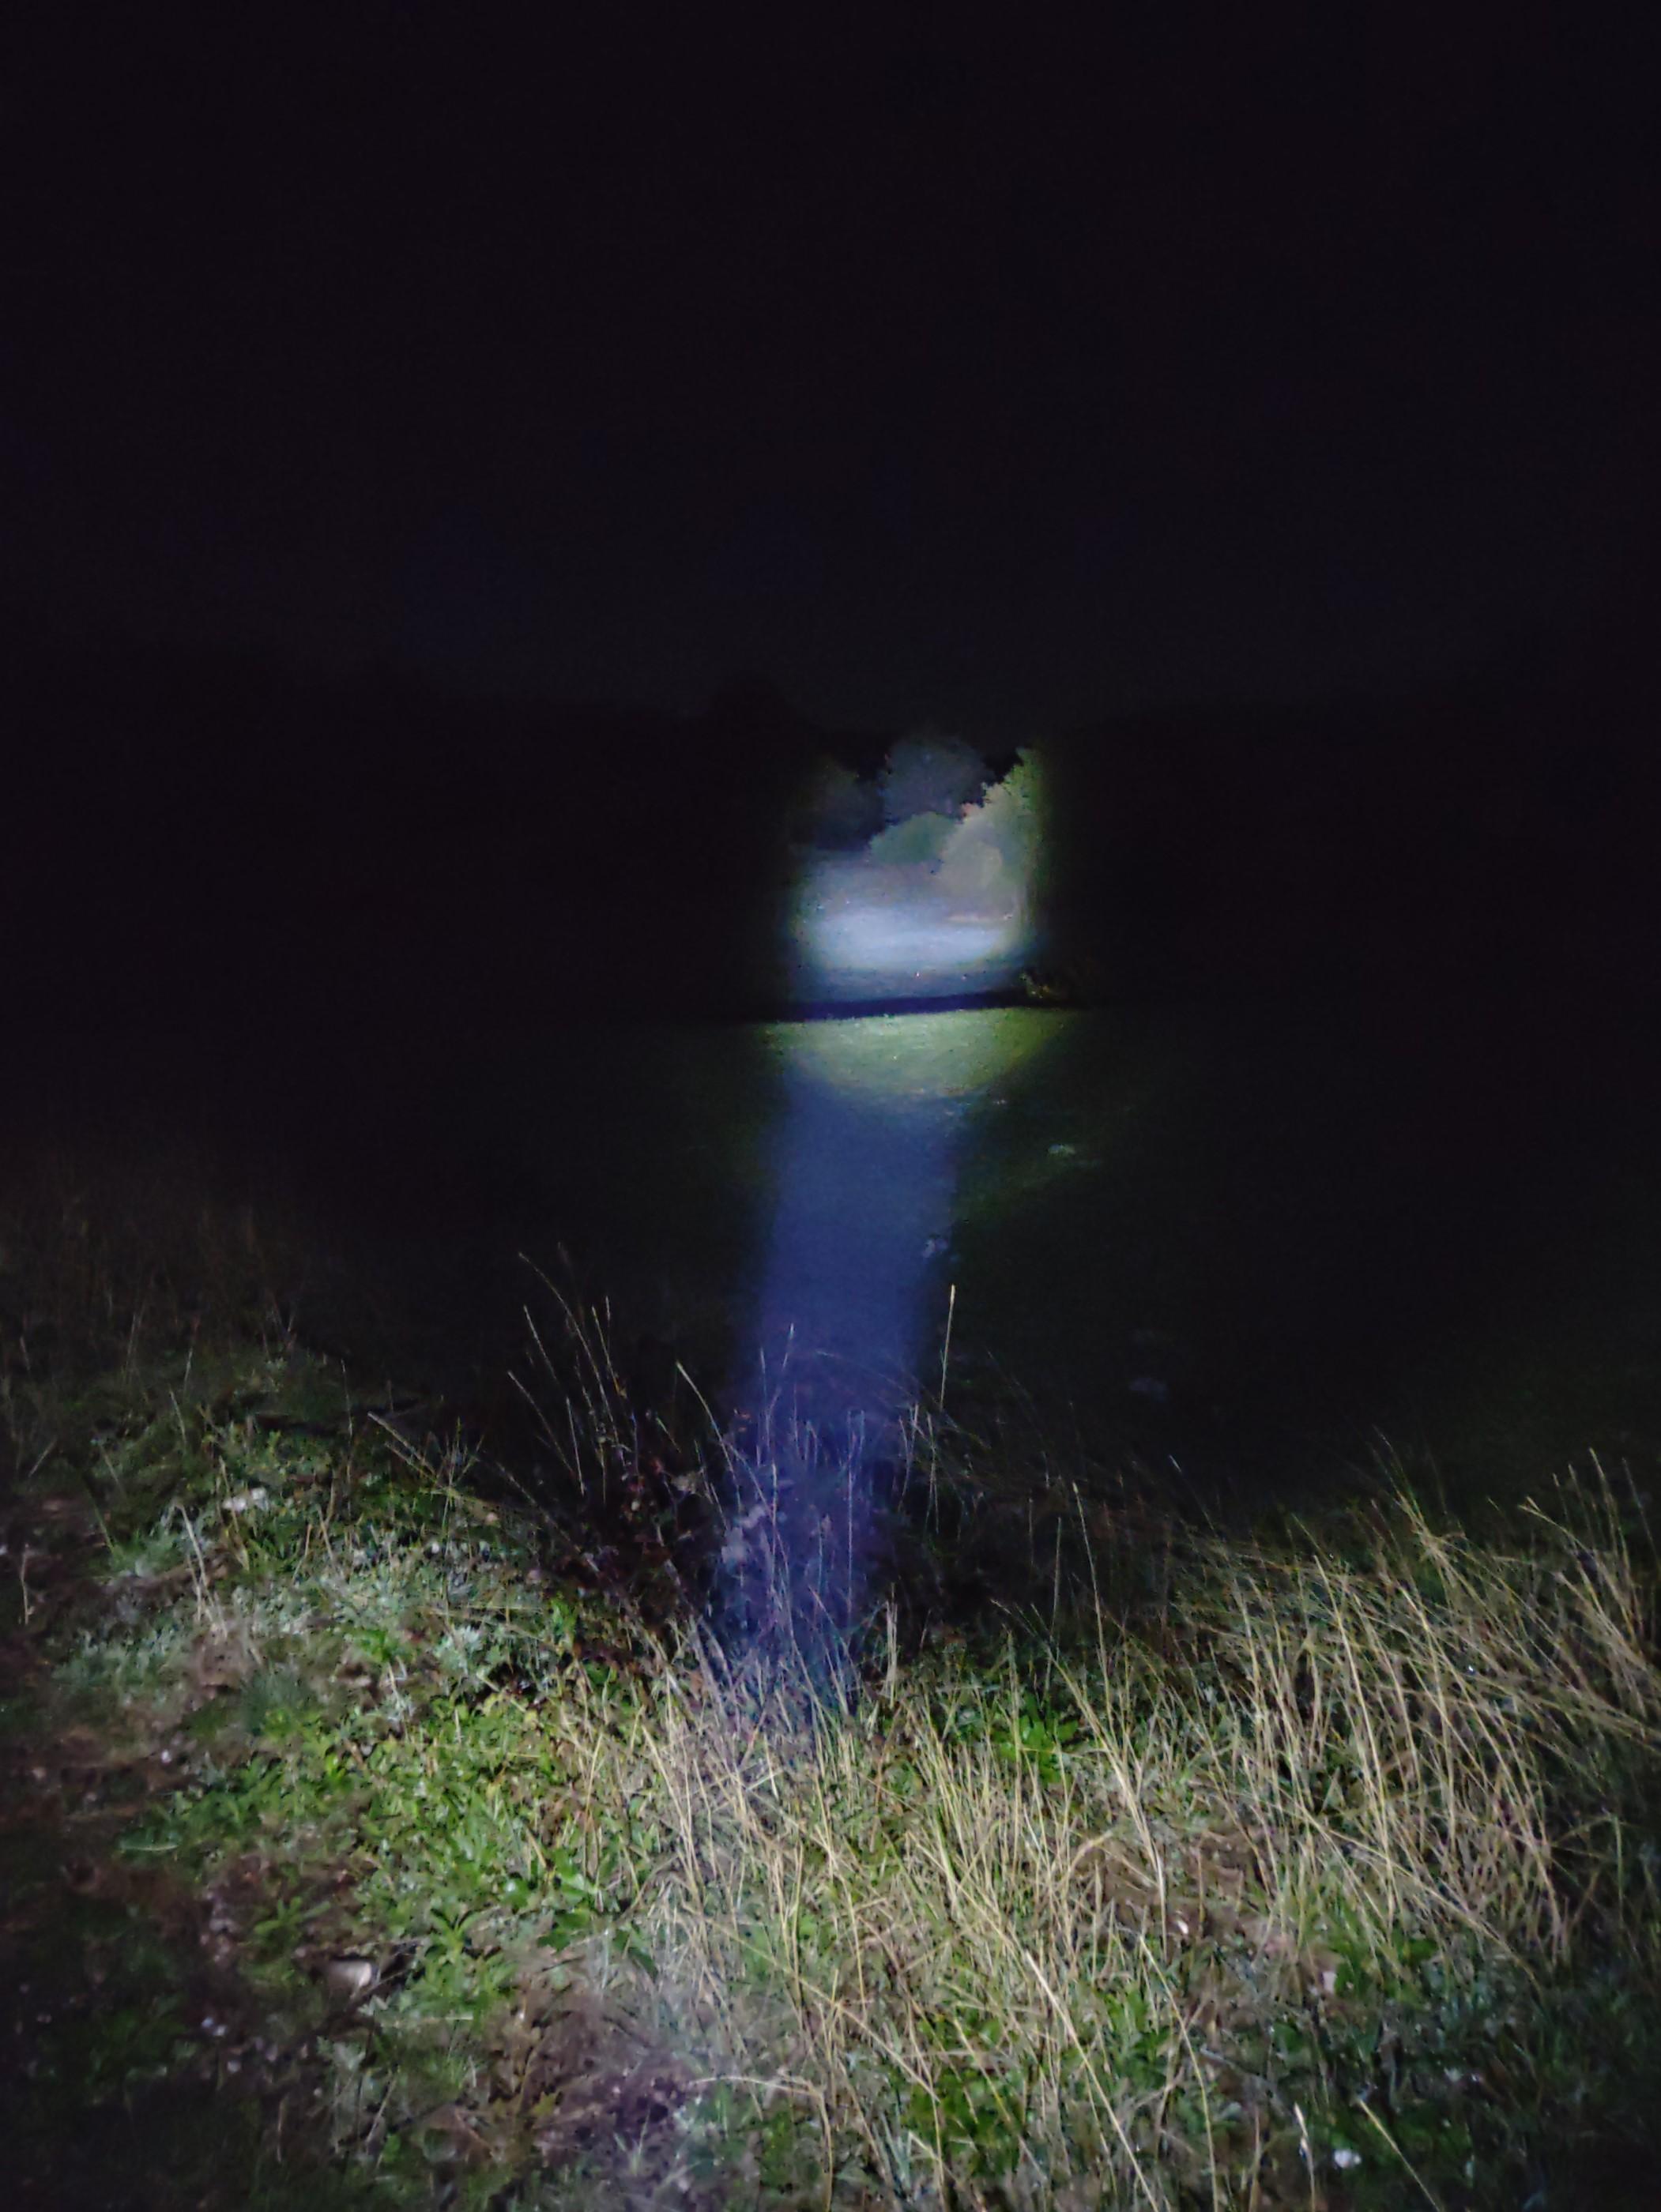
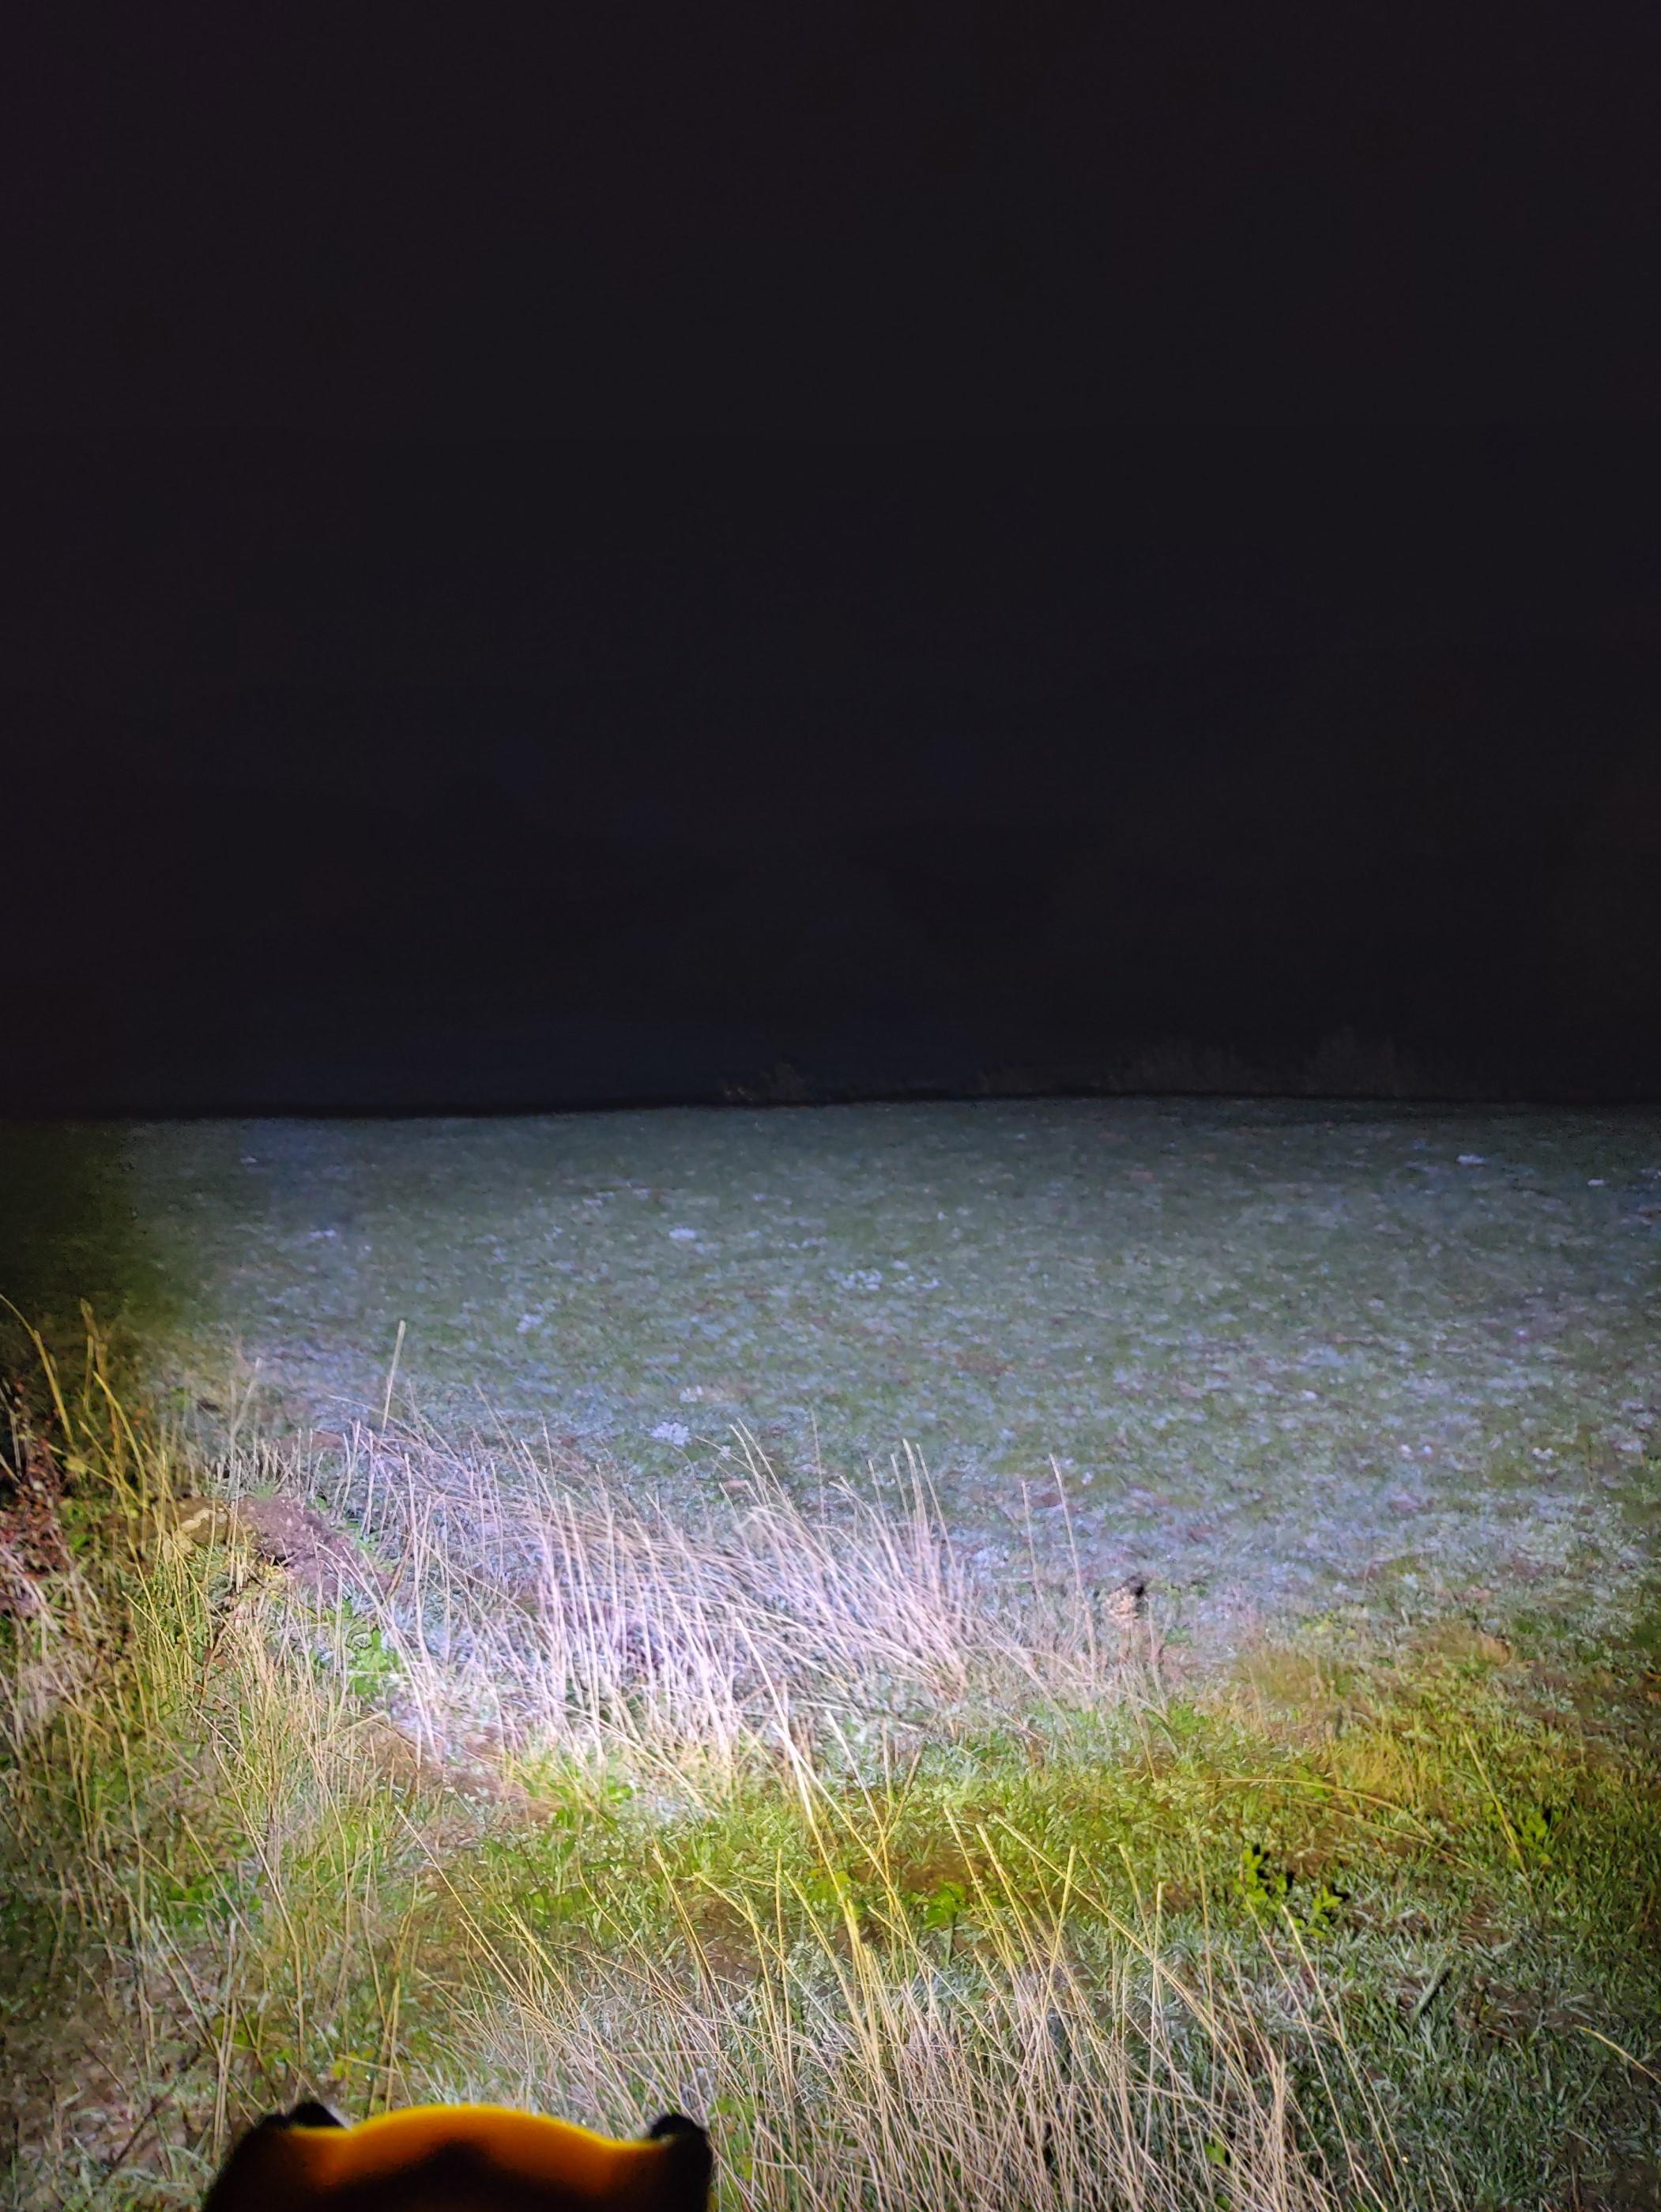
Finally, this is what it looks like at night. For comparison, the first image(on the left) is a spotlight I got from eBay. It reaches very far but has a very narrow beam. In the second image(on the right) you can see the torch I built It doesn’t have as much range as the spotlight due to having a wider angle lens but it does cover a much larger area so it works great as a floodlight. 
Share:

Leave a Reply

Your email address will not be published. Required fields are marked *

The following GDPR rules must be read and accepted:
This form collects your name, email and content so that we can keep track of the comments placed on the website. For more info check our privacy policy where you will get more info on where, how and why we store your data.

Advertisment ad adsense adlogger