Lattice iCE40 FPGA IceStorm Tutorial

iCE40 FPGA iCE aStick with IceStorm Tutorial
Share:

About

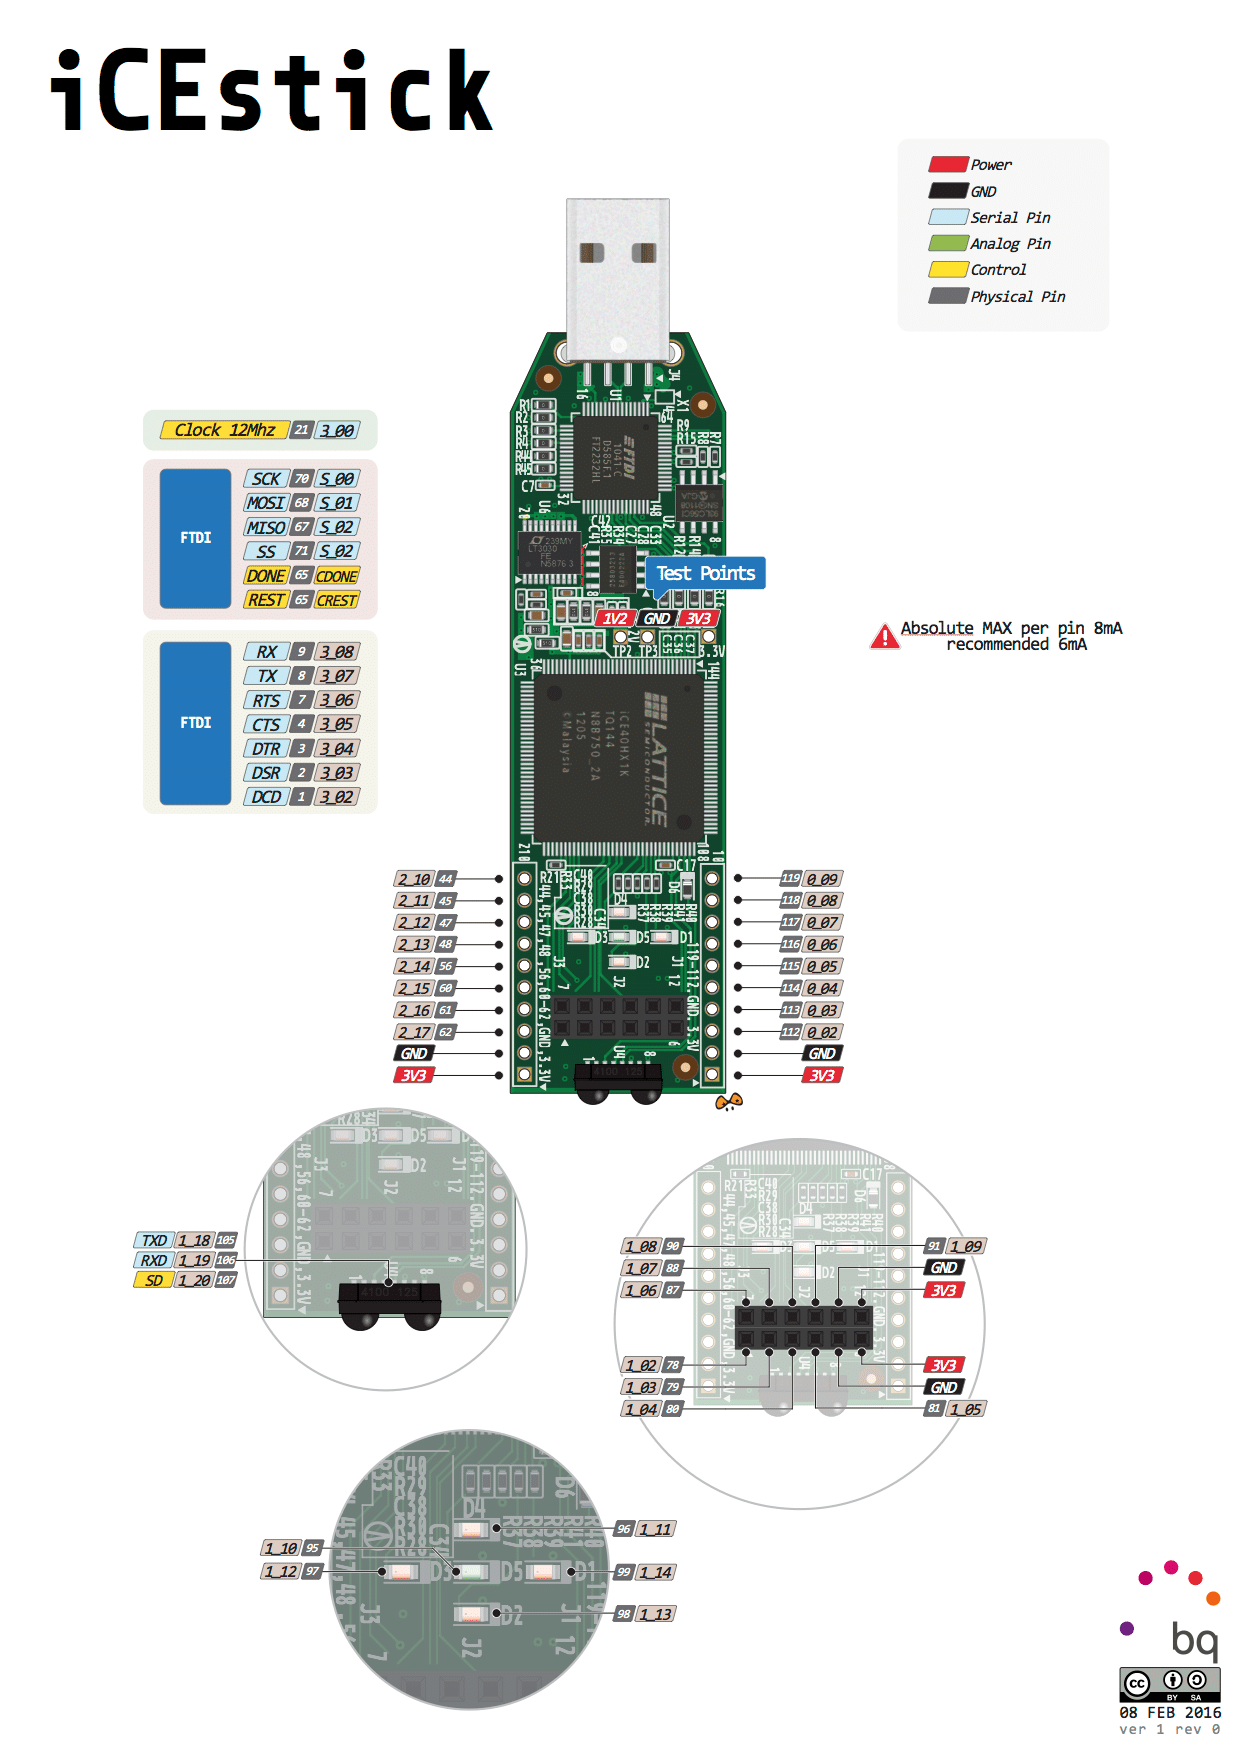
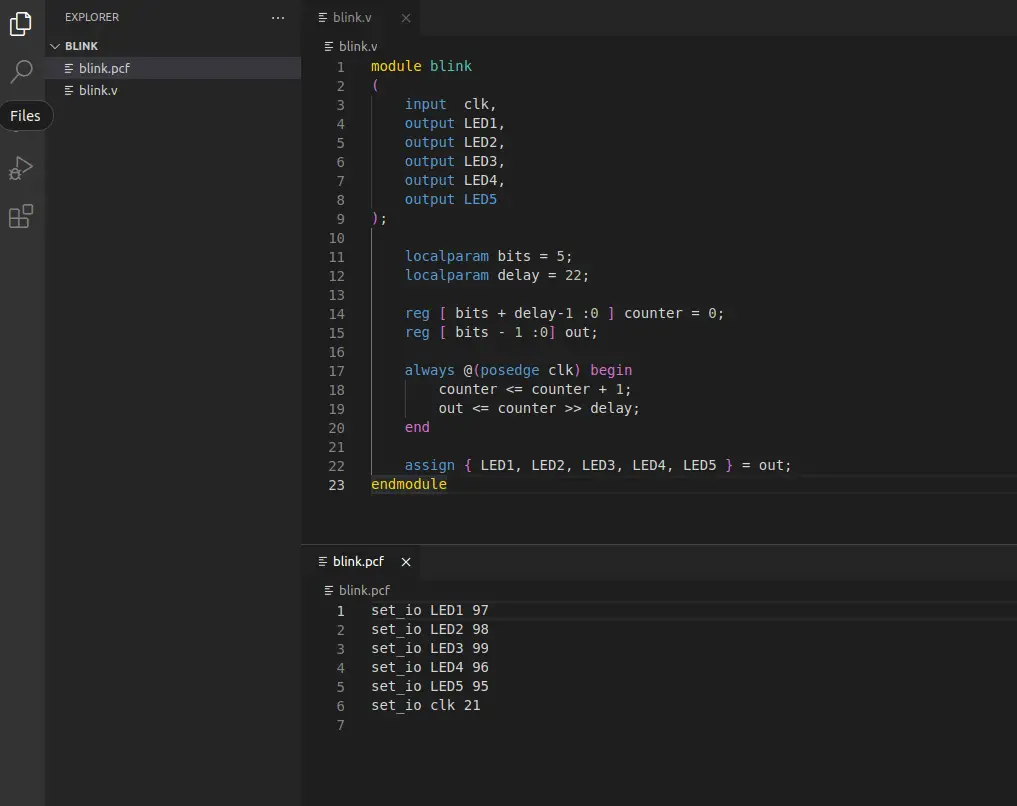
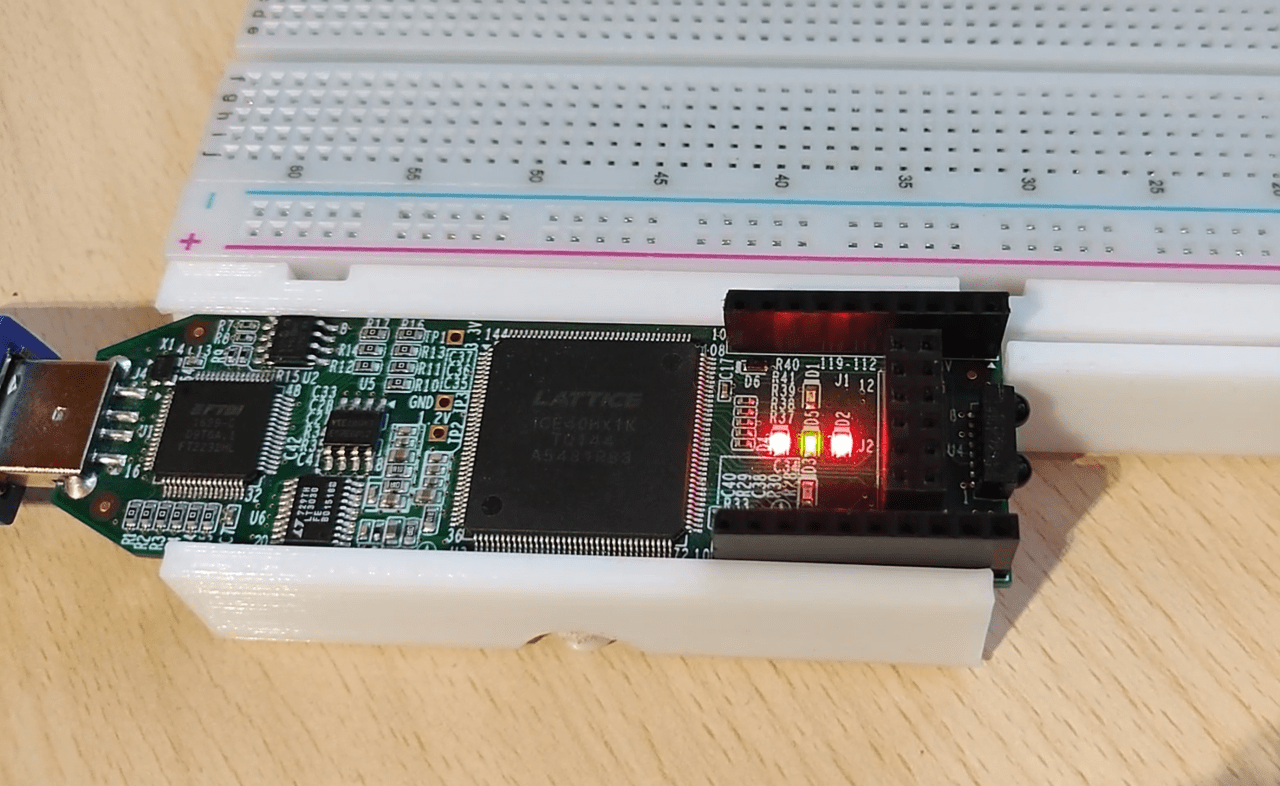
This tutorial will cover the hardware and software setup for the icestick development board that uses an iCE40 FPGA. The IceStorm open source toolchain will be used for programming the board instead of the vendor tools. For the demonstration, we’ll make a simple binary counter that will display its value with the onboard LEDs. The logic design will be defined/coded with Verilog.

Hardware Used

Documentation Files

Software setup

First, we have to install all the tools but you will need Linux to do that. If you are already using Linux that’s great else you will either have to use a VM, install Linux or use WSL(Windows subsystem for Linux). I made a tutorial on setting up WSL a couple years ago you can check it out here if you need. However, I will be using Ubuntu running as a VM in VirtualBox. 
Install dependencies.
sudo apt-get install build-essential clang bison flex libreadline-dev \
                     gawk tcl-dev libffi-dev git mercurial graphviz   \
                     xdot pkg-config python python3 libftdi-dev \
                     qt5-default python3-dev libboost-all-dev cmake libeigen3-dev
I’ll make a temp. folder for the tools.
mkdir Tools
cd Tools
Install the icestorm tools.
git clone https://github.com/YosysHQ/icestorm.git icestorm
cd icestorm
make -j$(nproc)
sudo make install
Install arachne pnr.
git clone https://github.com/cseed/arachne-pnr.git arachne-pnr
cd arachne-pnr
make -j$(nproc)
sudo make install
Install next pnr.
git clone https://github.com/YosysHQ/nextpnr nextpnr
cd nextpnr
cmake -DARCH=ice40 -DCMAKE_INSTALL_PREFIX=/usr/local .
make -j$(nproc)
sudo make install
Install yosys.
git clone https://github.com/YosysHQ/yosys.git yosys
cd yosys
make -j$(nproc)
sudo make install

Hardware setup

In this tutorial, we’ll be using the onboard LEDs so there isn’t anything else to setup hardware wise except plugging in the board.

As I said, I’m using a VM in VirtualBox, so I also need to add the USB device to the VM. If you are not using a virtual machine you can skip this part. If you choose to use WSL see how to attach the USB device to WSL here.

If you run the lsusb command you should be able to see your device(first one is the icestick).

Logic design

You need to create two files blink.v and blink.pcf. Then you need to open both of them in some sort of text editor(I will be using the VS code IDE) and put in the following code.
blink.v file
module blink 
(
	input  clk,
	output LED1,
	output LED2,
	output LED3,
	output LED4,
	output LED5
);

	localparam bits = 5;
	localparam delay = 22;

	reg [ bits + delay-1 :0 ] counter = 0;
	reg [ bits - 1 :0] out;

	always @(posedge clk) begin
		counter <= counter + 1;
		out <= counter >> delay;
	end

	assign { LED1, LED2, LED3, LED4, LED5 } = out;
endmodule
blink.pcf file(pin configuration file)
set_io LED1 97
set_io LED2 98
set_io LED3 99
set_io LED4 96
set_io LED5 95
set_io clk 21
In the .pcf file, we assign the input names from the blink.v file to the pin numbers of the FPGA. The pinout is in the image below.
icestick pinout
Source: https://www.embarcados.com.br/wp-content/uploads/2018/09/icestick_pinout.png
This is what both files should look like at the end.

Programming

First, we need to do Verilog to node list synthesis with yosys. This will make a blink.blif file from the blink.v file. The -top parameter requires the name of the module we set in the Verilog file(blink in this case).
yosys -p 'synth_ice40 -top blink blif blink.blif' blink.v
Next, we need to do place and route with arachne. You need to get the exact part number of your iCE40 FPGA(read markings on the chip)find it in the table below and use the proper options for arachne. -d 1K -P tq144 in this case.
You will also need to include the .pcf and .blif filenames as parameters for arachne. Then with -o you can define the name output text file. In this case, I will just call it blink.txt.
arachne-pnr -d 1k -P tq144 -p blink.pcf blink.blif -o blink.txt
Convert .txt to .bin file with icepack.
icepack blink.txt blink.bin
Finally, we can program the FPGA with blink.bin file we made in the previous step.
sudo iceprog blink.bin 
After the programming process is over the lights on the board should be counting up in binary.
Share:

Leave a Reply

Your email address will not be published. Required fields are marked *

The following GDPR rules must be read and accepted:
This form collects your name, email and content so that we can keep track of the comments placed on the website. For more info check our privacy policy where you will get more info on where, how and why we store your data.

Advertisment ad adsense adlogger