In this post, we’ll take a look at watchdog timers in microcontrollers. I will show you how to implement it with an Arduino and with an ESP8266 or ESP32.
A watchdog timer is a safety mechanism that reboots a microcontroller if the freezes or gets stuck in an endless loop. This can be implemented in a few ways:
External: You make an external circuit like a 555 timer that temporarily cuts the power to the MCU if the MCU stops periodically resetting the external timer.
Internal: You can use a library or “manually” set the bits in the watchdog register to configure the timer. You could also make a DIY version where you use a regular timer that triggers an interrupt, then in the interrupt function, you would check if a global flag to reset the timer has been set. If so, clear it and finish the ISR, else jump to the memory address 0, which would essentially run the code from the beginning, thereby resetting the MCU.
This is how you can implement the watchdog timer functionality when using the ESP8266 or ESP32. The watchdog timer functions are already present in the RTOS that all ESPs run already by default.
#include <esp_task_wdt.h>

void setup() {
  Serial.begin(9600);
  Serial.println("Starting ESP ...");

  //If the timer isn't reset after 5s the MCU will reboot.
  esp_task_wdt_config_t wdt_config = {
    .timeout_ms = 5000,
    .trigger_panic = true,
  };
  esp_task_wdt_init(&wdt_config);

  //Add task handle of the task you want the watchdog timer attached to.
  //If NULL is passed the current thread/task/context will be referenced.
  esp_task_wdt_add(NULL);
}

void loop() {
    //Do something.
    someTask();

    //Reset the timer.
    esp_task_wdt_reset();
    Serial.println("Timer reset.");
}

void someTask(){
  //Doing something ...
  delay(1000);
}
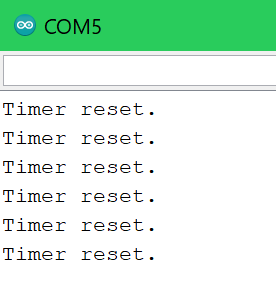
The first image shows the timer being reset in time, while the second one shows what happens if you, for example, increase the delay to 6s and the timer isn’t reset in time, causing the MCU to reboot.
This example shows you how to implement the watchdog timer functionality when using an Arduino. We’ll use the watchdog timer functions from <avr/wdt.h>.
#include <avr/wdt.h>

void setup() {
  Serial.begin(9600);
  Serial.println("Starting...");

  //Enable watchdog timer with a 4 second timeout.
  wdt_enable(WDTO_4S);
}

void loop() {
  Serial.println("Running ...");

  //Doing some work ...
  delay(1000);

  //Reset the watchdog timer.
  wdt_reset();
}
I won’t cover this here in detail, but you can alternatively also “manually” set the bits in the watchdog timer register. See the official documentation of the MCU you are using, for example, the ATmega328P: