Mini Portable Server From An Old Bitcoin Miner

Mini Portable Server From An Old Bitcoin Miner
Share:

About

In this post, I will document the build process for my mini portable server made from an old Bitcoin miner case and an Orange Pi Zero Plus.

One day I was looking through my SBCs parts bin and saw the Orange Pi Zero Plus board(still in its packaging) I had bought many years ago but never used. I got the idea to make a small portable server that could maybe run an MQTT broker, act as an AP, run a web server, etc.

When looking for the case I found an old Jalapeno 5GH/s Bitcoin miner from Butterfly Labs that I got around 10 years ago. When it became unprofitable to mine SHA256 based coins with it I tore it down and only kept the case for some future project.

Hardware used:

Hardware

Here’s what the case looks like inside and out. The large aluminum heatsink will not be used for this project.
I removed the plastic case for both the SATA to USB adapter and the SSD to reduce their size and enable the PCBs to fit inside the case.
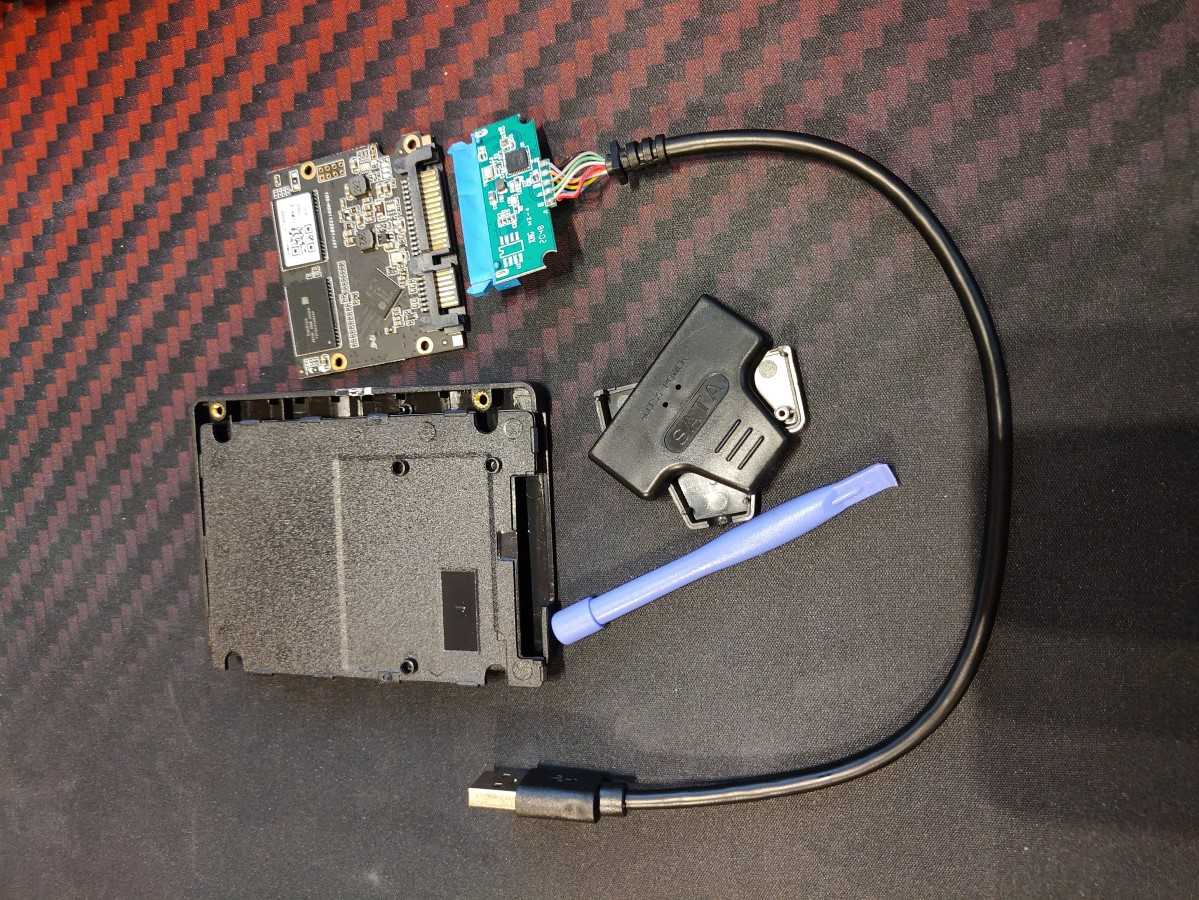
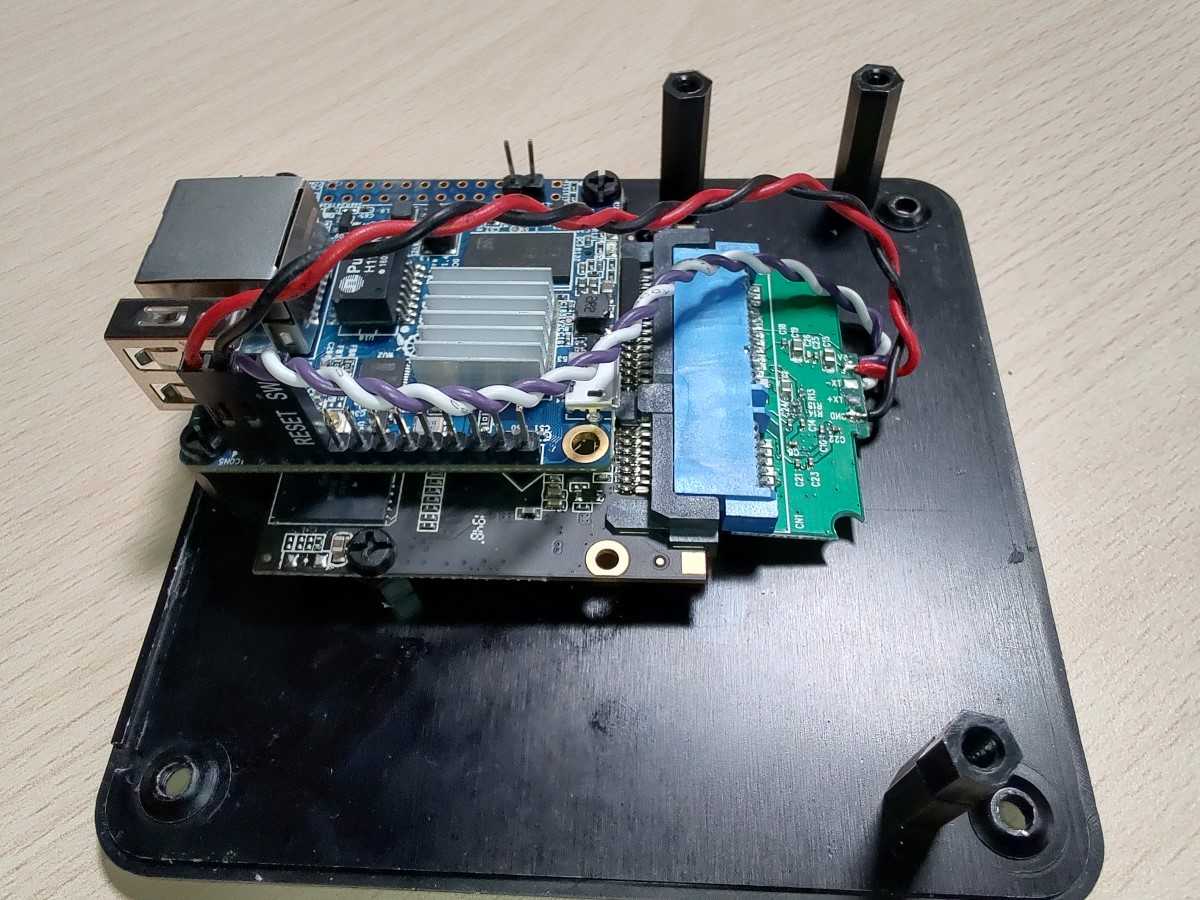
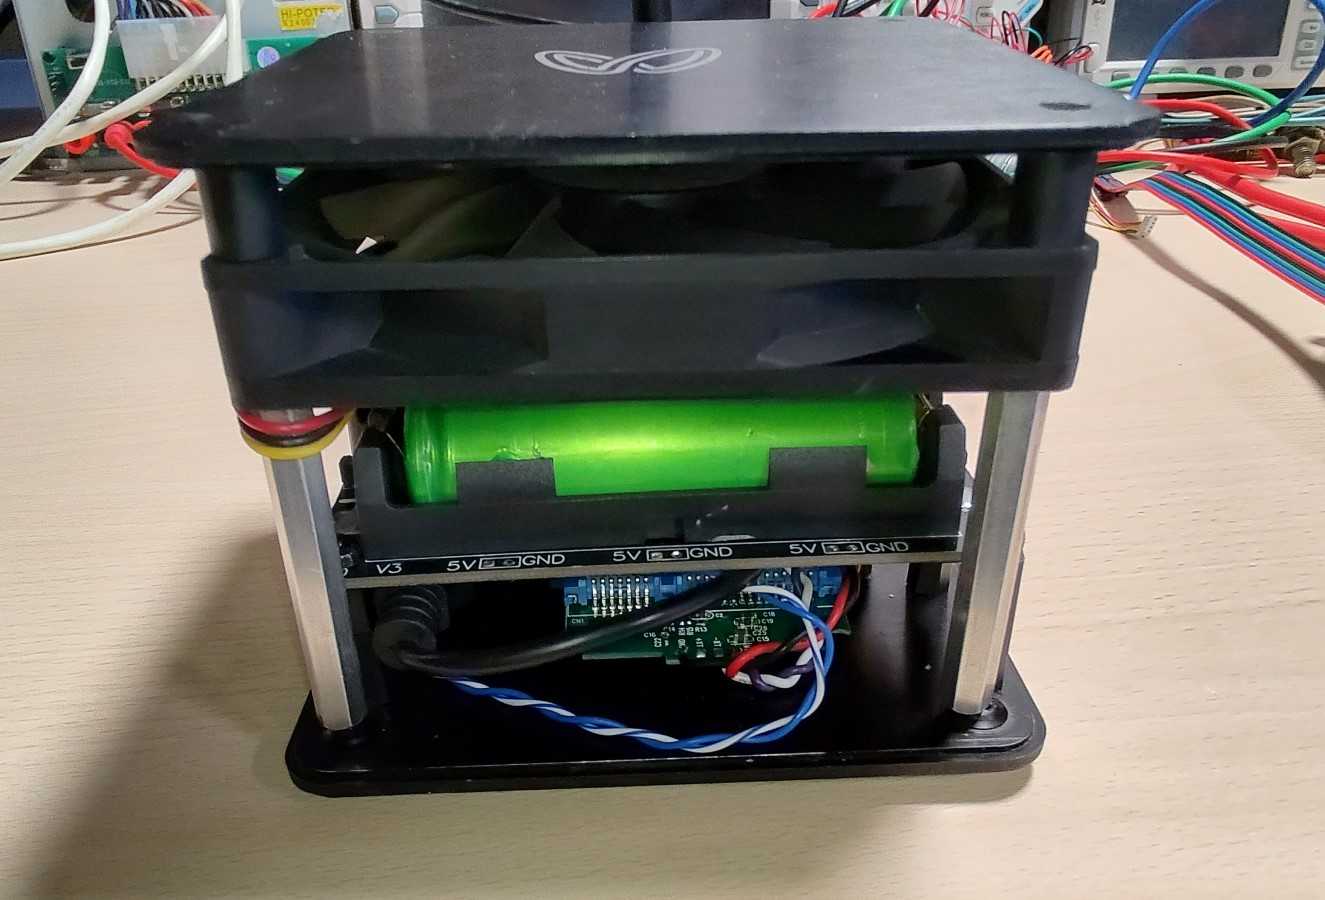
I used plastic standoffs to mount the Orange Pi Zero and the SSD onto the base of the case. I desoldered the USB cable and replaced it with two shorter pieces of twisted pair wires(more important for the data lines as differential signaling is used). I then connected these to the pin headers of the Orange Pi with a USB connection.

Next, all the connectors were added to the backplate:

    • I added a 230V plug with a 5V charger glued to it, additionally, I added a DC barrel jack just in case I would want to power the server with 5V directly.
    • An SMA connector for the WiFi antenna.
    • A power switch or the server couldn’t be powered off because of the UPS(or until the battery would run out).

The UPS powered by a single 18650 battery was also mounted to the base with plastic standoffs that were just high enough to clear the Orange PI zero and the USB connector coming from the 5V charger.

Note: The UPS board had to be modified to work properly see this post here for more details. Also part of the PCB had to be cut off for it to fit inside the case.

All assembled and powered on.

OS Install

For the OS I installed Armbian(you can find it here). You can also install one of the other supported operating systems found on the official website here.
Flash the downloaded .iso image with Balena Etcher(you can find it here) to a micro SD card. Then insert the SD card into the Pi, connect it to your router via ethernet cable and boot it up.

Give your Pi a minute to boot up. Then go to your router settings and find out what IP adress was assigned to your Pi. Your router settings will be different from the ones in the image below but the IPs assigned to your devices should be listed somewhere under the DHCP server settings/info.

Note: Consider adding a static IP address for your Pi so it’s easier to access it next time.

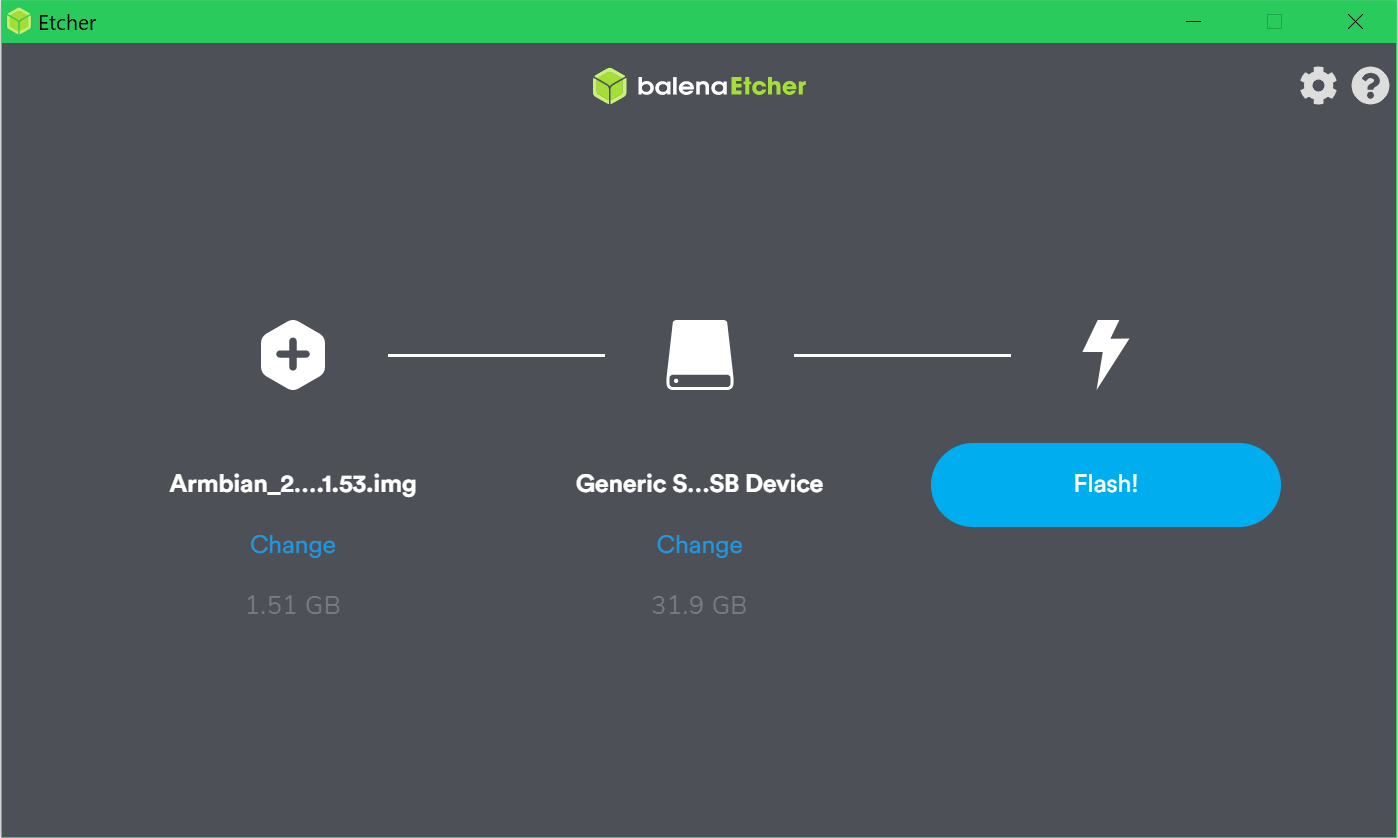
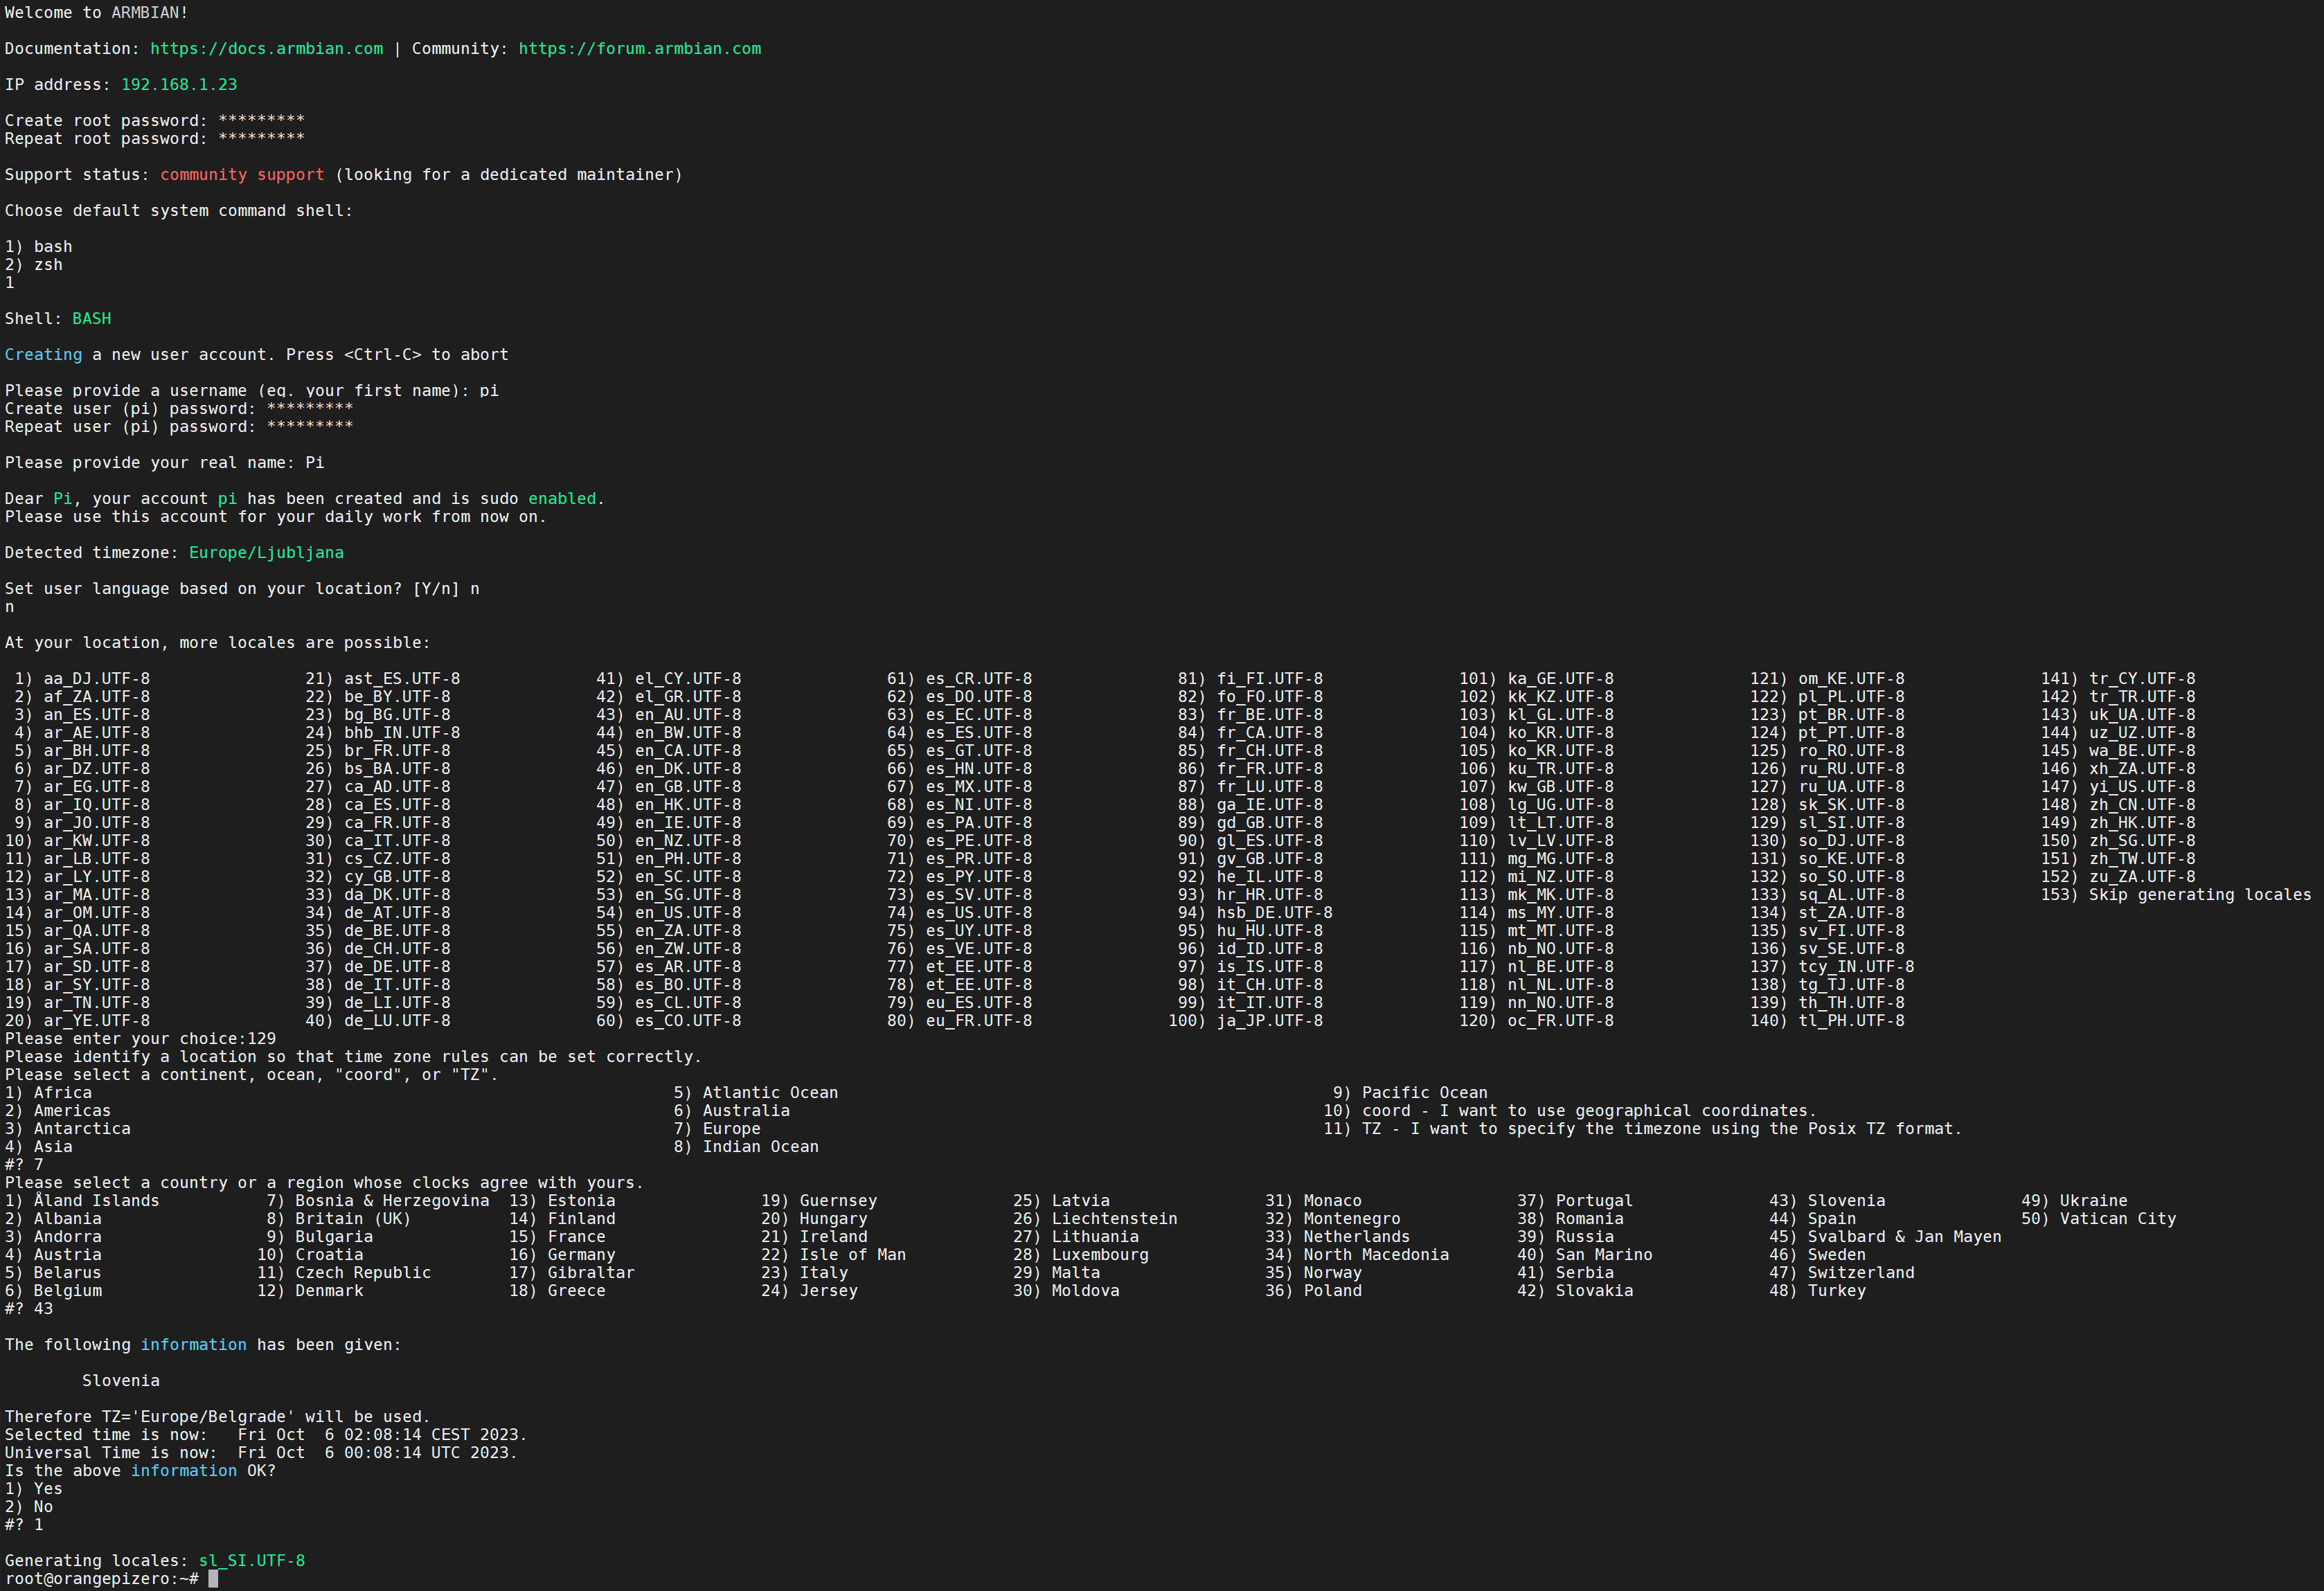
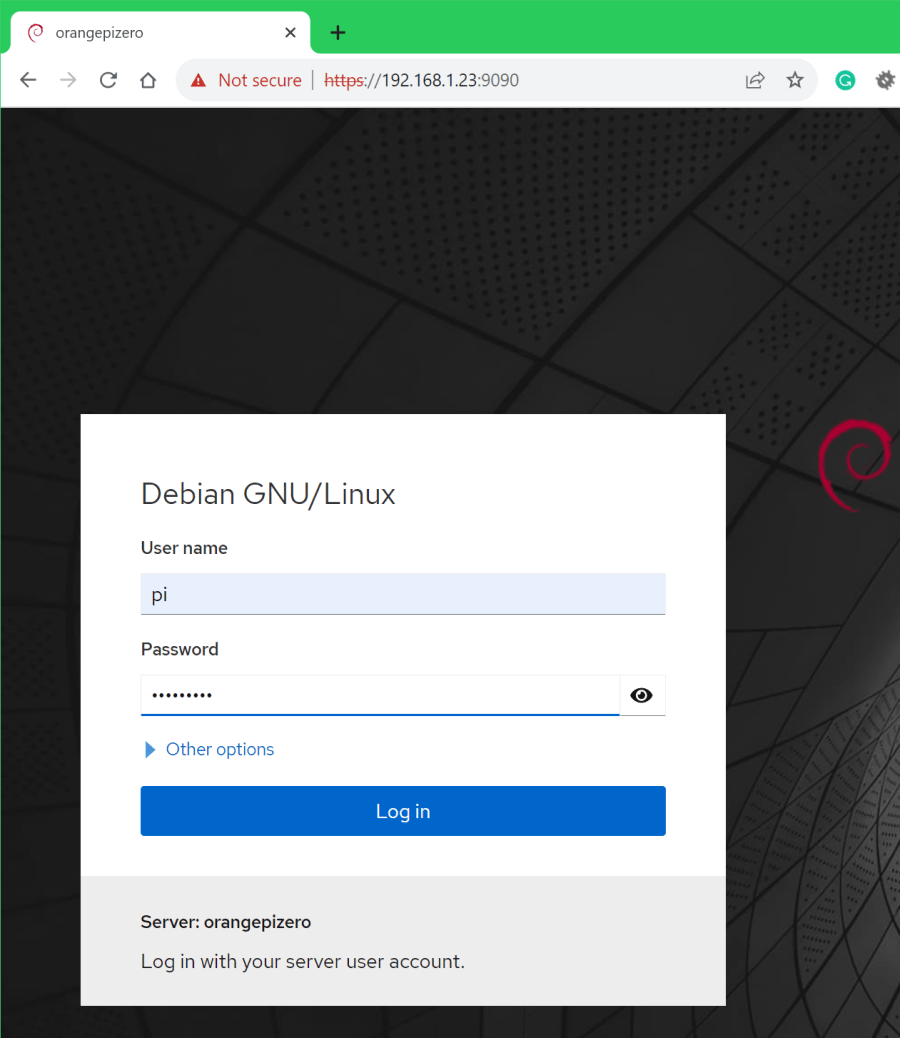
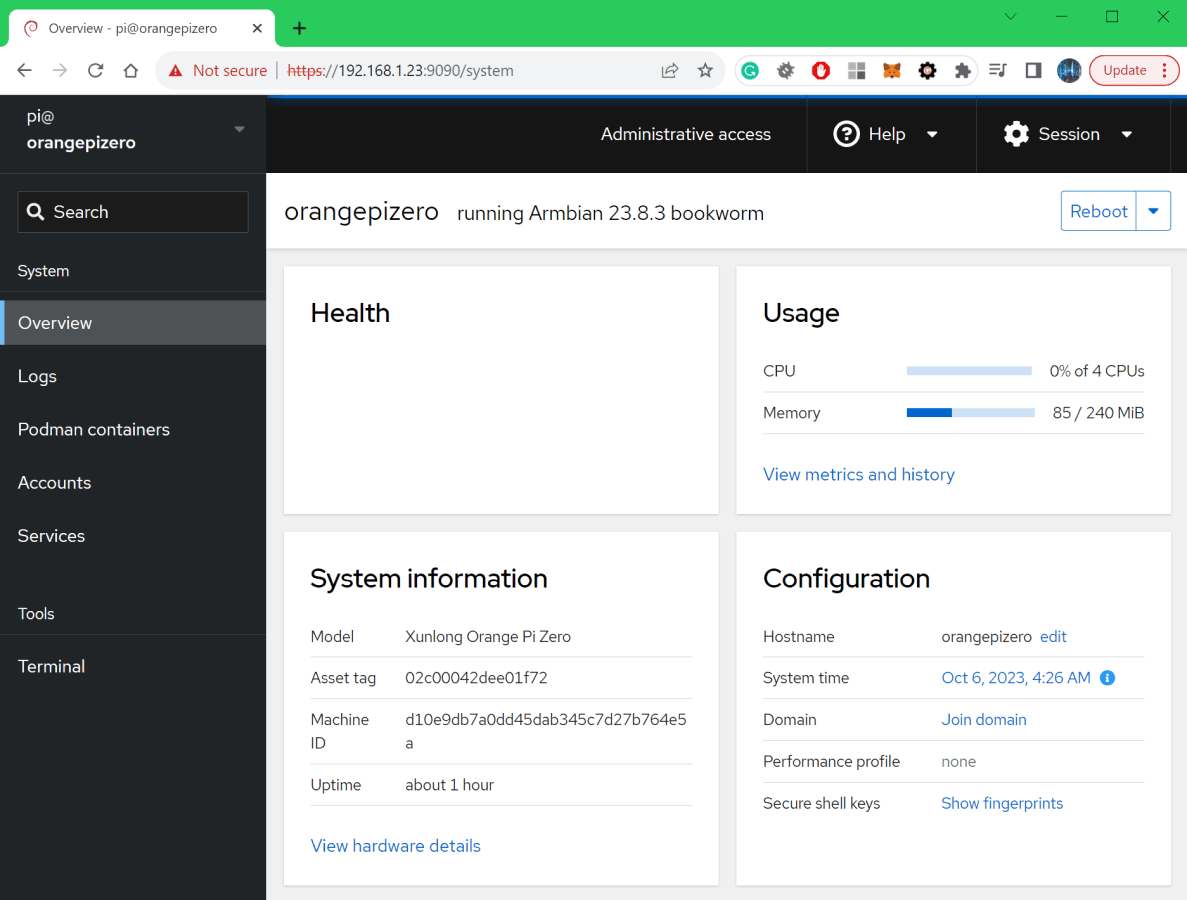
Use an SSH client like Putty or in my case, MobaXterm to connect to your Pi via SSH(port 22 using the IP you got in the previous step). Login as root the default password for it is 1234Immediately after being logged in you will have to create a new password.
Because this is your first time logging in you will also be prompted to create a new user account and set some other settings.
If you want to add more users. First, the user is created then the user is added to the sudo group and finally we set the password.
useradd pi -m
usermod -aG sudo pi
passwd pi
You can run the sudo armbian-config to set other system settings.

Mounting The Disk

You can list the disks with lsblk then create an ext4 file system on the desired disk/partition with sudo mkfs.ext4 /dev/sda1
Create a folder where the disk will be mounted with sudo mkdir /mnt/ssd1 and mount it to the created folder with sudo mount /dev/sda1 /mnt/ssd1 then we can check it with df -h
Run sudo nano /etc/fstab and add /dev/sda1 /mnt/ssd1 ext4 defaults 0 0 to the end of the file. Now every time the server boots the disk will be automatically mounted to the OS.
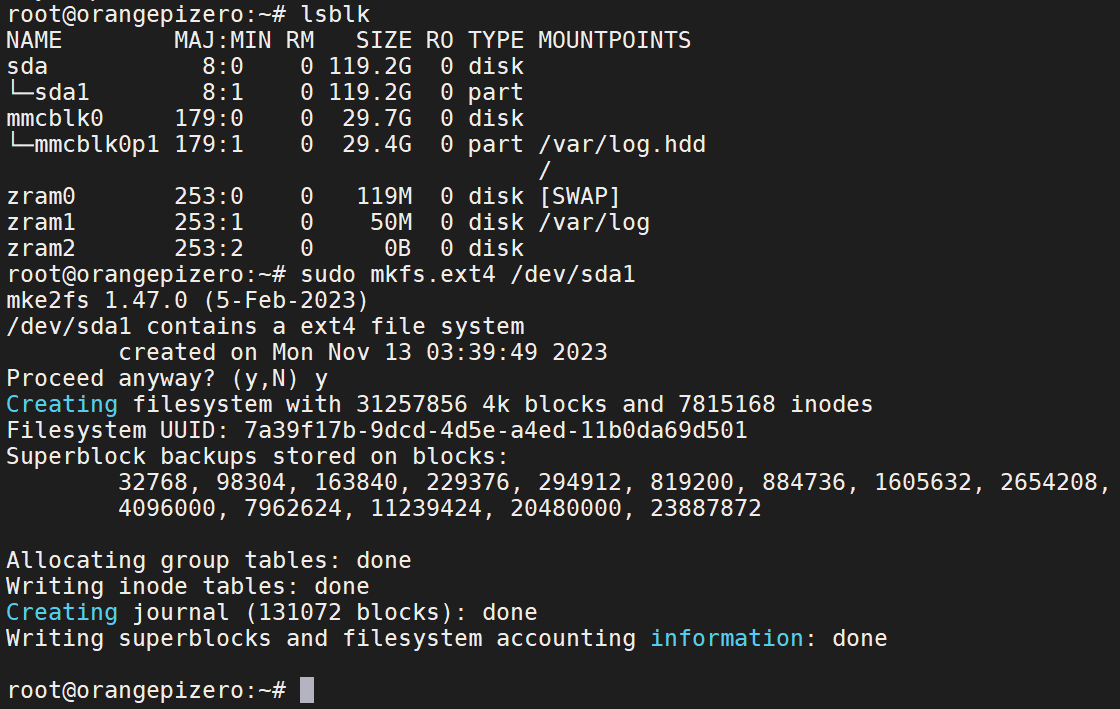
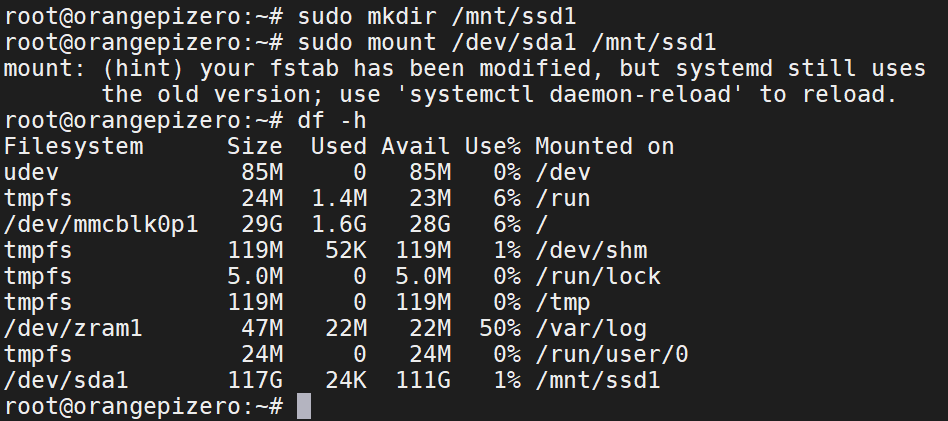
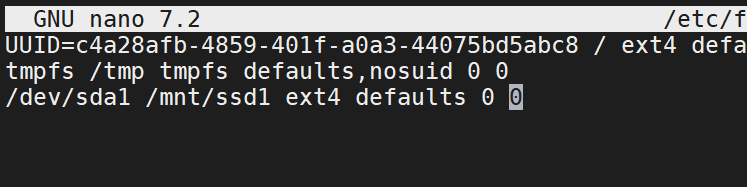
Note: Be careful editing the fstab as any errors in here will prevent your OS from booting. This happened to me as I initially forgot to format the SSD to ext4. Because of this my Pi server wouldn’t boot anymore. The solution was to take out the SD card connect it to my PC and remove the changes from the fstab file. Then I booted up the server again and formatted the SSD to ext4 before re-adding the same line to fstab.

Podman and Cockpit Install

Finally, let’s also install Podman and Cockpit. Podman is an open source light weight alternative to Docker while Cockpit is a web based UI for Podman.

  • Run sudo apt-get -y install podman to install Podman and sudo apt install cockpit cockpit-podman to install Cockpit.
  • To automatically start both services after boot run sudo systemctl enable –now cockpit.socket podman.service
  • Now you can run sudo systemctl status cockpit to check if the service is running. Or run ss -tuln to list all the sockets.
Cockpit should be accessible on port 9090. Use the same username and password you use for the system to log in.
For a quick test let’s create a simple web server.
And here’s the server up and running. The root directory of the server is empty but if you put an HTML file in there it will get served by the server to the browser.
For a quick test, I put a simple page on the web server(the HTML is courtesy of chatGPT 😉).
Share:

Leave a Reply

Your email address will not be published. Required fields are marked *

The following GDPR rules must be read and accepted:
This form collects your name, email and content so that we can keep track of the comments placed on the website. For more info check our privacy policy where you will get more info on where, how and why we store your data.

Advertisment ad adsense adlogger